Old-skool chrome Bacchetta handlebars

Bacchetta makes – or perhaps only used to make – multiple sizes of handlebars for their recumbent bikes. I ride with the handlebars much closer to my chest than they recommend, and rest my arms across the tops of the bars when I’m going straight — which is most of the time. The only size of handlebars that works for this purpose is the smallest size.

Long ago, Bacchetta used to make their handlebars with a shiny finish, by polishing the aluminum after bending it into shape. Now they use black anodized aluminum instead, with a rough texture. I suppose they switched to black because it looked better with more colors, but a consequence of this change is, the new bars less comfortable on the skin.

Since I ride with my wrists and hands in contact with the bar itself most of the time, this difference matters to me. So when I built Valoria II, I started with a stock pair of handlebars, then swapped my old ones over when the time came.

A pair of ancient chrome handlebars on top of a pair of small-size anodized handlebars. They're exactly the same except for the chrome finish.

It was a pretty involved process. I had to remove three mounts, two handlebars and bar-end caps, two brake controls, two shifter controls, the mirror, and the anchor plate. I’m not just riding with handlebars, I’m riding with a whole dang dashboard!

In the end, it was worth it. The chrome feels cool on hot days, and clings to my gloves on cold days.

If I lost my bike and had to rebuild it from scratch, I could actually get everything I need brand-new from a variety of suppliers, with the glaring exception of these handlebars. They were only made for the first-run Bacchetta recumbent circa 2001. If I had to find another pair, I’d have to scour the entire country, and most likely I’d have to buy the entire bike just to plunder the handlebars and resell it. Eventually they will all go the way of the old Bacchetta under-seat rack: They’ll all get broken or lost, and then they will be gone forever.

This is one of the many reasons why I lock my bike up with a very serious hardened-steel segmented lock! Arrr!!

Customized bike (and camping) speakers

It’s hard to find good, versatile hardware, and sometimes the thing I want just doesn’t exist, so I have to get all crafty. This is another of those things I’m documenting for my own reference, in case I need to recreate it.

Bluetooth is the new hotness, but wires still sound better - and use less power.

These are the iHome iHM79BC Rechargeable Mini Speakers. They sound good, pack reasonably small and light, and the design is simple. I’ve used them on many overnight hotel stays, arranged on a nightstand or next to a bathtub, and I’ve set them up in the middle of the picnic table on camping trips.

But I wanted to use them in even more places, including in a tent, and anchored to my bicycle. Here’s how I modified them.

First thing to do, of course, is take them apart. See that little screw visible underneath the lid? There are three of those. I found it pretty easy to bend the lid out of the way and remove them all. With those out of the way, the bottom of the speaker popped off.

After drilling the holes; before installing the ziptie.

Powered by a standard 500mAh 3.7v LiOn battery pack.

There’s a little magnet glued inside the base that I pried out with a screwdriver to save some weight. The battery rests on top of the base inside the speaker, and with the base out of the way it falls out. I had to be careful not to yank the tiny wires that linked it to the circuit board.

By the way, if you want, you can swap out the rechargeable batteries at this point, and solder in some fresher ones. There are a variety of 500mAh 3.7v lithium batteries available via Amazon for example. It’s a pretty standard size.

I wanted to add loops to the sides of the speakers so I could hang them from hooks in a tent, so I got a little drill and made two holes in the side of the shell, just a little lower than the underside of the circuit board. (You can see them near the top of the photo.) Then I threaded a small ziptie through the holes, tightened it into a small loop, and clipped off the excess plastic.

With the ziptie in place, I stuck the battery on the base and pushed it back into the bottom of the shell. It only took a little bit of fiddling to get the ziptie on the right side of the plastic post inside. Then I put the screws back in.

But the fun wasn’t over yet! I also glued a Quad Lock adapter to the bottom of each speaker.

Now I could use the speakers with my laptop, or by my bedside, or on the ceiling of my tent, or on my bicycle! Huzzah! Here’s how they look:

Ready for some sing-along riding!

Perfect stereo for an audience of one ... and loud enough to irritate others too!

Yeah I guess the wires make it a little messy. But it sounds great!

Camp cooking, round 1

Materials:

A first attempt at cooking with the stove: A basic cup of hot chocolate.

Results:

  • The original pot I had was so small that it could not actually cover the unfolded blades of the stove, making it incredibly unstable.
  • The stove I bought is actually quite large relative to others that only use white gas.
    • I did some research and discovered that the white gas fuel is available in the United States but not so much in Europe and is very hard to find in Asia
    • So, it was a good idea to go with the stove that can also use liquid fuel.
  • My first attempt at cooking was to make hot chocolate.
    • I discovered that the thinness of the titanium pot makes it very prone to burn materials.
    • Though on the other hand it is fairly easy to clean afterwards.
  • The hot chocolate was delicious but immediately after cooking it I tried to disconnect the gas, which upset the pot.
    • I spilled a lot of it requiring quick attention with paper towels and a sponge.
    • Lessons learned:
      • Wait to disconnect the gas until the stove is clear.
      • Take potential spill and splash zones seriously because cleanup materials are hard to find in a camp.
  • Afterwards I found that the stove and the cooking plate and the spork and the canister stand would all fit inside the pot
    • I did not have any easy way to keep the pot closed so I cut a luggage strap to fit around it.
    • This left the fuel bottle, the fuel bottle insert, the fuel canister, the spare parts, and the air shield outside.
    • All those items fit together in the original sack, except for the fuel canister.  The fuel bottle kind of poked out the top though.
  • As long as I cleaned the pot thoroughly after use I now had a cooking set contained in a pot and a sack, with a very small frying pan for a lid, small enough to fit in one of the mesh bags on my pannier.
  • Even with this slightly larger pot, there was still some instability on the burner.
    • Plus if I want to fry more than two eggs, or cook more than a fistful of pasta, I need more room.
  • Because of the thin walls of my cookware I will have to do most of my cooking using water to distribute heat.
    • For example steaming broccoli or squash or cooking noodles or sausage.
  • I suspect I am soon going to want some kind of prep table or cutting board.
  • Speaking of which, I do not have a knife.

Round 2

Adding a 20t chainring

When you pedal a bike, your feet push pedals. Those pedals turn on arms. Those arms are called cranks. The cranks are attached together, and in the middle you have one or more rings with teeth on them, around which the chain moves when you pedal the bike. The whole apparatus is called a crankset, and those rings are called chainrings.

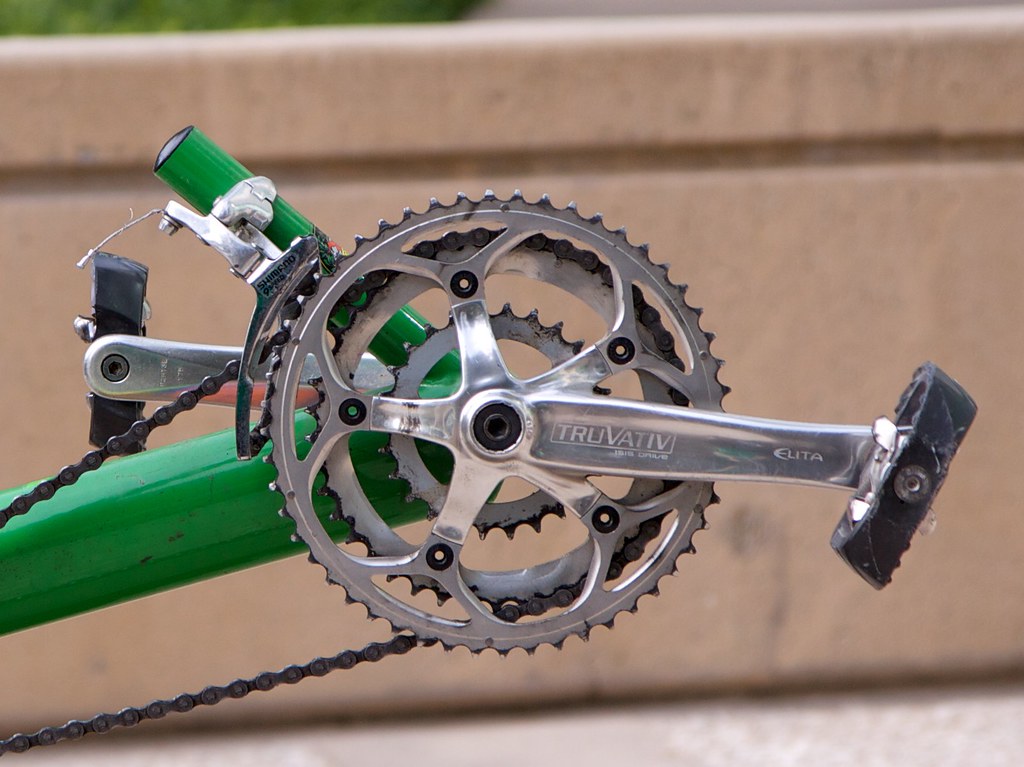
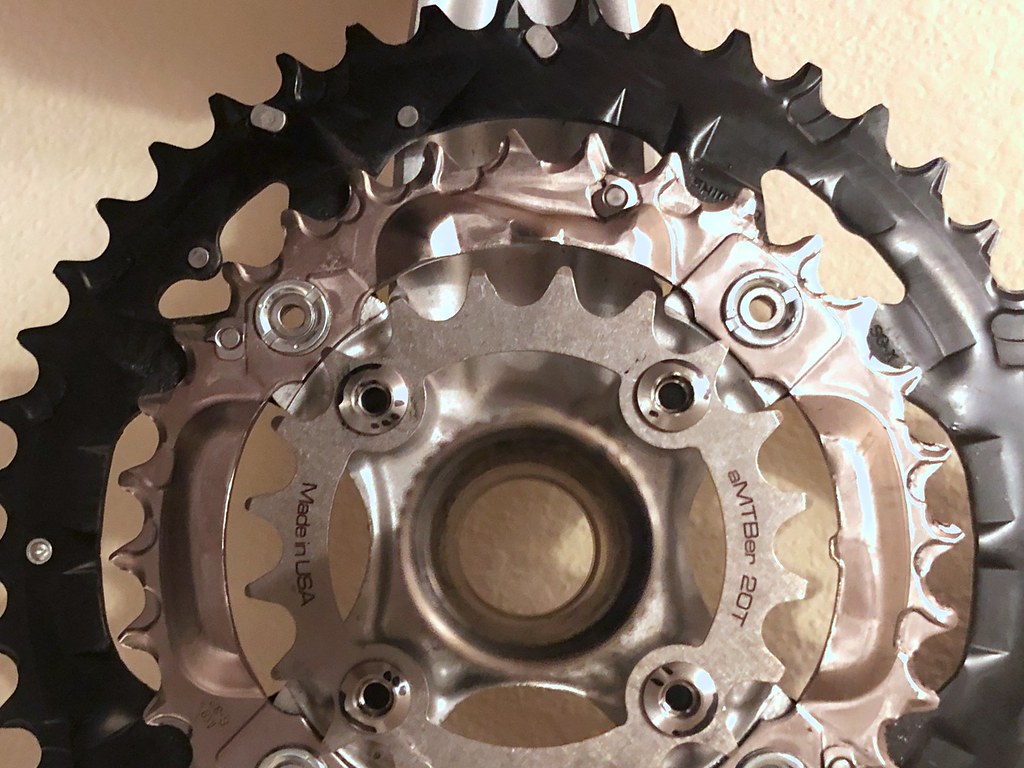
For example, this is the standard Bacchetta Giro 20 crankset with three chainrings on it. The chain is currently on the middle ring. The standard Bacchetta rings have 50 teeth, 39 teeth, and 30 teeth, from largest to smallest. This was the crankset on Valoria, my original Giro 20.

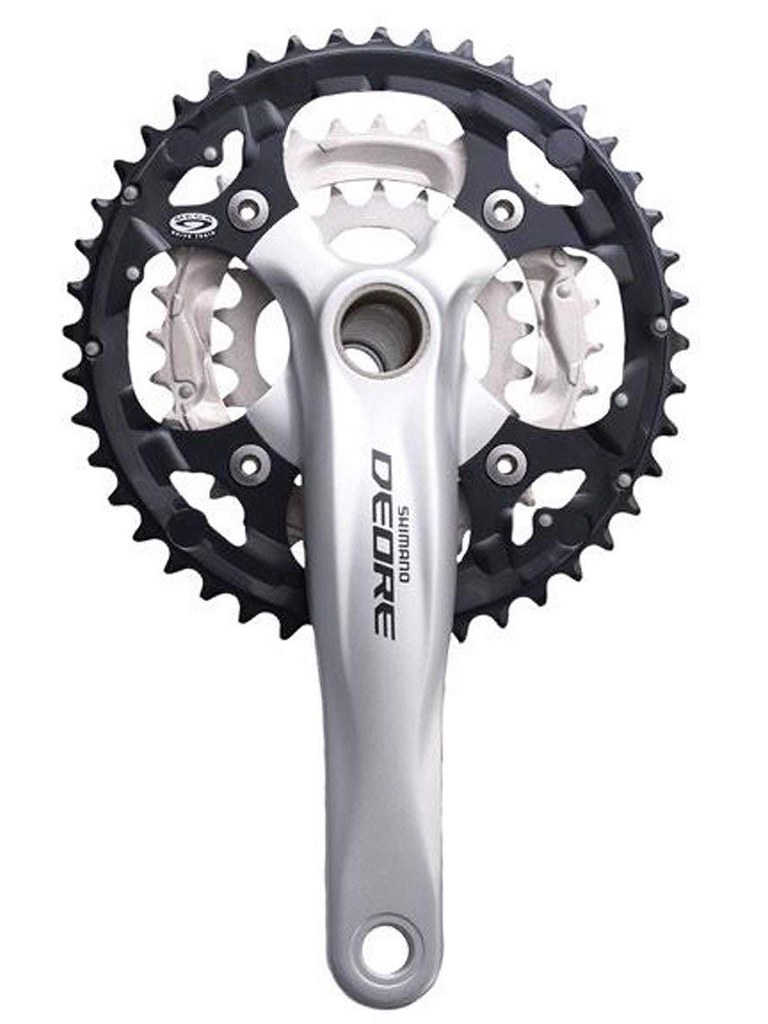
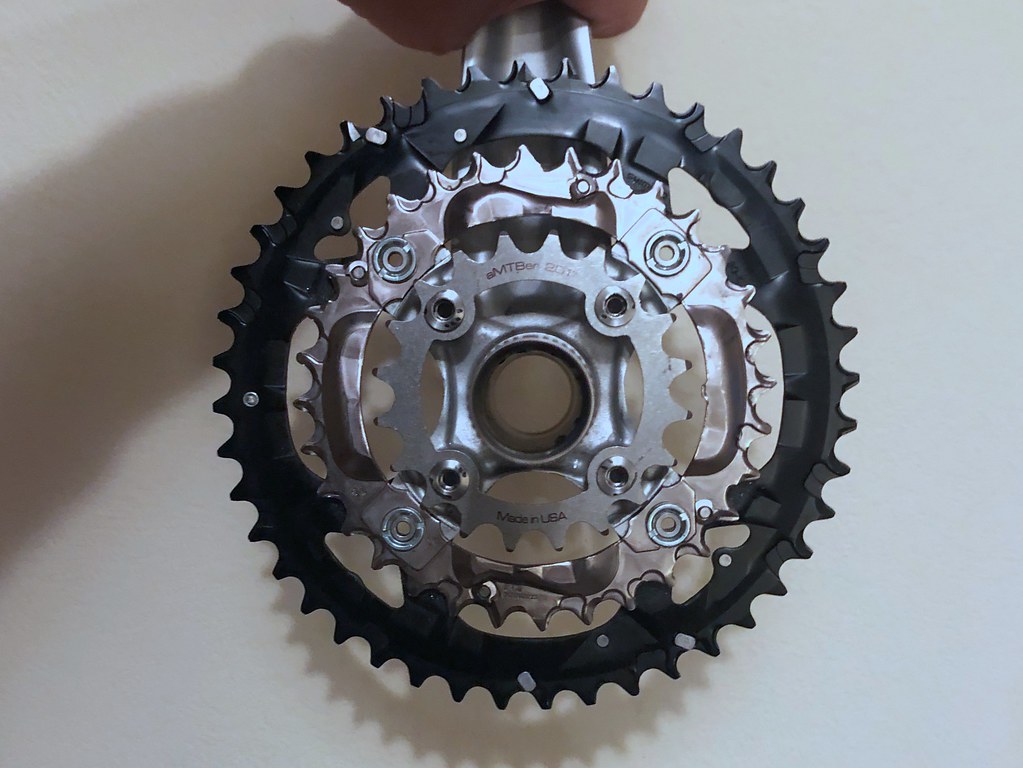
On the left you can see a Shimano Deore M590 crankset, with 44, 32, and 22-tooth chainrings. This is the crankset I installed on Valoria II. Having a 22-tooth ring in the smallest spot instead of the standard 30-tooth ring allows me to spin the pedals about 40% faster and still put out the same amount of power. That means I can carry all my touring gear up hills more easily. I can drop my maximum speed lower without straining my knees. My experience has shown me that with this chainring I can slow down to about 2.5 miles-per-hour and still keep the bike steady.

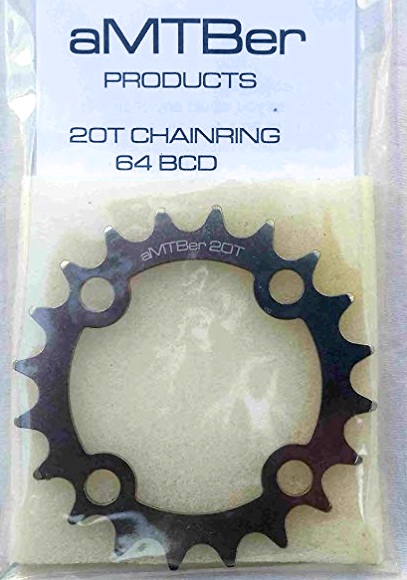
On the right you can see a 20-tooth chainring. This is what I intend to install onto the Shimano Deore M590 crankset, swapping it out with the 22-tooth chainring. It will speed up my cadence by 10% on top of the 40% speedup I already have.

Why is this worth doing? Why does this matter to me? I think the best way to explain this is with an experiment:

Take your bike outside. Now stack eight full-size bricks on the back of it. Yeah, the kind of bricks you build walls with. Now, get on the bike, and pedal those bricks up the steepest hill you can find, over and over again, until you’ve climbed the equivalent of 2000 feet with those bricks. Now repeat that exercise every day for two weeks.

Long-range bicycle riders are all a little bit crazy, because this is what they do. They make it manageable by climbing as slowly as they can. After a hundred hours pedaling like this, you are ready to do whatever it takes to go even a little bit slower; oh yes! If you’re lucky you can go slow enough that your digestion can actually keep up with this all-day energy demand, and you won’t starve to death right there on your bike! I’m only sort of joking.

So yeah, I’m putting this gear on. I’m going as low as I can go.

But this is a tricky operation, because the Shimano crankset isn’t designed to hold a ring that small. If I just bolted the new ring on without doing anything else, the chain would lay very awkwardly against the four posts holding the ring, and wouldn’t mesh with the teeth. The chain would slip along the ring unpredictably, or slip entirely off, causing me to lose control and crash the bike. And the chain itself would quickly become damaged as well.

So what I’m gonna do is, take the cranks off the bike, remove the 22-tooth ring, shave down the four posts with a Dremel tool, and put everything back together with the 20-tooth ring instead.

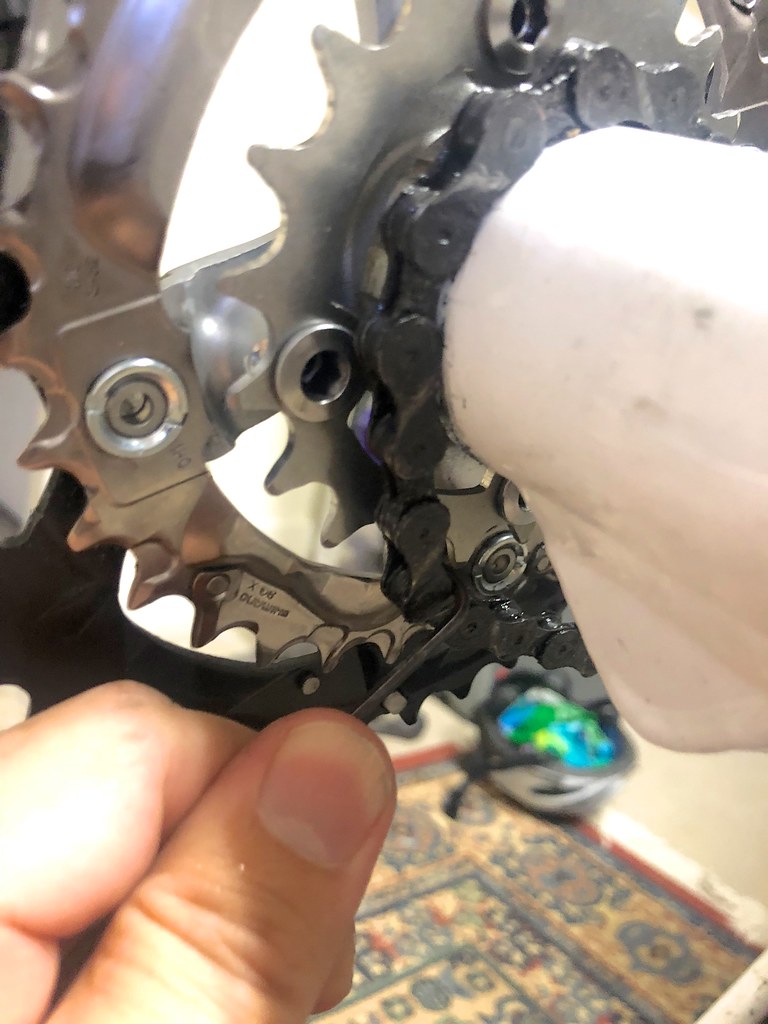
First things first. I’ve switched gears on the bike until I’m on the smallest front gear. Now I’m using my smallest L-shaped hex wrench to pull the chain off the gear as I turn the cranks, so the chain ends up resting on the boom of the recumbent. I want that greasy thing out of the way while I work.

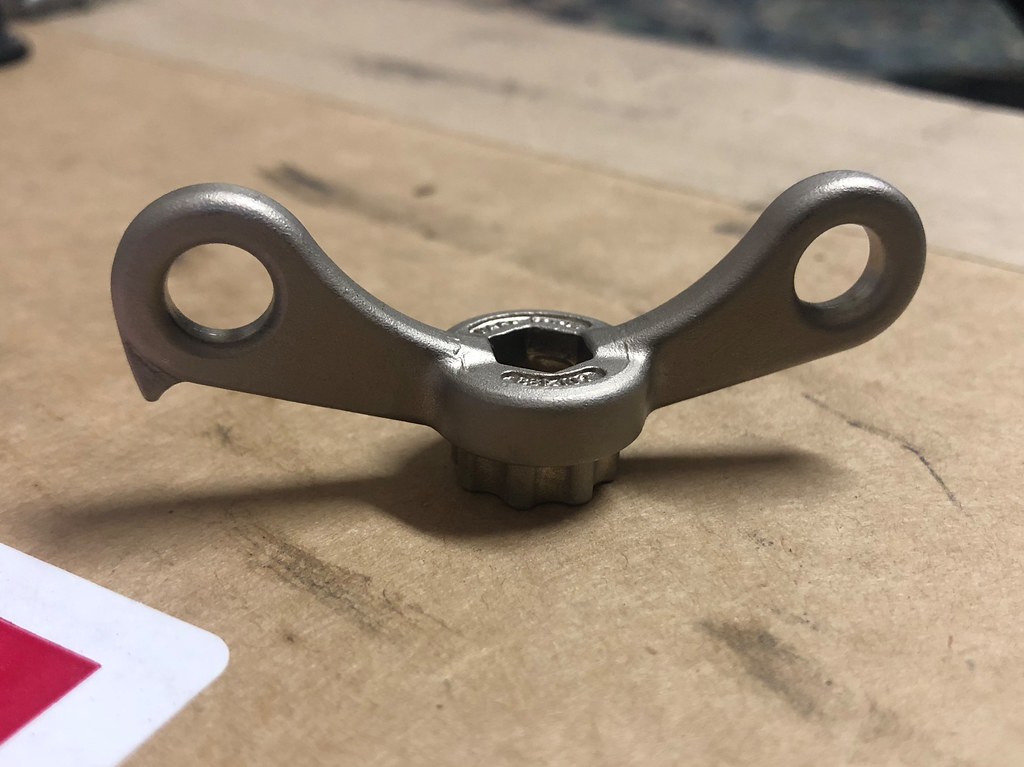
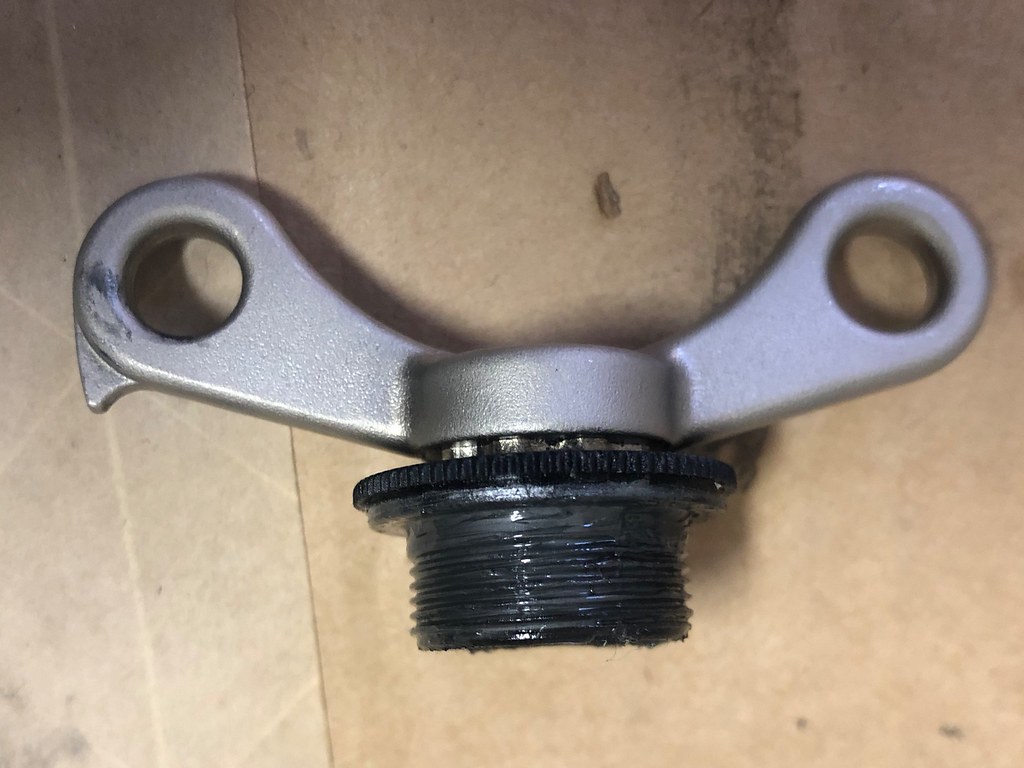
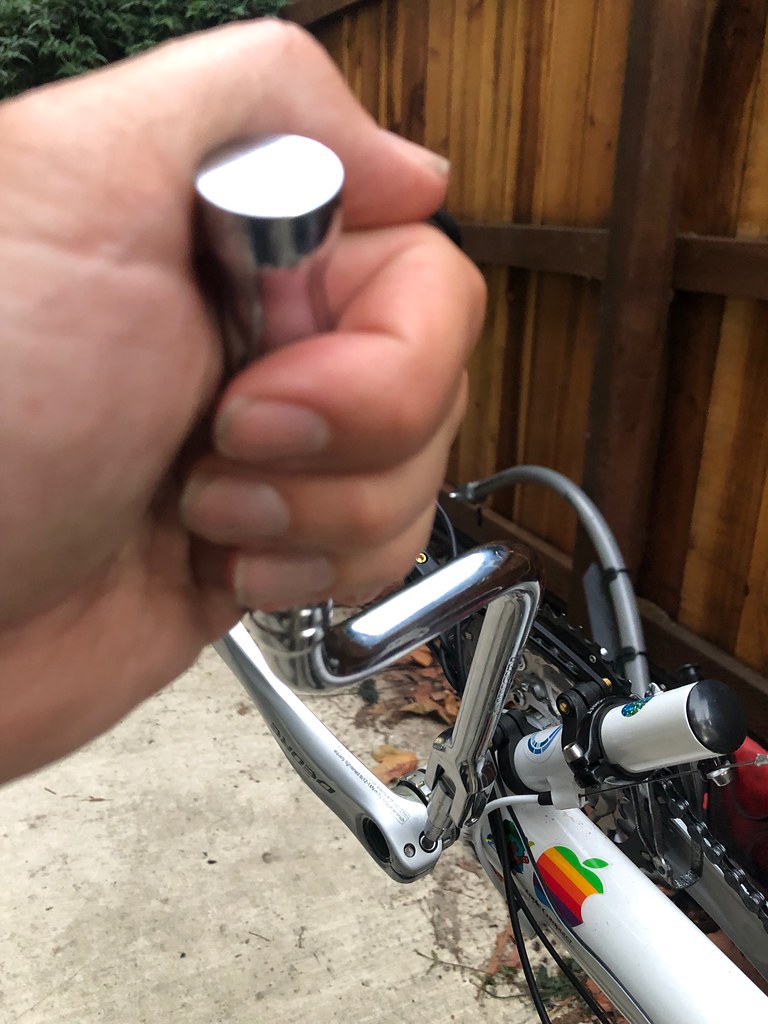
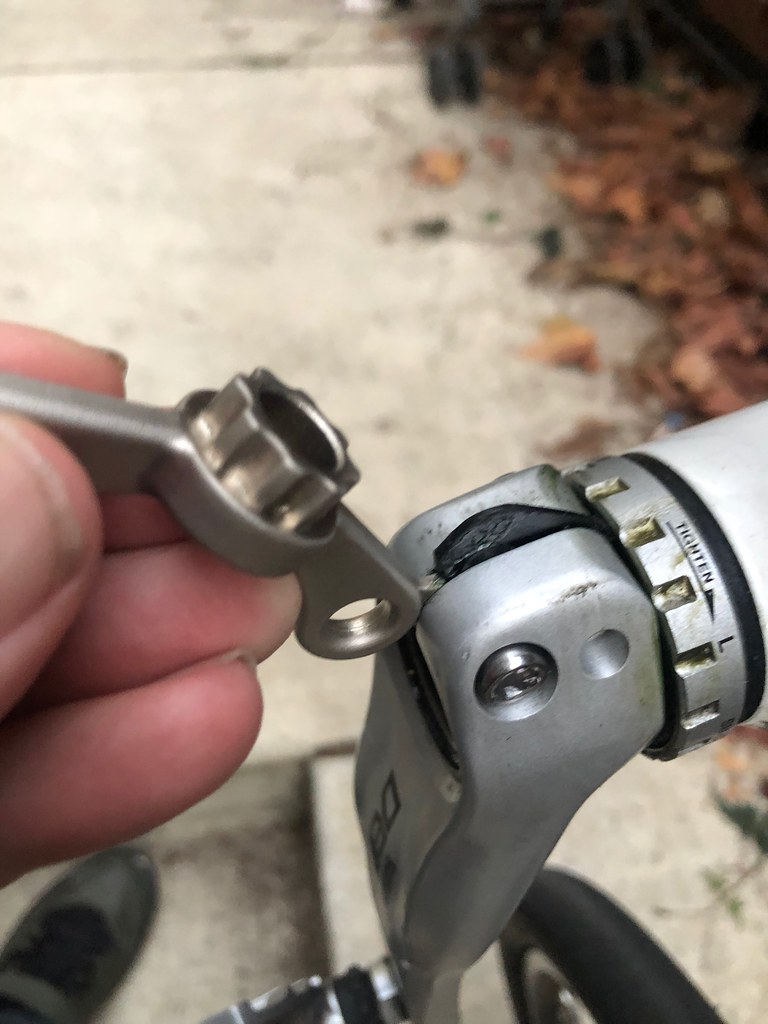
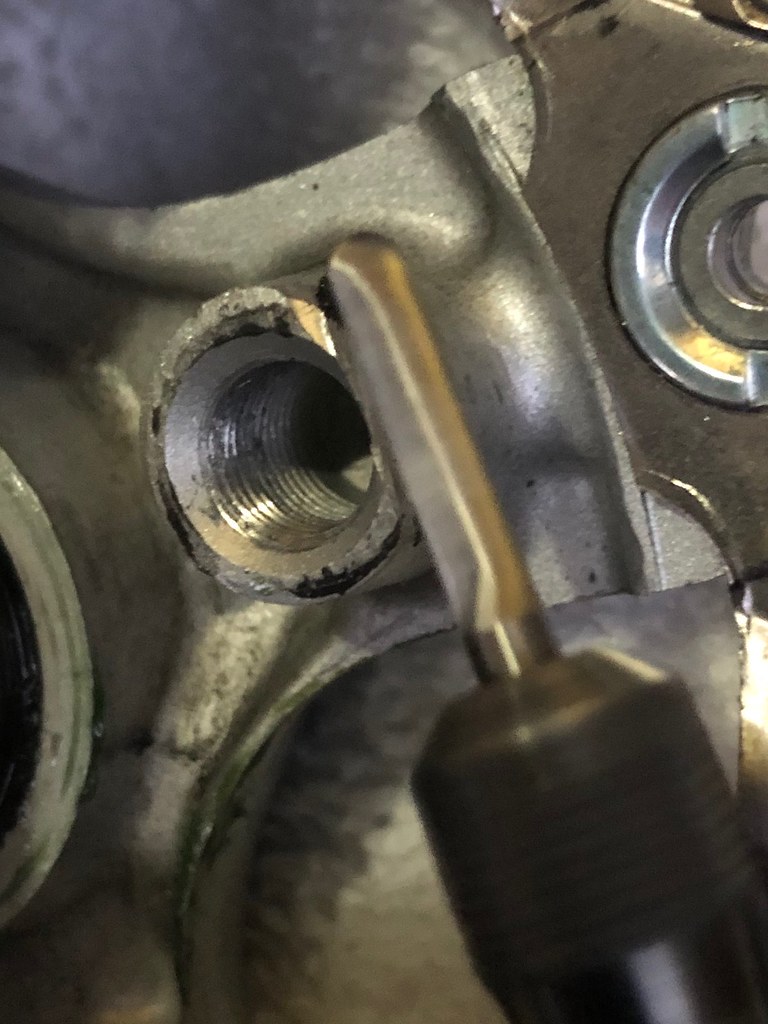
This little wingnut gadget is called an “Adjusting Cap Tool“. It’s for removing the plastic plug on the left end of the axle, where the left crank is attached. Not something I’m going to be doing all the time, but something that definitely goes easier if I have this fancy little tool. When I removed the plug, I observed that it’s actually screwed in very loosely. I need to remember not to tighten it very much at all when I’m putting it back on later.

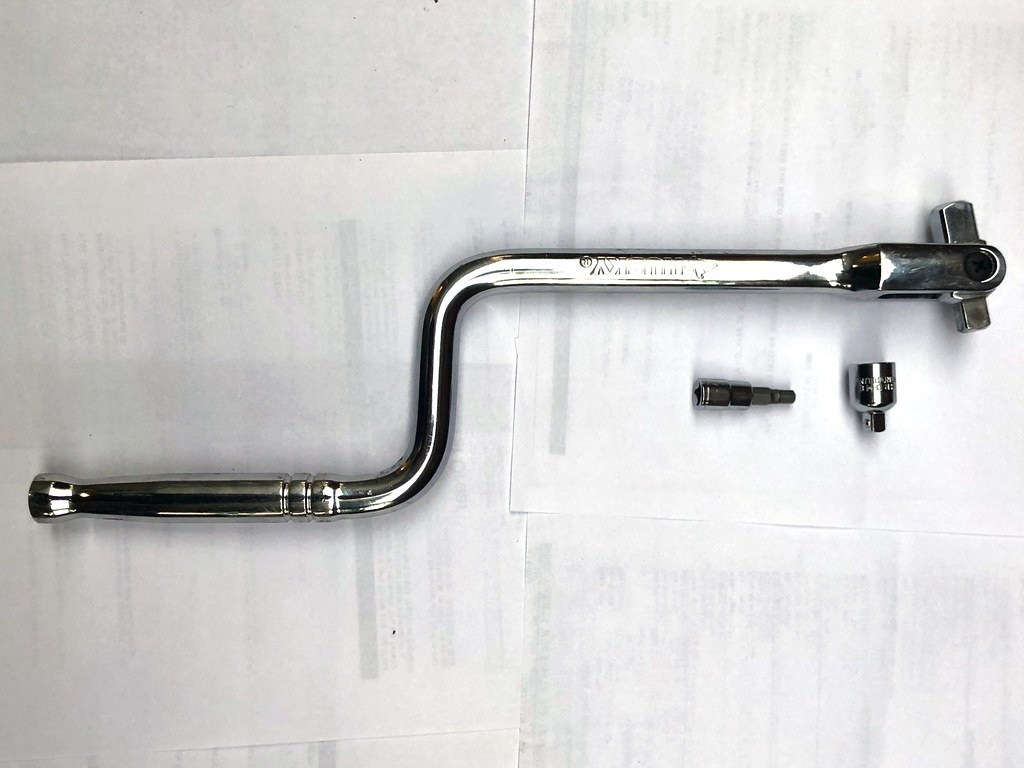
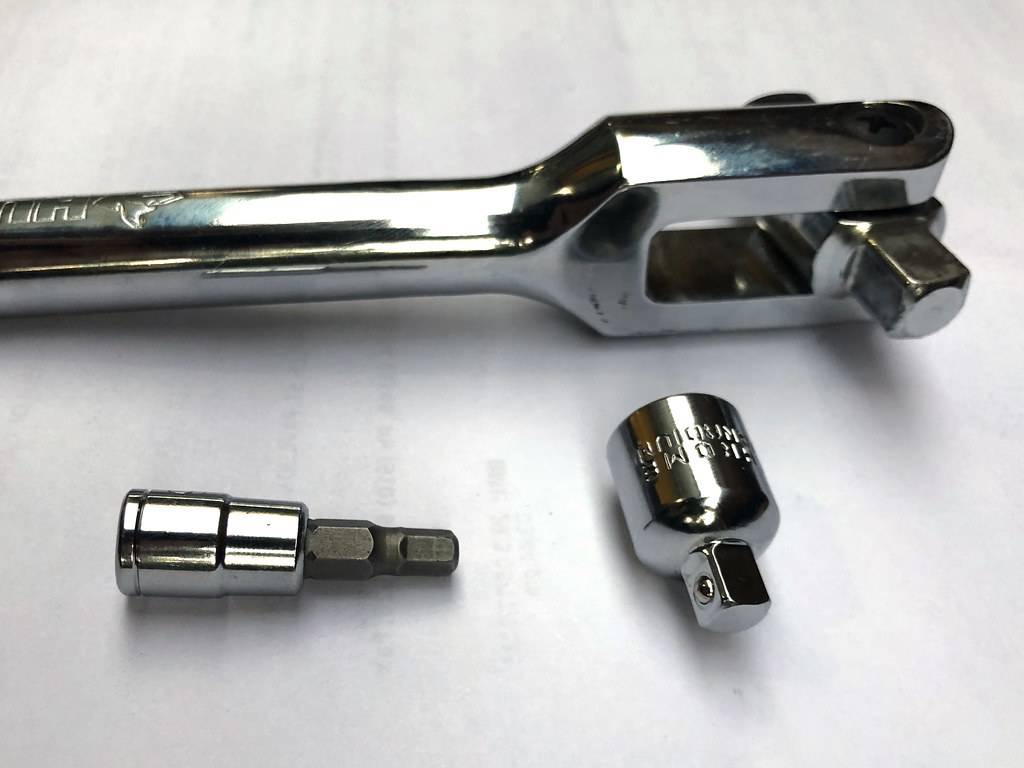
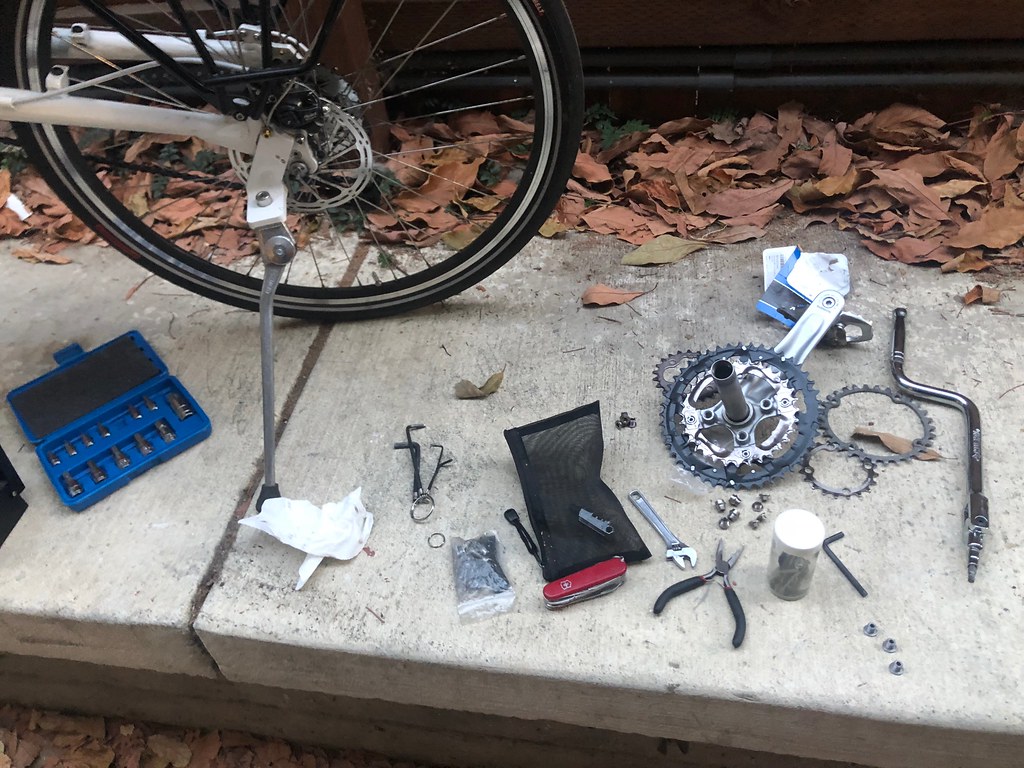
These items are strictly optional, but help the work go faster. The big thing is a combination speeder/breaker bar. Essentially a jointed handle that you can use to apply a lot of force and unstick bolts, or spin around like a crank to screw in bolts quickly. It’s the macho version of a wrench. The two smaller things are a 3/8" to 1/4" adapter and a 5mm hex bit socket. I used them like so:

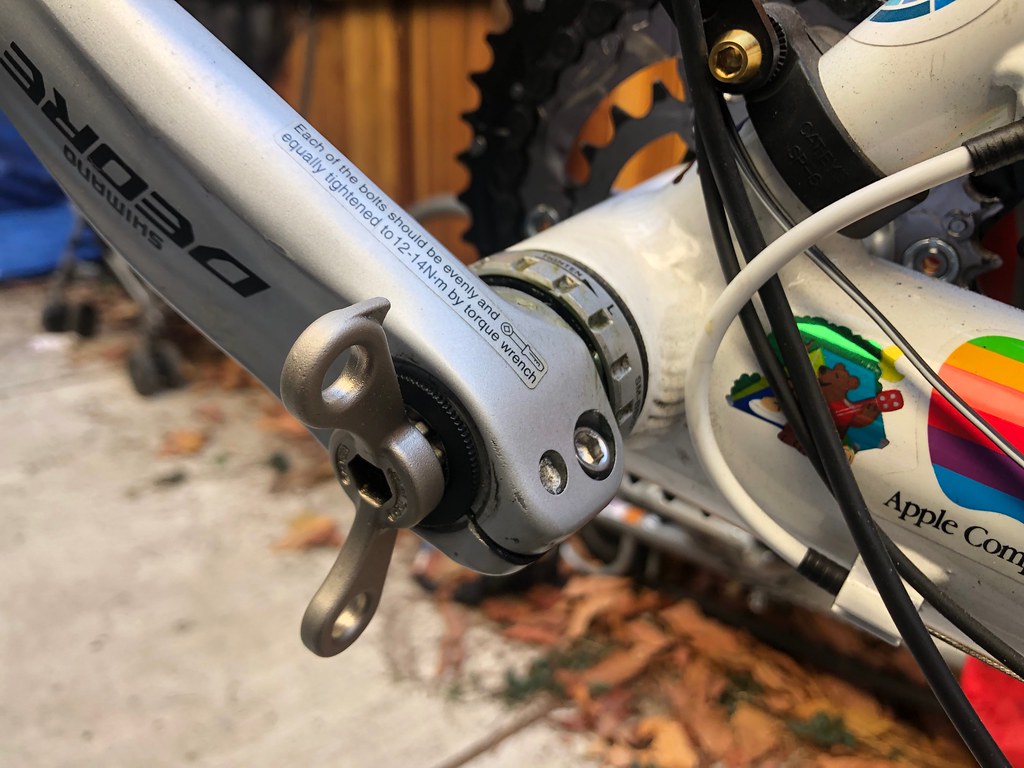
I did not need to remove the bolts holding the left-side crank, I only needed to loosen them two or three turns. Then I used the Adjusting Cap Tool again:

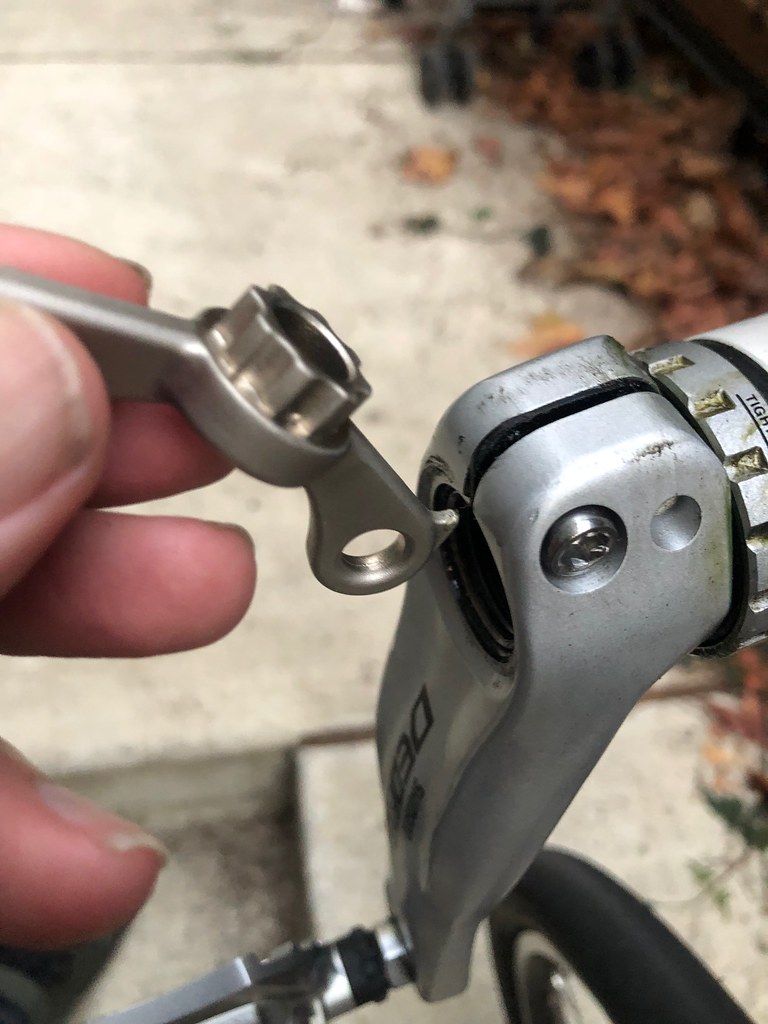
There’s a little metal safety catch on the left-side crank. It’s a last line of defense to keep your crank from sliding off if you forget to tighten the bolts or one of them somehow breaks. Using the little ridge on the side of the Adjusting Cap Tool, I lifted it up, so I could pull the crank off.

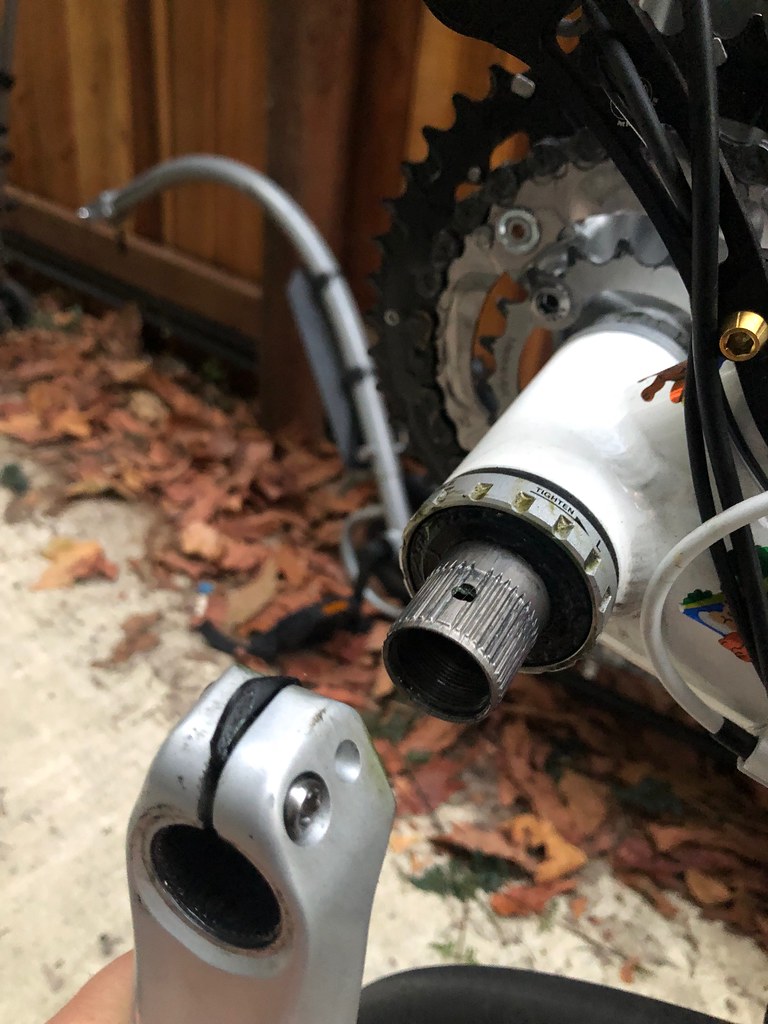
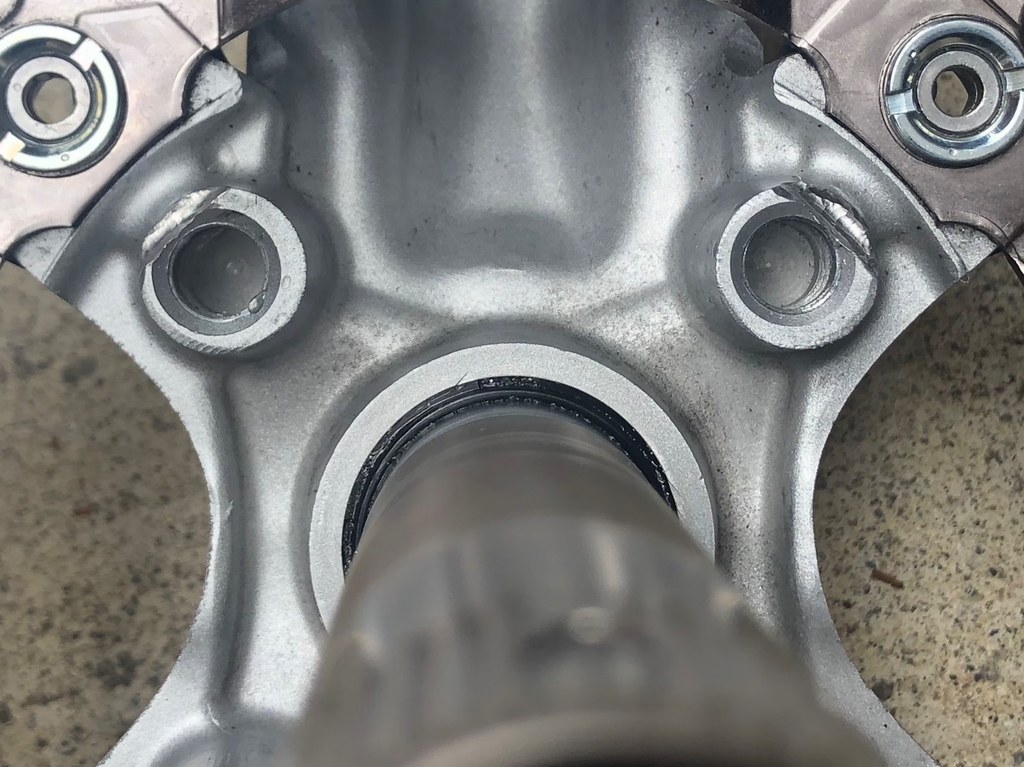
With the left crank removed, the rest of the crankset can be pulled out from the right side.

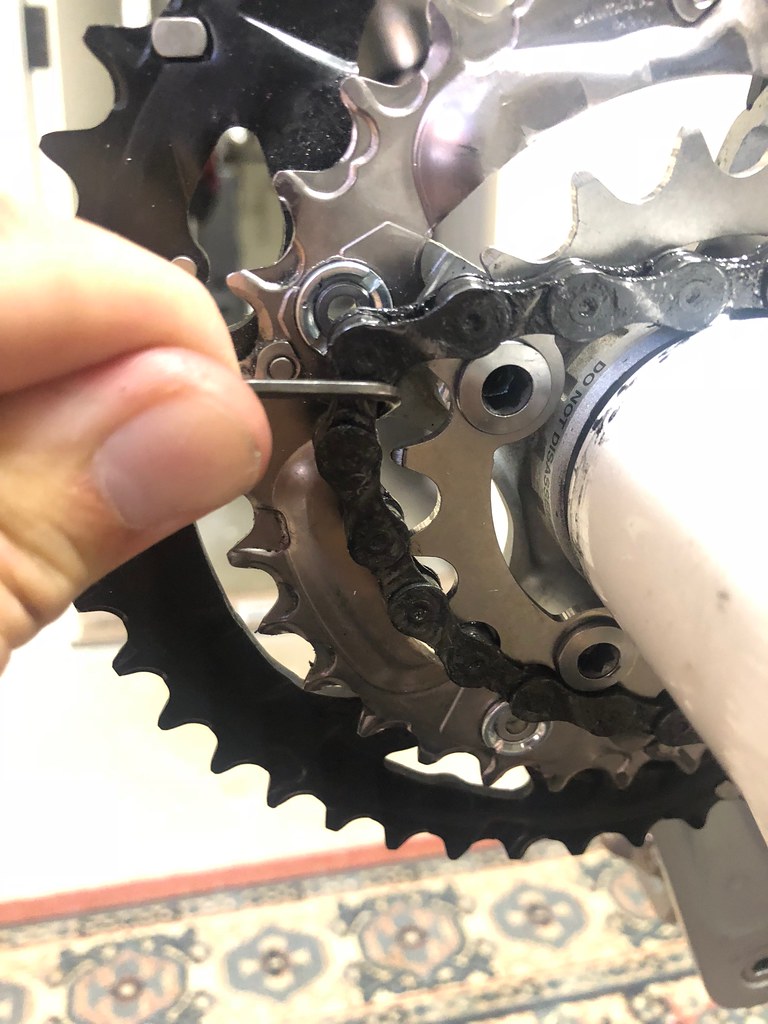
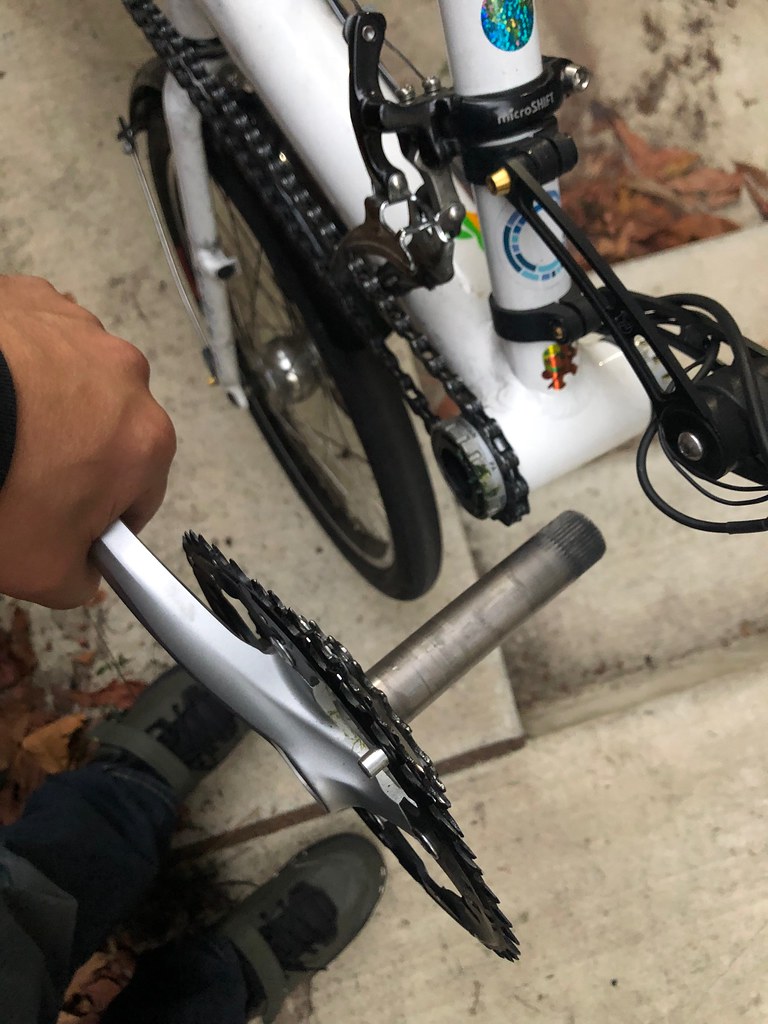
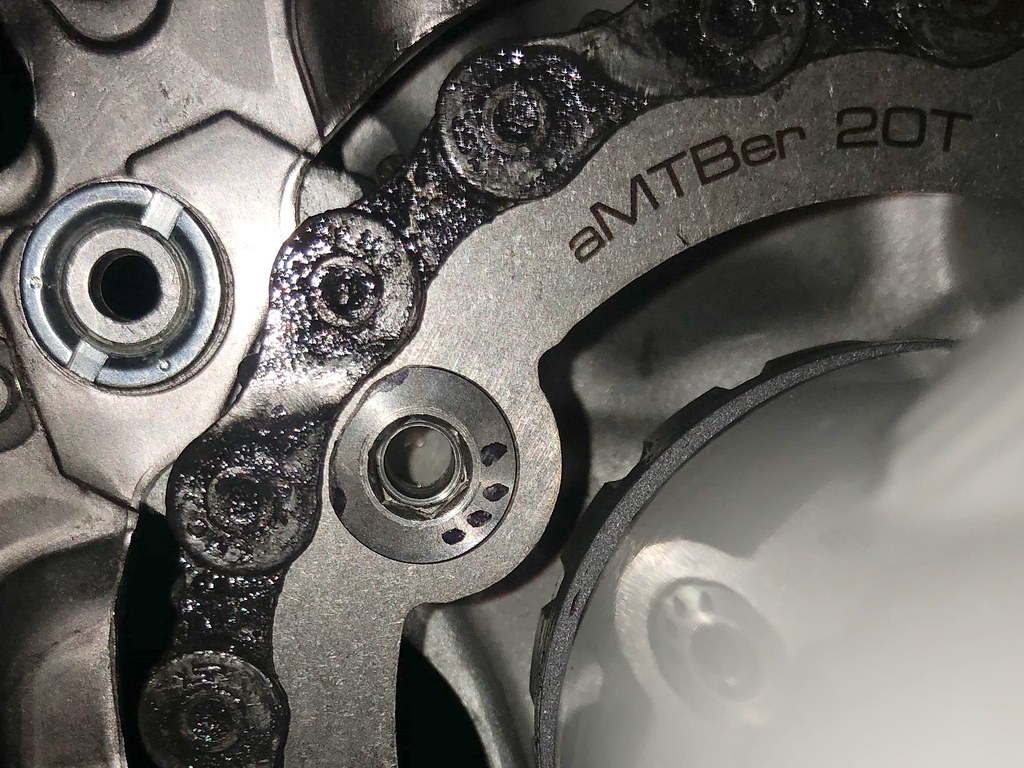
At this point I sat down with the crankset and started tinkering. I had a 30-tooth chainring that I tried swapping out with the 32-tooth ring, but that didn’t fit. I gave up on it and removed the 22-tooth ring, and bolted the 20-tooth ring into place.

Marking the bolts with dots, clockwise, so they can be placed back in the same sockets afterwards. Also marking the region on each bolt to be shaved off.

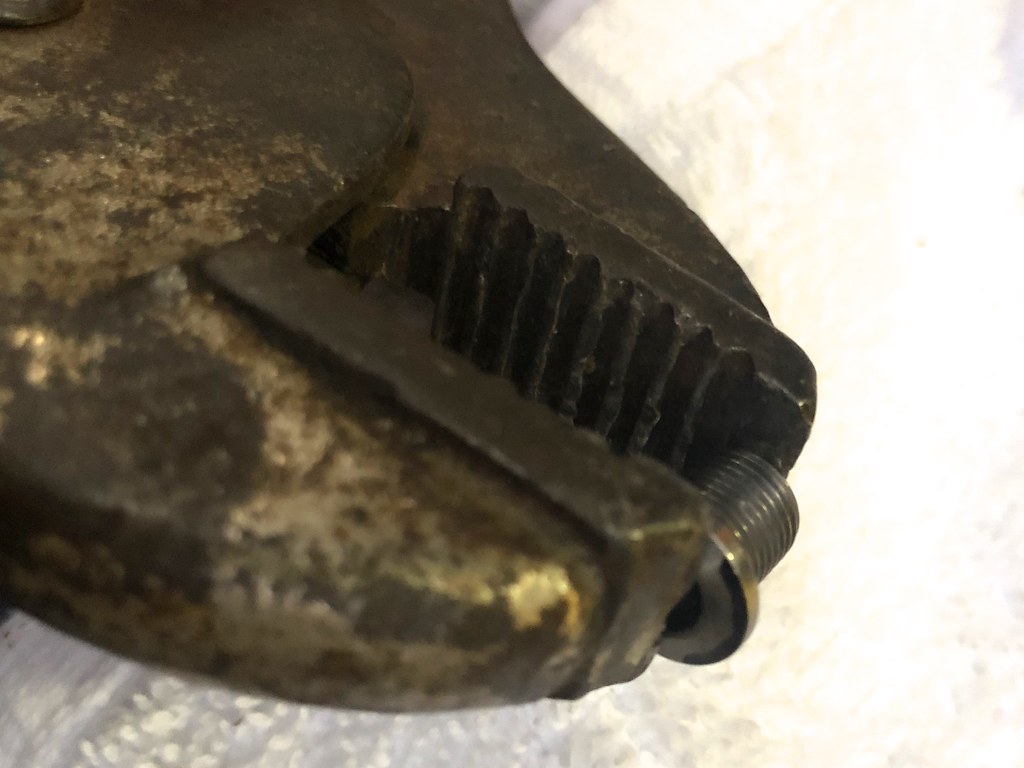
With the bolts tightened down, the next thing I did was use a permanent marker to label the bolt heads, so I could shave them down the same way I was going to shave down the posts. Once they were marked I removed them again, and took off the 20-tooth ring, and prepared for carving.

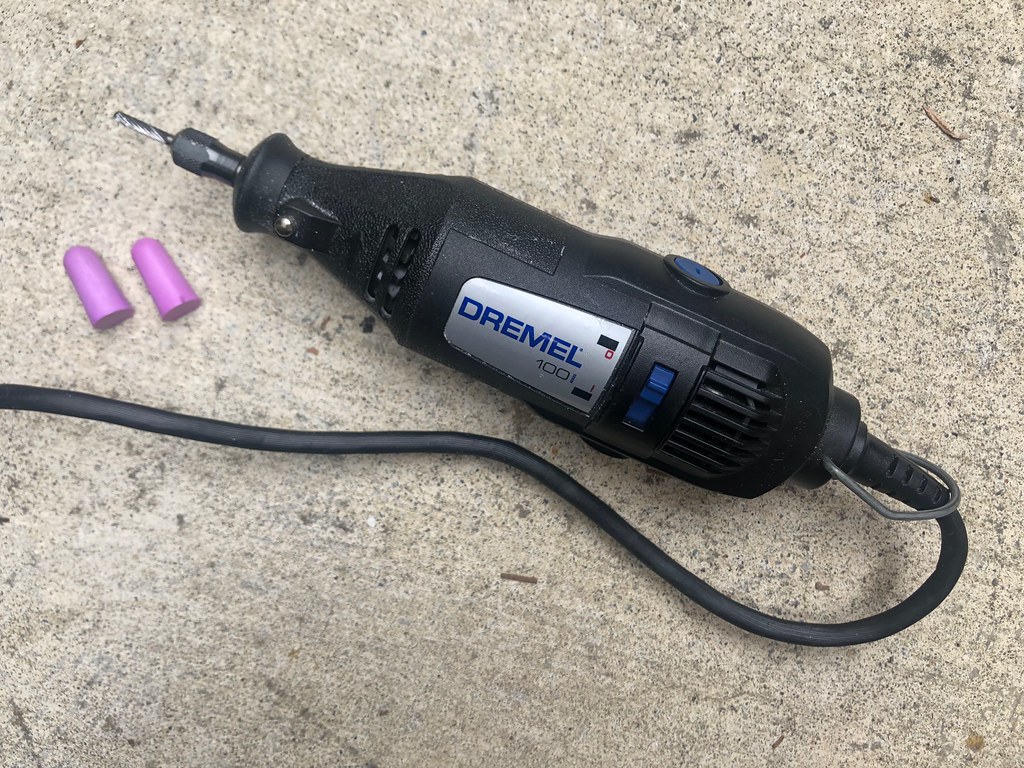
This is a Dremel tool with a tungsten-carbide tip, specially designed to carve metal. You can get both for under 40 bucks, and they are well worth it. Being able to easily carve metal, plastic, and wood is a weirdly liberating ability.

Note also the earplugs. Gotta have those. Carving metal can be loud as heck.

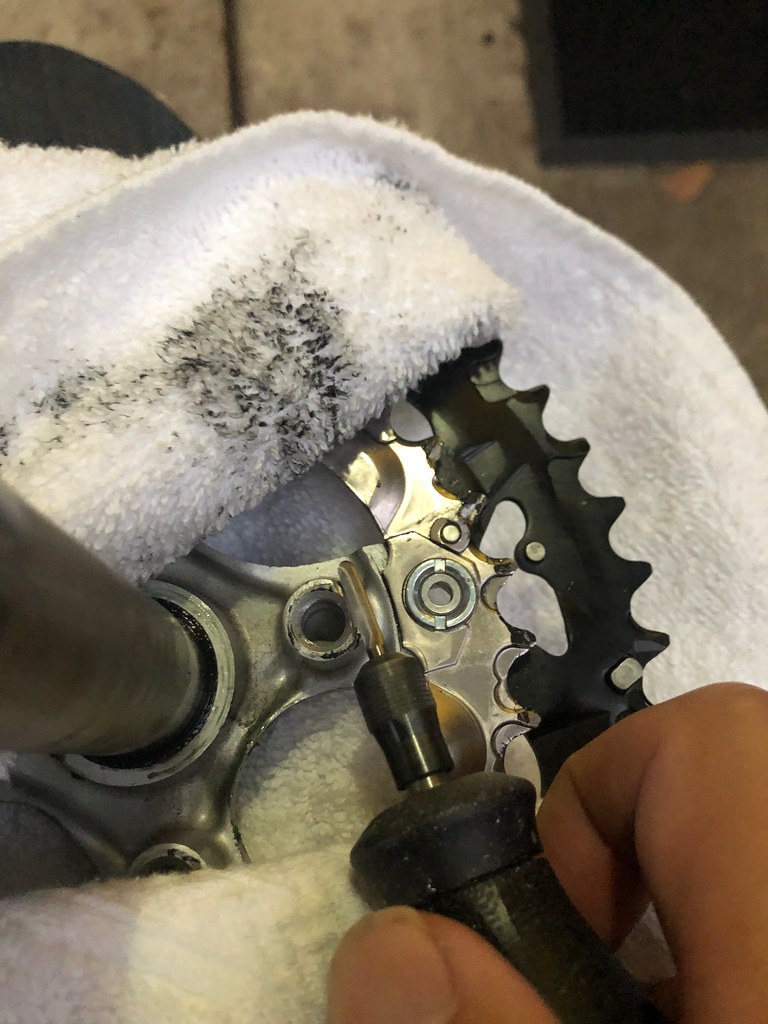
I put in the earplugs, wrapped the crankset in a rag, set it on my lap, and began carving the four inner posts down with the Dremel tool, cutting a good-sized notch away from the outer edge of each post.

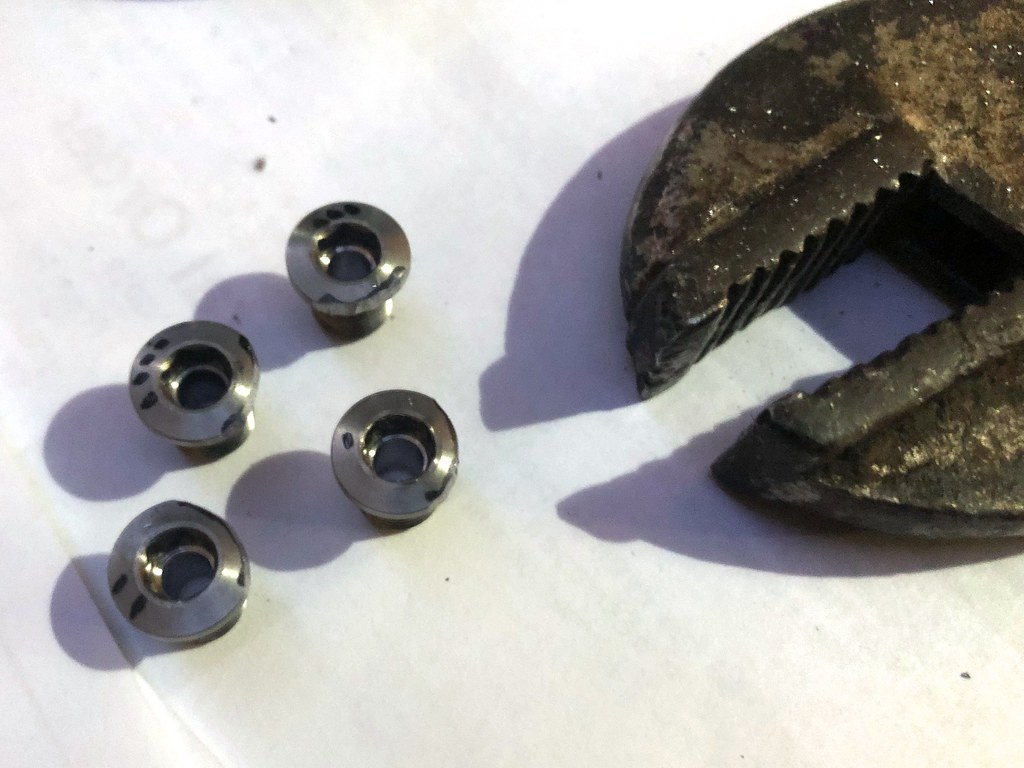
I had a hunch that I’d need to cut the notches deeper, but this was a good start. I moved on to the bolts.

By sticking a bolt sideways in a pair of vise-grips with the marking line on the outside, I was able to run the Dremel tool along the edge and smooth it down very easily. It only took a few minutes to do all four bolts this way.

I did the carving outside over a section of driveway next to a drain, and then I poured water on the ground to wash the aluminum dust down the drain, and then I washed the aluminum dust off the crankset. Then I took a shower and changed my clothes. I don’t want aluminum alloy dust on my skin or in my lungs, or on my cat’s feet!

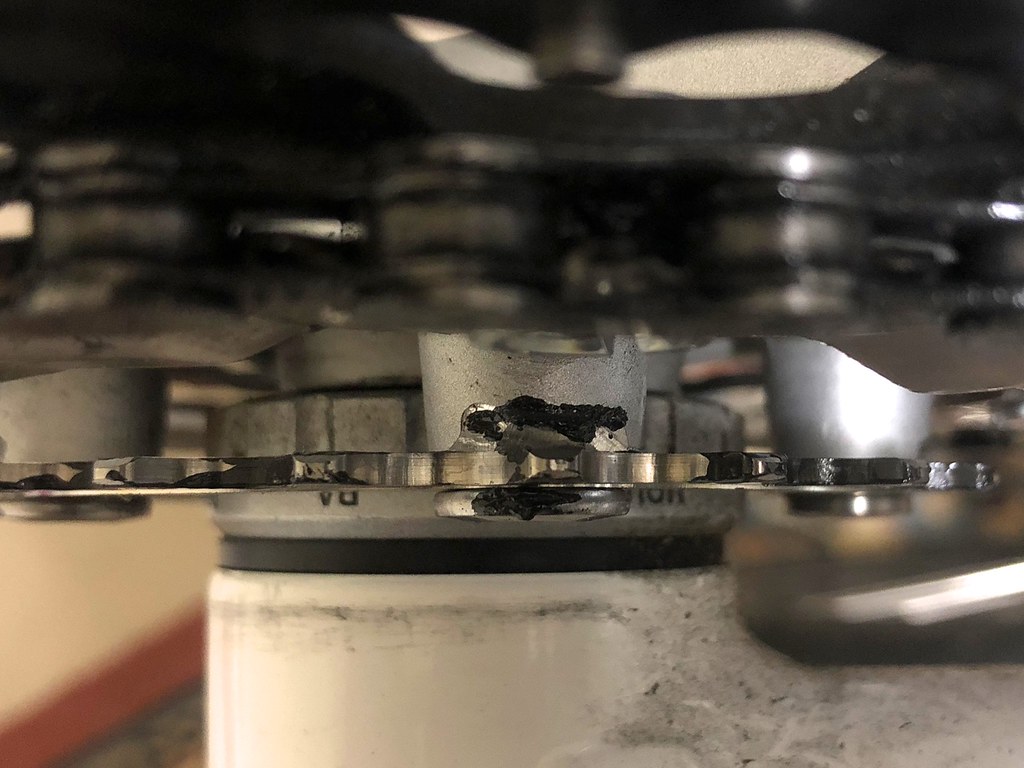
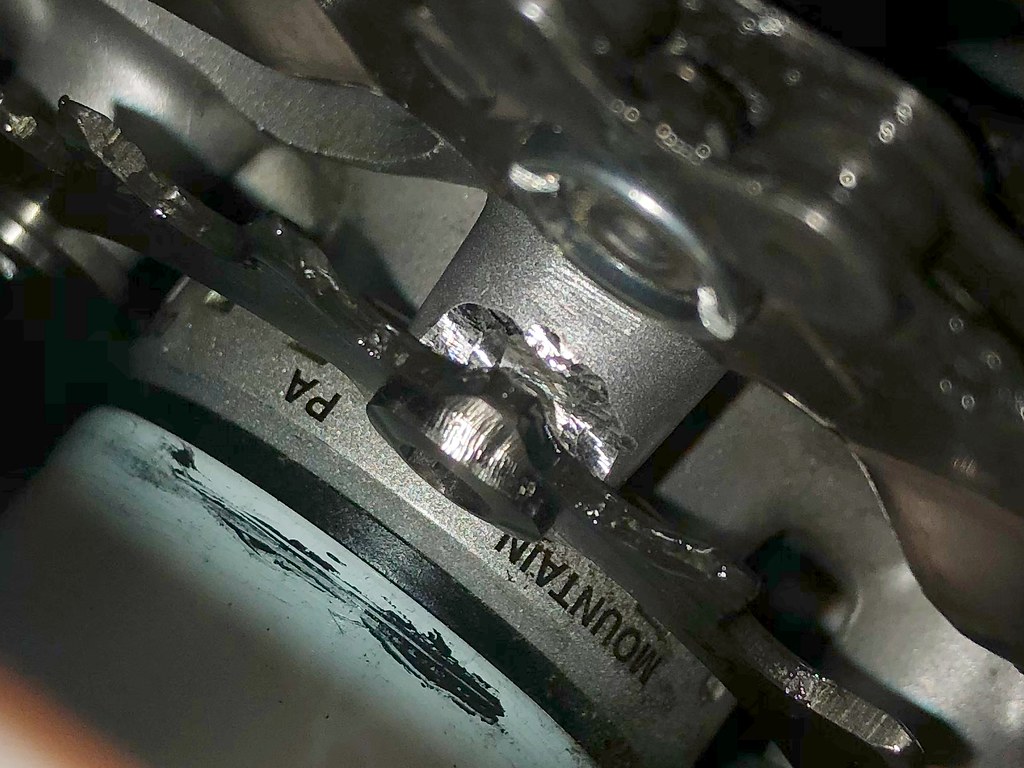
Then I reassembled the whole crankset, with the new 20-tooth ring and the bolts in place, placed the chain on the ring, and rode around for a few minutes.

The result: Easily visible grease marks on all the spots where I needed to shave away more metal.

I took the crankset apart again and shaved away all the spots that had accumulated grease. Then I reassembled it for a second time, and did another test.

No grease marks this time. The shaved bolts and notches were perfect — and no bigger than they absolutely needed to be. I was definitely compromising the structural integrity of the lowest gear on my crankset, but at least I wasn’t compromising it more than I had to.

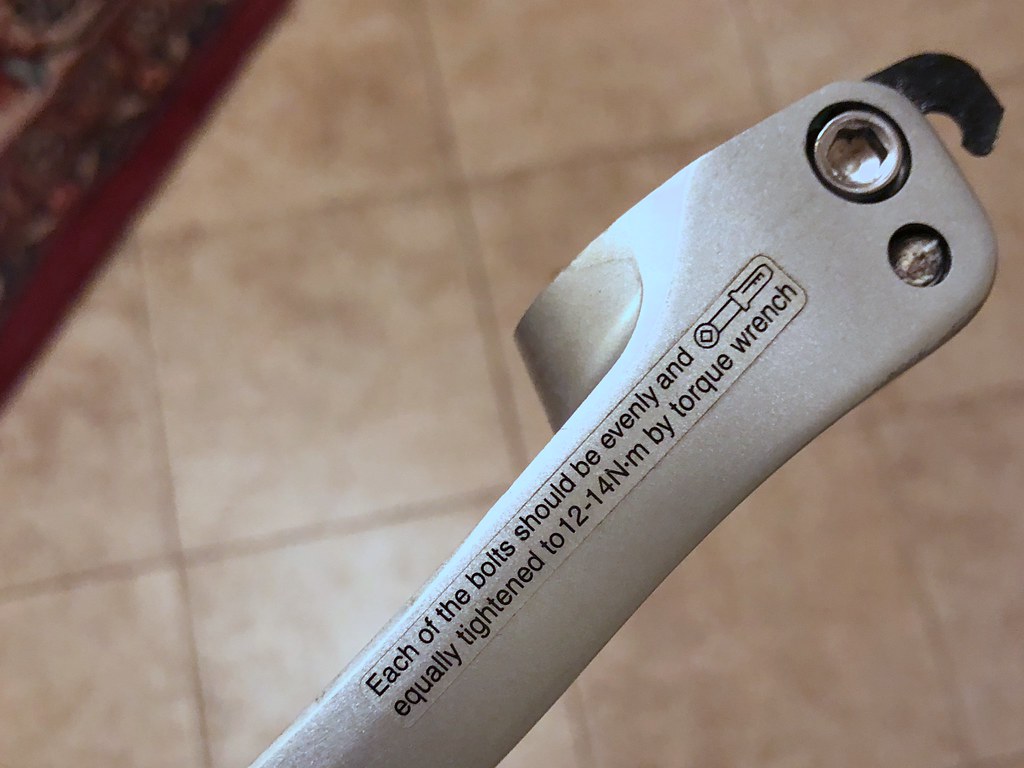
For the final assembly I made sure the bolts were tightened according to the instructions, and re-applied a bunch of lubricant.

Mission accomplished! So, what did I gain?

I loaded 65 pounds of gear onto the bike, using both racks and a backpack. Then I took a ride around Oakland, deliberately aiming for really steep hills. To my astonishment, I could pedal up all of them comfortably. My previous minimum speed had been about 2.5mph. Now I could drop all the way down to 1.9mph without losing stability. That is slower than a casual walking speed!

I know, I know. You’re saying, “what kind of brain-damaged lunatic actually wants to pedal a bike that slow, for hours at a time?” Well, before you judge cycle tourists, consider those people who run in place for hours every week on a treadmill inside “fitness centers”, looking at a television, or staring at a wall. At least we’re outside!

In traffic!

… Okay, yes. We are lunatics.

How to pass a bicyclist on the road

(This post is based on a stack exchange answer I wrote recently, which in turn was based on this post from 7 years ago.)

Are Cyclists Just Jerks?

So you’re driving down a nice country road. In the distance you spot a cyclist.

You slow down, wait a while behind the cyclist for the opposite lane to clear, then swing out to give the cyclist plenty of space as you pass by. You’re pretty sure you’re doing exactly the right thing, but as you pass, the cyclist makes a rude gesture at you. Whoah, what’s up with that? What a jerk! Are bicyclists always this rude?

No, bicyclists are almost never this rude. But something that bicyclists often are, is nervous around cars. When you’re driving a car and you pass a bicyclist – even in a very respectable way – you may be unfairly judged by that cyclist. Spend enough time on the road and it will happen. And it hurts, and feels unfair.

To reduce the sting of that judgement, it helps to have some perspective on the situation:

The Ambiguity Of Cars

When you’re on a bicycle, cars are death monsters. You spend your time trying to keep distance from them. You wish they would all just disappear. Even when they’re trying to be friendly. It’s like you’re walking around in the woods, and suddenly you’re approached by a woodcutter who wants to have a friendly chat with you, but he’s carrying a running chainsaw casually in one hand, and walking really fast. What are his intentions?

Same sort of thing with drivers zooming up to you. People don’t even realize their mistake, because most people have never had it happen to them. Cross-country bicyclists deal with it all the time. (I am one of those.)

People will cruise up within inches of you at a stoplight and ask “where ya goin’?”, expecting an answer while you’re madly trying to determine if they intend to go straight or turn right when the light changes, potentially obliterating your bicycle and ending your life. If you don’t respond, you’re being rude. It sucks for everyone. People will honk their horns at you as they drive by, startling you as you attempt to balance on a narrow strip of shoulder, and unless you look up into their window and parse their faces and their upraised hands, you’ll never know if they were honking because they want to encourage you and cheer you on, or because they hate the sight of you and intend to plow you into a ditch.

People will slow down to a crawl behind you, stacking up the traffic, even though you’ve given them the entire open lane to pass you by, while you ride over rocks and garbage in the gutter to make yourself as small as possible. They will hover there, and you have no idea if they are displaying chivalry and waiting for a clear oncoming lane so they can veer into it and give you a wide, respectful berth – or if they are malevolently cursing you for having the nerve to ride such a ridiculously slow contraption on their highway, and getting ready to scream at you or throw something at you from an open window as they shoot forward. You have no idea because you can hear them, but you can’t see them. Or if you have a rearview mirror (like I do, and like I recommend every cyclist obtain), you can see them well enough to know there’s a car there, but you still can’t see their faces. In all of these situations, people are either trying to be model citizens—or they are planning to seriously endanger you—and you have absolutely no idea which it is until it happens.

I was driving my car across Nevada once. It was sweltering outside. I passed a cyclist slowly rolling in the other direction and I knew he would be thirsty. I turned around at a pullout and went back the other direction, passed him again, then went another half a mile ahead of him before I slowed down and stopped. Then I shut off the car, got out with the water bottle in my hand, clearly visible, and waited there while he closed the distance. It was a gallon of water and he was grinning ear-to-ear as I handed it to him, and sure enough he drank half of it on the spot, in one go. He’d underestimated the heat of the day and I knew he had another 50 miles to go. We had a great chat about touring and took a few photos together.

I wouldn’t have known to approach him that way if I hadn’t already had a dozen encounters of my own on long tours. And I have to take the rarity of this knowledge into account, for however long I ride: People just aren’t going to know what it’s like. It’s always going to be ambiguous. They will always scare you without intending to. And you just gotta accept that your life is in their hands and hope they mean well.

So, it’s a scary situation, and there aren’t very many good ways to reduce that fear. But there are a few:

How To Pass A Cyclist

  1. When you’re interacting with a bicyclist, never honk your horn. If they’re new to the road, just the sheer surprise of it might make them accidentally steer into a ditch. With experienced riders, you can sometimes toot your horn after you’ve passed them, while also waving to show you’re not furious, but usually just waving works as well. Believe me, they’re got their eyes on you at that point, they’ll probably see you wave. And that’ll make them smile and feel relieved, which is great. We’re all on an adventure together!
  2. When you need to pass them, be assured that they see you and are trying to do what they can to make that pass happen, so you can both be rid of each other as soon as possible. With this is mind, try to hang back as far as you can while still keeping your own view of the situation in the oncoming lane. The closer you hover by a cyclist, and the longer the time, the more nervous they become. What’s worse, sometimes long-range cyclists attract a lot of attention just because of their gear, and people will hover behind them just out of curiosity, which they find frustrating, especially when there are other cars around to complicate things. But that’s not your situation, and it’s rare in general. Do your best to drift back as far from them as you can until the opportunity to pass presents itself. The very fact that you are drifting back—that you were closer and now you’re farther—will signal to them that you are taking things seriously and understand their perspective. That said, number three:
  3. Pass as soon as you safely can! Get out from behind them and get on your way as soon as the visibility and the space is adequate. If you’re not on a busy road, chances are the cyclist was riding in relative peace and quiet until you appeared, and is eager to get back to that, rather than this constant state of panic. The longer you linger back there the higher his/her panic will rise. Every cyclist, everywhere, would much rather have you ahead of them than behind. All that deadly force is then pointed the other way!

Please employ these tactics. Every cyclist on the road will appreciate it, even if some of them still react badly in the moment. It’s sometimes just a no-win situation that way. But believe me, most of us really get it—we’re all drivers too (unless you’re in a dense urban environment where cars are optional)—and we’ll truly appreciate that you hung back, then made your move ASAP. The almost businesslike appearance of this when it’s executed well is especially refreshing.