Iceland gear and packing

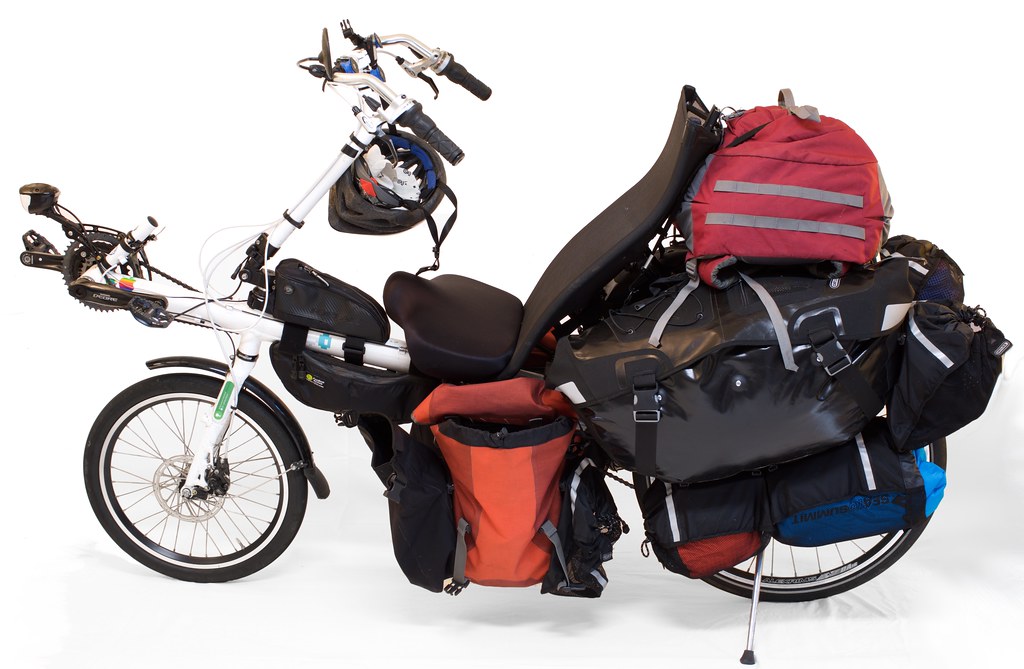
For my own reference, here is the overwhelming amount of gear I packed for my Iceland tour, and how I arranged it.

This is what everything looks like packed onto the bike:

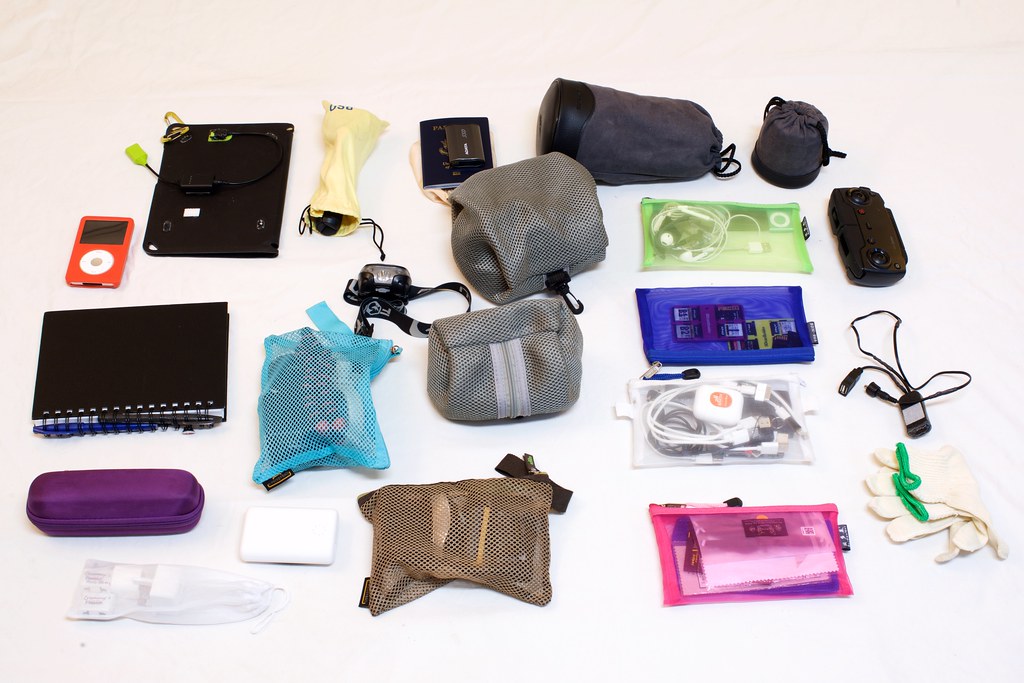
Here are the bags without the bicycle:

In the back: Two Ortlieb sport packer plus bags, each with an add-on net pocket and an add-on large roll-top pocket.

In the middle: Two ortlieb recumbent bags. The one on the left has three net bags attached to its underside in a row. The one on the right has a net bag, and then two small roll-top bags attached below, since it hangs over the drivetrain of the bike.

In the foreground: A Kelty Redwing backpack. On the loaded bike, this is placed sideways on top of the recumbent bags, where it fits nicely behind the seat, and is held down with two bungee cords.

This is all the gear that’s held in the Kelty backpack and the recumbent bags, or in the add-on bags attached to the recumbent bags.

The sleeping bag, with an inflatable insert and an extra liner included, is kept inside the large cotton sack which is then stuffed into the right-side recumbent bag and takes up all the space. The blue bag of rain gear goes into the net bag on that side, along with the raincoat, and the small add-on bags that hang over the drivetrain carry the bicycle lock and the drone.

The recumbent bag on the left side of the bike carries the tent, the stakes, and the pump. Suspended in the net bags beneath it are the blue sack with hiking shoes inside, and the red sack with pants, swimsuit, and other off-bike clothing. The net bag on the rear carries the big wool sweater. The yellow sack of sleeping gear and the other bags go into the backpack.

All this stuff goes into the sport packer bags, along with the laptop and the camera which are not pictured.

This is the charging gear for both the drone and the laptop, with a Y-connector so that they can both be run from one power cord with one international adapter. Between the two charging bricks, six USB devices can be charged at the same time.

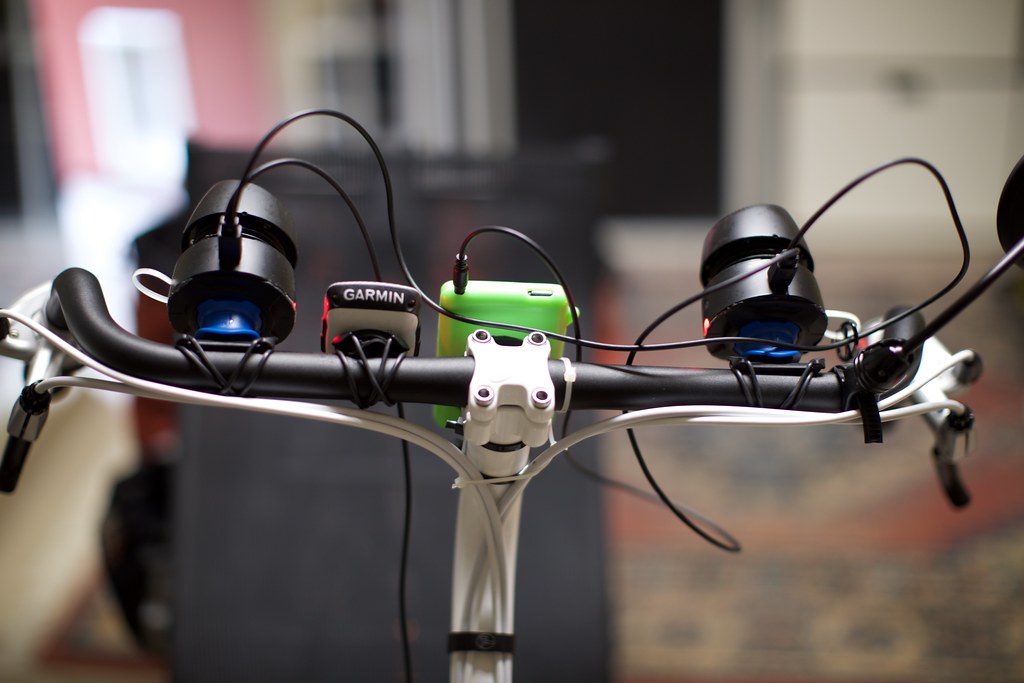
These are the portable speakers, adapted to attach to the handlebars of the bike. There’s also an old iPod mini in here, for playing bedtime music. An iPod shuffle is not suitable for this purpose since it has no ability to stop playing! It will always repeat the current playlist forever or until it runs out of power! How silly. Not that it matters, since all iPods have been discontinued and will soon die out, and we will all be locked into digital subscription services and completely abandon the whole idea of controlling what we listen to without it being mediated from one minute to the next by a jealous corporate overlord in the sky.

This is a kit of spare music hardware. None of it is essential; it’s just here to give me options, or in case something breaks. Spare headphones, a spare microphone wire, airpods, a bluetooth transmitter, et cetera.

These are camera accessories. A macro attachment (not very useful but very lightweight, so might as well bring it), a wireless camera control that pairs with an iPhone app, an external IR focus-assist lamp, a tripod collar, and a smaller tripod for the iPhone.

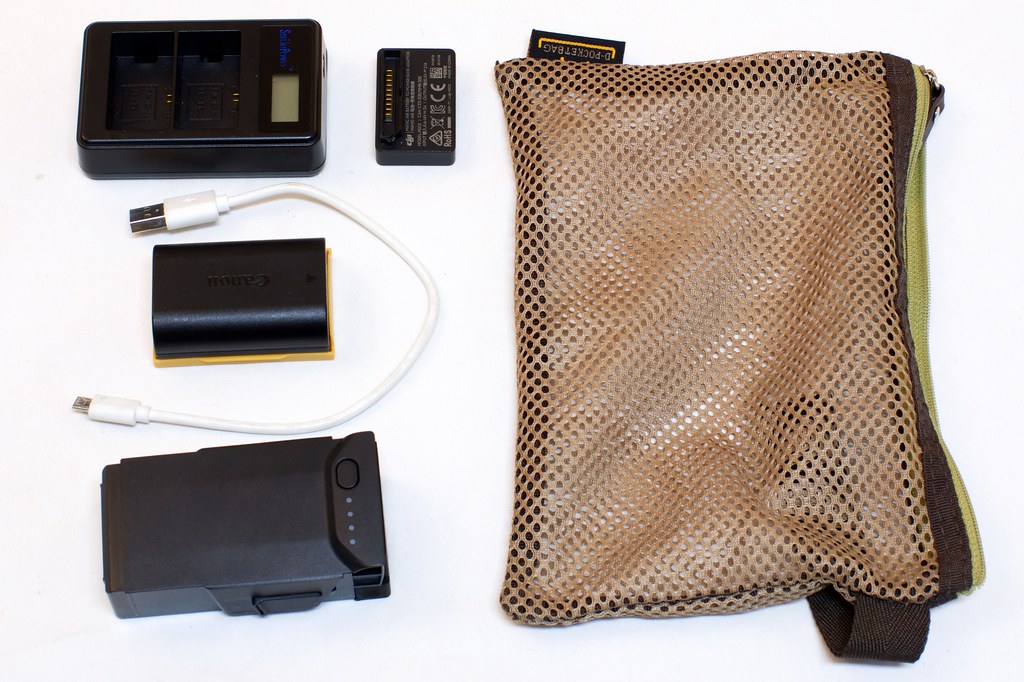
Camera and drone charging stuff, plus an extra cable.

Lens and laptop cleaning cloths, plus a set of spare blades for the drone.

A collection of media cards, holding music, audiobooks, photo archives, and other stuff that’s non-essential and can be deleted as necessary to make room for photos. All formated APFS with encryption on, for the heck of it.

Micro-USB charging cables, a camera card reader, an add-on hub for the laptop, and various small adapters to extend the utility of the micro-USB cables.

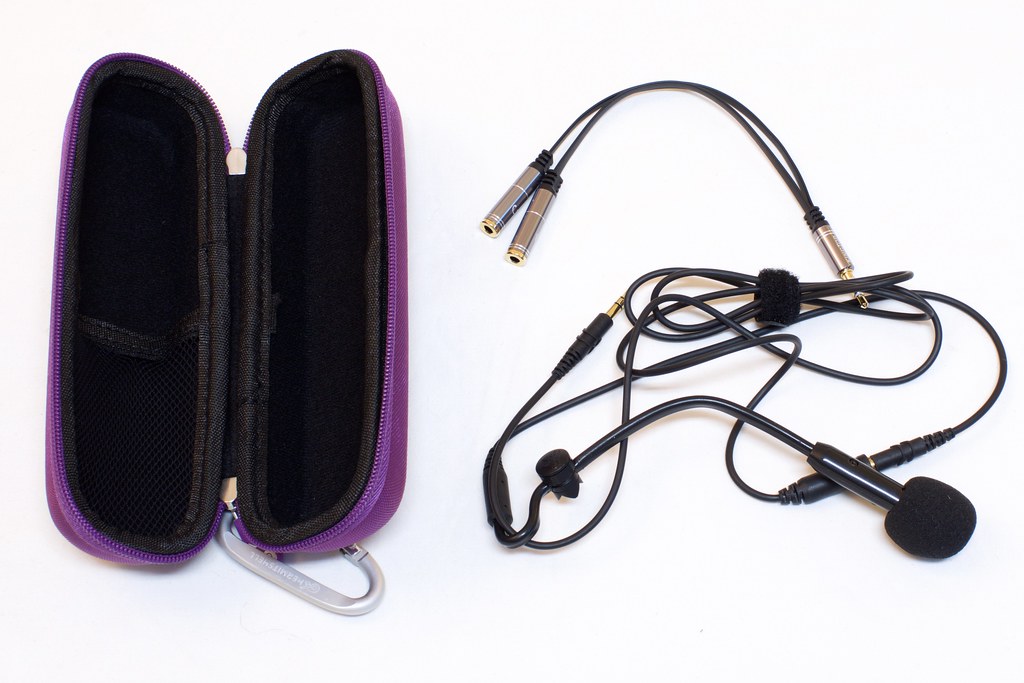
A boom microphone for calling up friends and for video conferencing in strange places. The strangest place I’ve used this so far is by the side of the road next to a geothermal power plant in the middle of Iceland. The boom snaps into place on the side of my headphones, using a small stick-on magnet. It works with the laptop and the iPhone lightning adapter, and it sounds far better than anything else I’ve tried.

The travel toolkit. This is kept in the bag under the seat, along with a small tire pump and an emergency spoke repair wire.

The kit contains everything I need to disassemble the bike and put it back together, including removing the pedals and seat. I can repair chain, fix a flat, replace broken cables, patch wires, adjust brakes and shifters, and also prepare food and trim my nails and mustache. Each of these tools has had a lot of thought put into it.

The rest of the space on the bike is occupied by myself, two large water sacks, and whatever food I happen to be carrying at the time.

Camp cooking, round 2

Removed Materials:

Added Materials:

Results:

  • I moved to a larger pot and fry pan, with a non-stick coating instead of titanium.
    • This unit comes with four plastic cups, two nested inside the others.
      • Though cute, I reasoned that I didn’t actually need four or even two cups
      • So I’m sticking with my original titanium cup, and leaving out all the plastic cups.
  • I still need at least one plate, perhaps two for food preparation.
    • There are plates that fit perfectly inside this cookset, but they are sold in a different product, which is annoying and wasteful.
      • I’d have to spend another 35 dollars for them and then throw away the four additional cups and two of the plates.
  • This unit comes with a lid for the pot that is separate from the fry pan.
    • I suppose it would be handy if I had two burners instead of one and wanted to fry and boil at the same time.  But I don’t.
    • The lid is also not suitable for placing over the pan.  Apparently hot grease should not contact it.  That sharply reduces its usefulness.
      • Why would they handicap this well-planned cooking set with this lid?
  • There is enough room inside to fit all the parts of the stove in their original sack, except for the fuel bottle and/or canister(s).
    • Those items can now be placed in a separate drawstring sack.
  • The whole set is held together with a waterproof half-sack which acts as a water carrying bowl and washing-up sink.  Pretty convenient.
  • The wrapped-up set and the fuel bottle bag still fit into one mesh sack on the outside of my panniers.
  • Much easier to cook regular-size meals, easier to clean, and now I have room for plates.
  • Still no knife.
  • The spork is not a very good fork.
  • I think I may want to move to a dedicated fork and knife, but a plastic spoon so I can eat right out of the non-stick pot when I make cereal or soup.

Comparison of Heimplanet tents

Small Tent (The Fistral) – 2.9 kg / 6.4 lb

  • About 2 minutes to inflate with small pump.
  • Makes its full shape only after using at least two stakes.
  • Great for single-night stays and time spent mostly on the bike in unpopulated areas.
  • More risky because far more equipment needs to stay outside under the tent flaps.
  • Not good for remaining indoors during rainy days, due to low ceiling and lack of room.
  • Great weight-to-space ratio.
  • Decent for rain, not great for snow.
  • Line of pockets at front is good for small items but additional after-market hanging storage should be added.

Note that in all the photos below, I have attached a large Heimplanet tarp to the side of the Fistral, creating a enormous vestibule. (See postscript at the bottom of this post.)

Another site, another setup.
https://live.staticflickr.com/65535/52929995462_f9300071ce_b.jpg
https://www.flickr.com/photos/57897385@N07/52929995462/
https://live.staticflickr.com/65535/52929995462_f9300071ce_s.jpg
2023-05-20-230307-IMG_6921

Another site, another setup.

Tent all spread out, ready to inflate.
https://live.staticflickr.com/65535/48326198801_7a77ef770d_b.jpg
https://www.flickr.com/photos/57897385@N07/48326198801/
https://live.staticflickr.com/65535/48326198801_7a77ef770d_s.jpg
IMG_9304

Tent all spread out, ready to inflate.

Tent inflated, with bicycle stowed under, from a different angle.
https://live.staticflickr.com/65535/48326326967_3b918a0e03_b.jpg
https://www.flickr.com/photos/57897385@N07/48326326967/
https://live.staticflickr.com/65535/48326326967_3b918a0e03_s.jpg
IMG_9306

Tent inflated, with bicycle stowed under, from a different angle.

Doing laundry in the midday sun.
https://live.staticflickr.com/65535/51384705438_49db328e38_b.jpg
https://www.flickr.com/photos/57897385@N07/51384705438/
https://live.staticflickr.com/65535/51384705438_49db328e38_s.jpg
2021-08-08-142103-IMG_8817

Doing laundry in the midday sun.

Drying out items before packing.
https://live.staticflickr.com/65535/51383131574_3b4131ceb3_b.jpg
https://www.flickr.com/photos/57897385@N07/51383131574/
https://live.staticflickr.com/65535/51383131574_3b4131ceb3_s.jpg
2021-08-05-101928-IMG_8554

Drying out items before packing.

Comfy as usual!
https://live.staticflickr.com/65535/51383393180_6a12535240_b.jpg
https://www.flickr.com/photos/57897385@N07/51383393180/
https://live.staticflickr.com/65535/51383393180_6a12535240_s.jpg
2021-08-05-222700-IMG_8590-2

Comfy as usual!

Tent inflated, with bicycle stowed under attached tarp. That red mark is the taillight, visible through the fabric.
https://live.staticflickr.com/65535/48326198561_d04d54e49a_b.jpg
https://www.flickr.com/photos/57897385@N07/48326198561/
https://live.staticflickr.com/65535/48326198561_d04d54e49a_s.jpg
IMG_9305

Tent inflated, with bicycle stowed under attached tarp. That red mark is the taillight, visible through the fabric.

Snug as a bug.
https://live.staticflickr.com/65535/48326326647_671b33159d_b.jpg
https://www.flickr.com/photos/57897385@N07/48326326647/
https://live.staticflickr.com/65535/48326326647_671b33159d_s.jpg
IMG_9310

Snug as a bug.

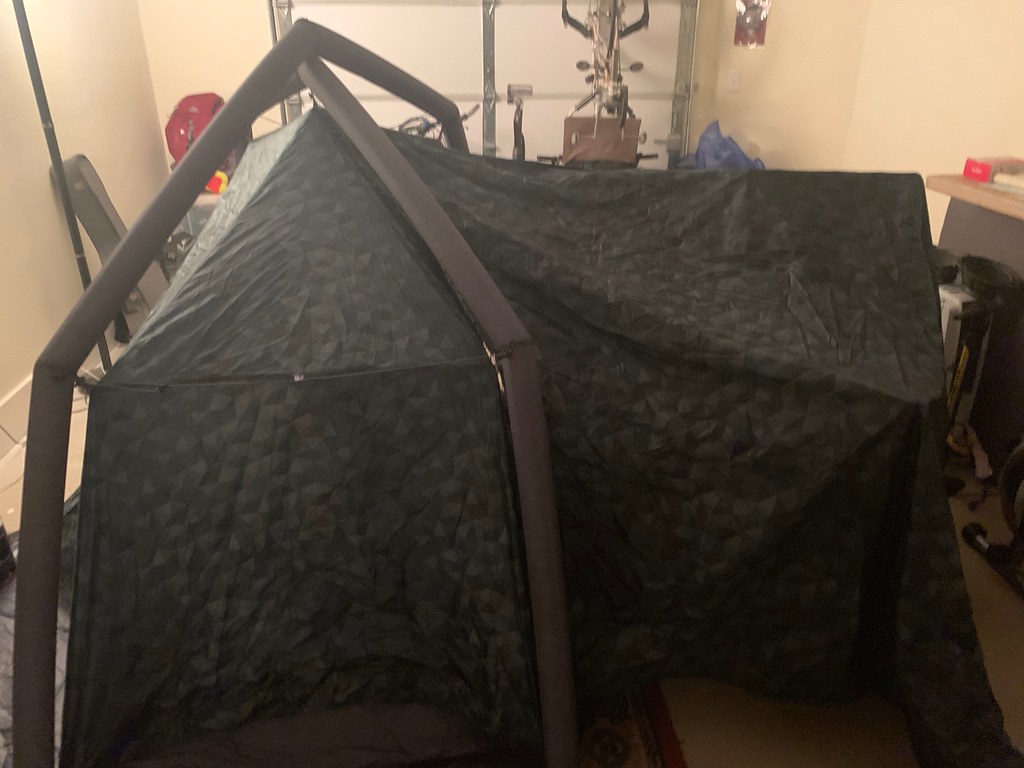
You can see my hack job here, where I ziptied a tarp to the side of the tent. From a distance it almost looks like it was designed this way…
https://live.staticflickr.com/65535/48326333202_154aa5089b_b.jpg
https://www.flickr.com/photos/57897385@N07/48326333202/
https://live.staticflickr.com/65535/48326333202_154aa5089b_s.jpg
2019-07-17_11-18-56-66+01-00_E33A3643

You can see my hack job here, where I ziptied a tarp to the side of the tent. From a distance it almost looks like it was designed this way…

The tent, tucked into a nice corner of the Búðardalur campground.
https://live.staticflickr.com/65535/48524607042_633bb4fa20_b.jpg
https://www.flickr.com/photos/57897385@N07/48524607042/
https://live.staticflickr.com/65535/48524607042_633bb4fa20_s.jpg
IMG_9826

The tent, tucked into a nice corner of the Búðardalur campground.

Had to use one guyline here, on account of the high wind. Still a pretty good site!
https://live.staticflickr.com/65535/51476375743_5f67153c86_b.jpg
https://www.flickr.com/photos/57897385@N07/51476375743/
https://live.staticflickr.com/65535/51476375743_5f67153c86_s.jpg
2021-09-03-101858-IMG_9347

Had to use one guyline here, on account of the high wind. Still a pretty good site!

Another fine camping spot.
https://live.staticflickr.com/65535/51477046015_770898d4e8_b.jpg
https://www.flickr.com/photos/57897385@N07/51477046015/
https://live.staticflickr.com/65535/51477046015_770898d4e8_s.jpg
2021-09-03-212522-IMG_9426

Another fine camping spot.

All set up for a long stay.
https://live.staticflickr.com/65535/51476395823_b88cdcb9d2_b.jpg
https://www.flickr.com/photos/57897385@N07/51476395823/
https://live.staticflickr.com/65535/51476395823_b88cdcb9d2_s.jpg
2021-08-31-195100-IMG_9294

All set up for a long stay.

Set up in the corner of the campground, for maximum wind blockage.
https://live.staticflickr.com/65535/48576260607_60594a3652_b.jpg
https://www.flickr.com/photos/57897385@N07/48576260607/
https://live.staticflickr.com/65535/48576260607_60594a3652_s.jpg
IMG_0087

Set up in the corner of the campground, for maximum wind blockage.

The Fistral is my favorite one-person bike touring tent. It’s roomy, versatile, and absurdly easy to set up over and over again, even in the dark. The extra weight is worth it. I’ve taken it all over, from the Nevada desert to the rainy shores of Iceland.

Medium-Small Tent (The Kirra) – 3.8 kg / 8.3 lb

  • About 2.5 minutes to inflate with the small pump. Can easily be inflated and then staked down after.
  • Needs at least three stakes to take its full shape.
  • Easy to move and reposition even for one person.
  • Interior can be cleaned by picking the entire tent up and shaking it with the door open.
  • Vestibule is relatively large.
  • Ventilation is not great.
  • Quite good weight-to-space ratio.
  • Much more spacious on the inside than you’d expect. Two adults can sleep in it easily.
  • Good in light wind, but heavy wind requires multiple guy lines attached to elevated terrain/objects, e.g. a fencepost.
Reading the morning memes.
https://live.staticflickr.com/65535/52930972205_461423913e_b.jpg
https://www.flickr.com/photos/57897385@N07/52930972205/
https://live.staticflickr.com/65535/52930972205_461423913e_s.jpg
2023-05-21-093551-IMG_6927

Reading the morning memes.

Setting up the tent for the last time, and trying not to get bitten in the process…
https://live.staticflickr.com/65535/53111793582_f69b7edede_b.jpg
https://www.flickr.com/photos/57897385@N07/53111793582/
https://live.staticflickr.com/65535/53111793582_f69b7edede_s.jpg
2023-07-19-211011-IMG_9675

Setting up the tent for the last time, and trying not to get bitten in the process…

https://live.staticflickr.com/65535/53112789495_93e9f4f402_b.jpg
https://www.flickr.com/photos/57897385@N07/53112789495/
https://live.staticflickr.com/65535/53112789495_93e9f4f402_s.jpg
2023-07-19-091934-IMG_9614
https://live.staticflickr.com/65535/53112186694_1e20f401d5_b.jpg
https://www.flickr.com/photos/57897385@N07/53112186694/
https://live.staticflickr.com/65535/53112186694_1e20f401d5_s.jpg
2023-06-29-105604-IMG_8489
https://live.staticflickr.com/65535/53905176534_3ddc79d3bb_b.jpg
https://www.flickr.com/photos/57897385@N07/53905176534/
https://live.staticflickr.com/65535/53905176534_3ddc79d3bb_s.jpg
2024-07-28-183702-IMG_2654

Aside from the difficulty in high wind (30+ mph), this is a really great all-around tent. I’d say it’s the best one Heimplanet makes, drawing on everything they’ve learned from previous designs.

Medium Tent (The Cave) – 4.8 kg / 10.6 lb

  • About 3 minutes to inflate with small pump. Can easily be inflated and then staked down after.
  • Least reliant on guy lines and stakes; keeps its full shape without any.
  • Easy to move and reposition even for one person.
  • Interior can be cleaned by picking the entire tent up and shaking it with the door open.
  • Four pockets, two on each side, make a division between sleep gear and outside gear.
  • Poor weight-to-space ratio. Almost twice as heavy as Fistral with 2x the space.
  • Single round door is small and very awkward to use.
  • Relatively poor ventilation.
  • Vestibule area is relatively small but reasonably secure from rain.
  • Good in rain and wind and snow without using guy lines.
  • Can remain operational even if two out of the five struts fail (leak), though it will sag without guylines.
  • Extremely good performance in high wind when staked down.
https://live.staticflickr.com/65535/50363940788_ea1a96019f_b.jpg
https://www.flickr.com/photos/57897385@N07/50363940788/
https://live.staticflickr.com/65535/50363940788_ea1a96019f_s.jpg
2018-03-13_22-34-50_IMG_5939
https://live.staticflickr.com/65535/50364723537_b6112b3aa7_b.jpg
https://www.flickr.com/photos/57897385@N07/50364723537/
https://live.staticflickr.com/65535/50364723537_b6112b3aa7_s.jpg
2019-01-16_11-48-14_IMG_8257
https://live.staticflickr.com/65535/53783595993_499c540a4b_b.jpg
https://www.flickr.com/photos/57897385@N07/53783595993/
https://live.staticflickr.com/65535/53783595993_499c540a4b_s.jpg
cave-IMG_2355

This tent is too heavy for backpacking or biking, but I’ve deployed it on many vehicle-based camping trips, including the California mountains and at Toorcamp in Washington. It’s sturdy, dead simple to deploy, and easy to clean, though the narrow door doesn’t do it any favors. It’s the first and the most eye-catching design by Heimplanet, and it got me hooked on the whole idea of inflatable tents.

Large Tent (The Backdoor) – 6.2 kg / 13.7 lb (4-Season)

  • About 3.5 minutes to inflate with small pump.
  • Decent weight-to-space ratio. Twice as heavy as Fistral but with 3x the space and a higher ceiling.
  • Pocket arrangement has indoor/outdoor division, same as the Cave.
  • Large enough to deploy a large bed, unpack gear, and comfortably use a chair at the same time.
  • Almost enough vestibule space to enclose an entire bicycle!
  • Semi-reliant on guy lines.
  • Can remain standing even without guylines if one of the four struts fails, though it will list somewhat.
  • Ventilation options are very good, even better than the Fistral.
  • Good in rain and wind and snow if guy lines are used.
  • Has a very large footprint:
    • Too large for almost all indoor deployments.
    • So large it may upset other people competing for space.
    • Difficult to find a patch of flat ground this large.
  • Color scheme matches my bike!
https://live.staticflickr.com/65535/50363927383_0f9ea57a14_b.jpg
https://www.flickr.com/photos/57897385@N07/50363927383/
https://live.staticflickr.com/65535/50363927383_0f9ea57a14_s.jpg
2018-06-26_21-47-38_IMG_6985
https://live.staticflickr.com/1763/42534956405_4b8dc79f71_b.jpg
https://www.flickr.com/photos/57897385@N07/42534956405/
https://live.staticflickr.com/1763/42534956405_4b8dc79f71_s.jpg
Huzzah, the tent is repaired!
https://live.staticflickr.com/65535/52327280636_3721e86953_b.jpg
https://www.flickr.com/photos/57897385@N07/52327280636/
https://live.staticflickr.com/65535/52327280636_3721e86953_s.jpg
2022-08-05-193022-IMG_3250

Huzzah, the tent is repaired!

It was a small campsite but the parking space was big.
https://live.staticflickr.com/65535/52327528298_48e592608a_b.jpg
https://www.flickr.com/photos/57897385@N07/52327528298/
https://live.staticflickr.com/65535/52327528298_48e592608a_s.jpg
2022-08-08-175541-IMG_4989

It was a small campsite but the parking space was big.

https://live.staticflickr.com/65535/50200362456_ca49073a11_b.jpg
https://www.flickr.com/photos/57897385@N07/50200362456/
https://live.staticflickr.com/65535/50200362456_ca49073a11_s.jpg
2020-08-03_20-38-19-48-07-00_E33A6339
https://live.staticflickr.com/1770/43391656032_4bc01368c7_b.jpg
https://www.flickr.com/photos/57897385@N07/43391656032/
https://live.staticflickr.com/1770/43391656032_4bc01368c7_s.jpg
https://live.staticflickr.com/65535/53903927397_6c52d538bb_b.jpg
https://www.flickr.com/photos/57897385@N07/53903927397/
https://live.staticflickr.com/65535/53903927397_6c52d538bb_s.jpg
2024-07-28-183651-IMG_2653

For one person this is overkill, and for two it’s luxury. You can stick the equivalent of a queen size bed in here and still have room for your stuff. Far too heavy for bike touring, but it’s been part of my standard car camping gear ever since it was introduced.

Very Large Tent (The Nias) – 6.8 kg / 15 lb

  • About 4 minutes to inflate with the small pump.
  • Requires laying out with four stakes before inflation, but additional stakes are optional.
  • Each side is large enough for two adults to sleep comfortably, as long as they face towards the inside door. Three could fit (total of six), but it could get awkward.
  • Average weight-to-space ratio.
  • Average ventilation. Large mesh door but side flaps are small.
  • Enormous central area for storing gear. Almost wide enough for two loaded bicycles side-by-side.
  • Extremely large footprint.
    • Too large for indoor deployment.
    • So large it may upset other people competing for space.
    • Difficult to find a patch of flat ground this large.
  • Far too heavy to be practical to bike tourists.
https://live.staticflickr.com/65535/53783596098_91b2becabd_b.jpg
https://www.flickr.com/photos/57897385@N07/53783596098/
https://live.staticflickr.com/65535/53783596098_91b2becabd_s.jpg
nias-IMG_2334

This is the only tent Heimplanet makes that absolutely requires stakes. Without them, the sleeping areas will not take their shape.

Conclusions

Based on the above, it seems to make the most sense to travel with the Fistral through remote areas, use the Kirra for more rural camping, and use the Backdoor only when traveling with three or more companions.

This is a little disappointing, since the Backdoor is luxurious to use. Lots of ventilation, tons of space, room to work inside, a giant vestibule for cooking… It’s too bad it weighs so much, because if I’m going to be living in a tent for months at a time, I’m going to need a place that can feel like a home.

Postscript: A giant vestibule makes the Fistral an ideal one-person touring tent!

Since my first few rounds of using the Fistral I’ve discovered that it’s possible to clip a lightweight tarp to one side of it and use the tarp to cover a bicycle parked parallel to the tent, with most of my gear still on it.

With the tarp attached, the Fistral is basically a good-sized one-man tent with a rear vestibule that’s larger than the living space. When the edges are staked down on opposite ends of the bike, the entire bike forms the outside wall of the vestibule, keeping the contents – bike included – safe from rain, and easily accessible through one of the doors in the tent. It’s also ventilated enough for cooking.

With the bicycle visibly concealed and staked down it is far less likely to be snatched by thieves, and I never have to worry about a wet seat or chain when I pack up in the morning.

I’ve deployed this tent dozens of times over multiple trips and years, and it’s worked brilliantly.

https://live.staticflickr.com/65535/50364618451_c0c0bf8998_b.jpg
https://www.flickr.com/photos/57897385@N07/50364618451/
https://live.staticflickr.com/65535/50364618451_c0c0bf8998_s.jpg
2018-08-16_12-12-21_IMG_7464
https://live.staticflickr.com/65535/50364608721_0db53566de_b.jpg
https://www.flickr.com/photos/57897385@N07/50364608721/
https://live.staticflickr.com/65535/50364608721_0db53566de_s.jpg
2018-08-15_21-53-01_IMG_7462
https://live.staticflickr.com/65535/50364613361_73fc90109a_b.jpg
https://www.flickr.com/photos/57897385@N07/50364613361/
https://live.staticflickr.com/65535/50364613361_73fc90109a_s.jpg
2018-08-15_23-45-14_IMG_7463
https://live.staticflickr.com/65535/50363870303_726fae6cfd_b.jpg
https://www.flickr.com/photos/57897385@N07/50363870303/
https://live.staticflickr.com/65535/50363870303_726fae6cfd_s.jpg
2018-11-12_01-48-07_IMG_7895

Customized bike (and camping) speakers

It’s hard to find good, versatile hardware, and sometimes the thing I want just doesn’t exist, so I have to get all crafty. This is another of those things I’m documenting for my own reference, in case I need to recreate it.

Bluetooth is the new hotness, but wires still sound better - and use less power.

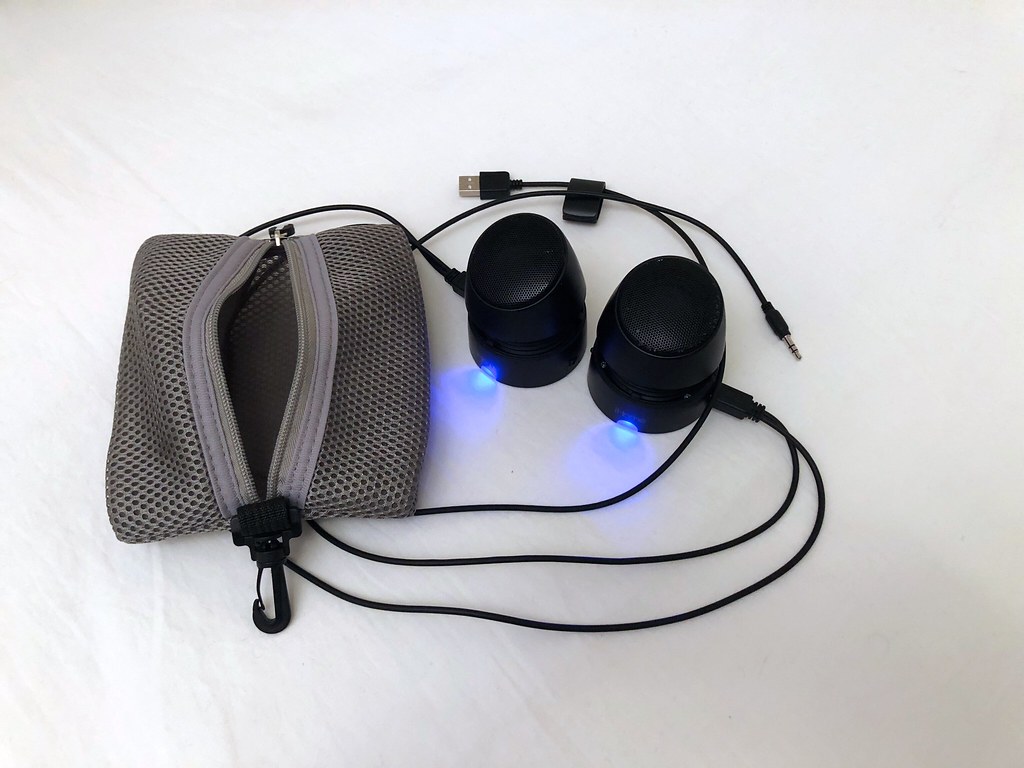
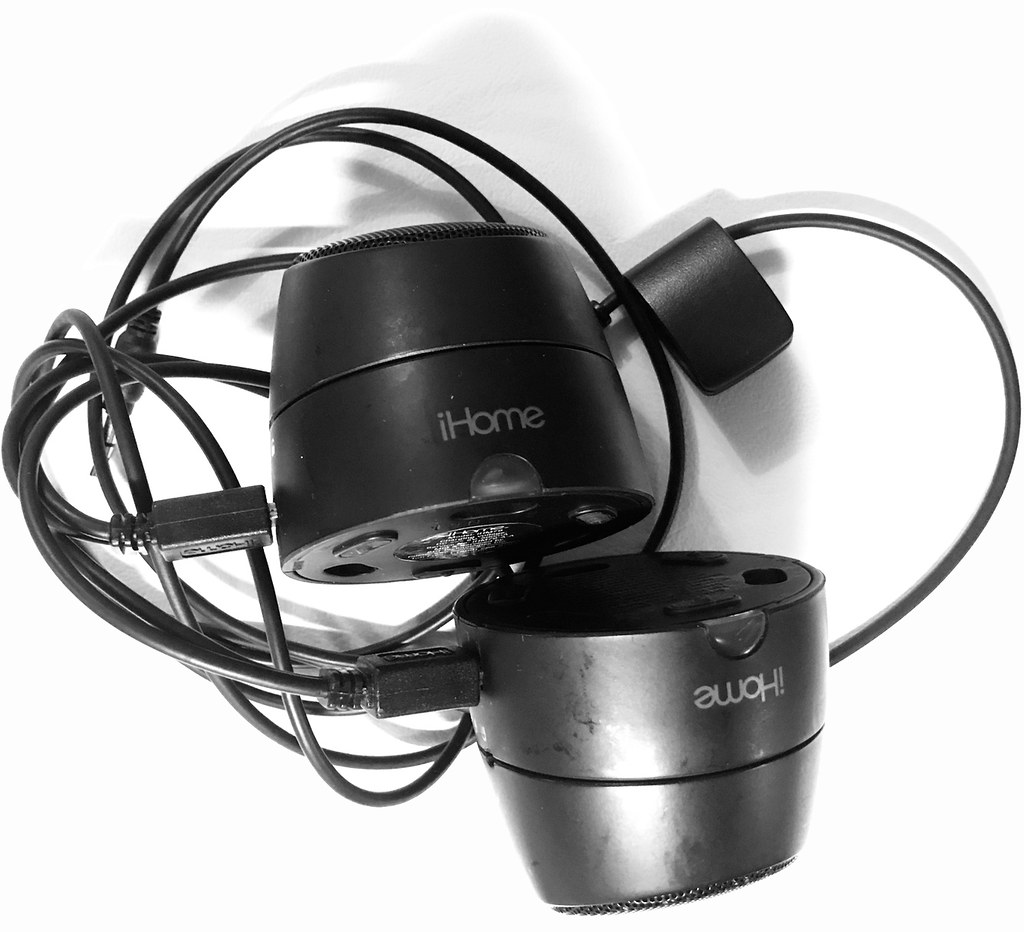
These are the iHome iHM79BC Rechargeable Mini Speakers. They sound good, pack reasonably small and light, and the design is simple. I’ve used them on many overnight hotel stays, arranged on a nightstand or next to a bathtub, and I’ve set them up in the middle of the picnic table on camping trips.

But I wanted to use them in even more places, including in a tent, and anchored to my bicycle. Here’s how I modified them.

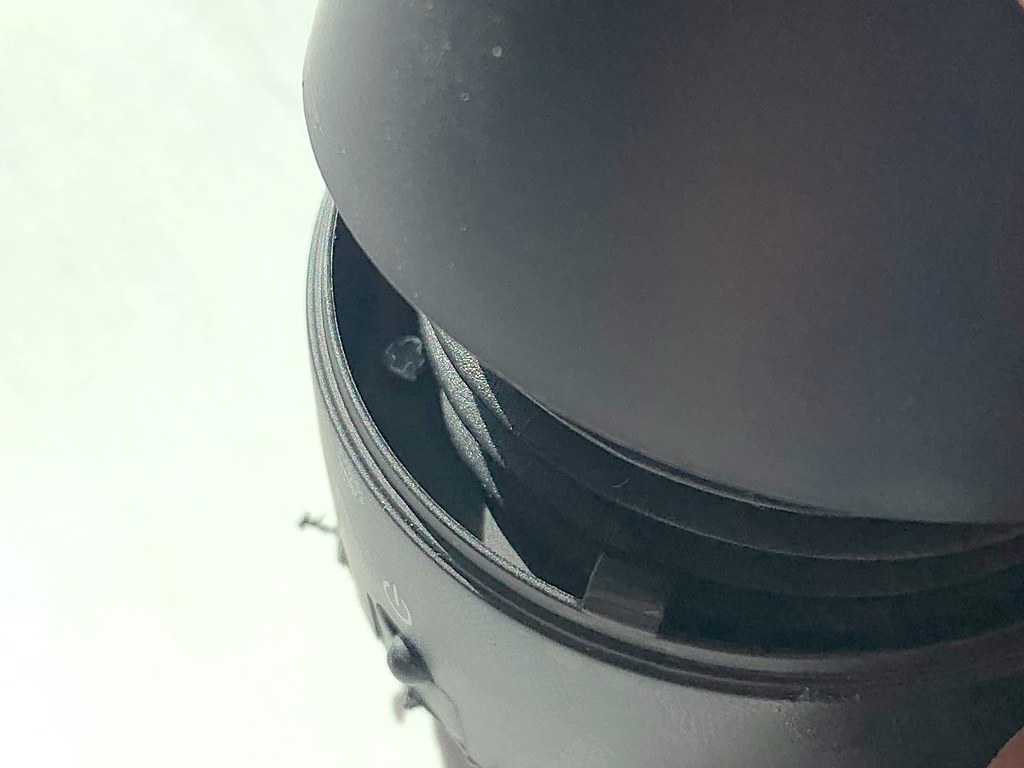
First thing to do, of course, is take them apart. See that little screw visible underneath the lid? There are three of those. I found it pretty easy to bend the lid out of the way and remove them all. With those out of the way, the bottom of the speaker popped off.

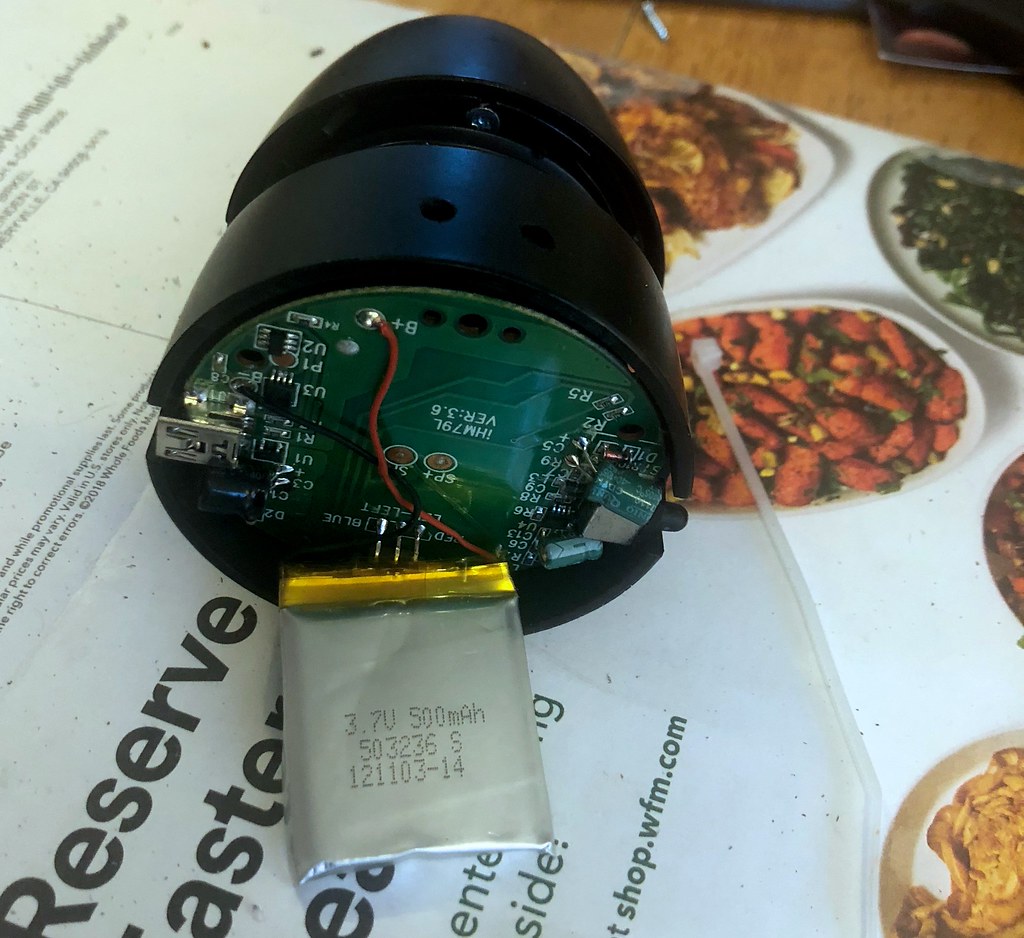
After drilling the holes; before installing the ziptie.

Powered by a standard 500mAh 3.7v LiOn battery pack.

There’s a little magnet glued inside the base that I pried out with a screwdriver to save some weight. The battery rests on top of the base inside the speaker, and with the base out of the way it falls out. I had to be careful not to yank the tiny wires that linked it to the circuit board.

By the way, if you want, you can swap out the rechargeable batteries at this point, and solder in some fresher ones. There are a variety of 500mAh 3.7v lithium batteries available via Amazon for example. It’s a pretty standard size.

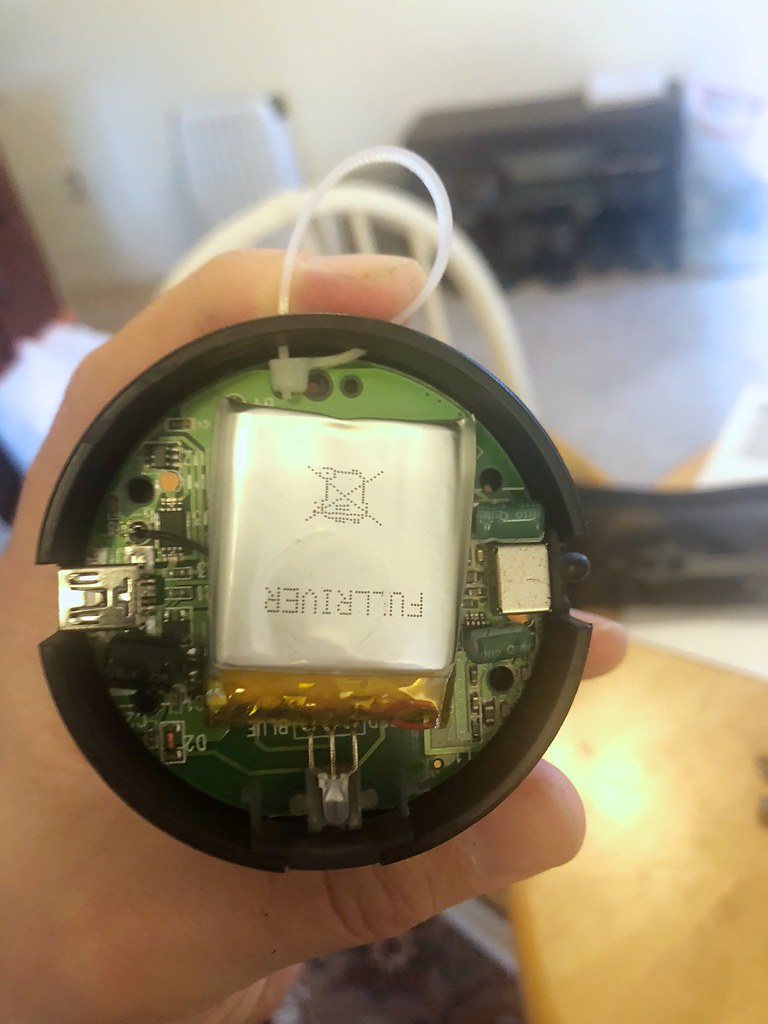
I wanted to add loops to the sides of the speakers so I could hang them from hooks in a tent, so I got a little drill and made two holes in the side of the shell, just a little lower than the underside of the circuit board. (You can see them near the top of the photo.) Then I threaded a small ziptie through the holes, tightened it into a small loop, and clipped off the excess plastic.

With the ziptie in place, I stuck the battery on the base and pushed it back into the bottom of the shell. It only took a little bit of fiddling to get the ziptie on the right side of the plastic post inside. Then I put the screws back in.

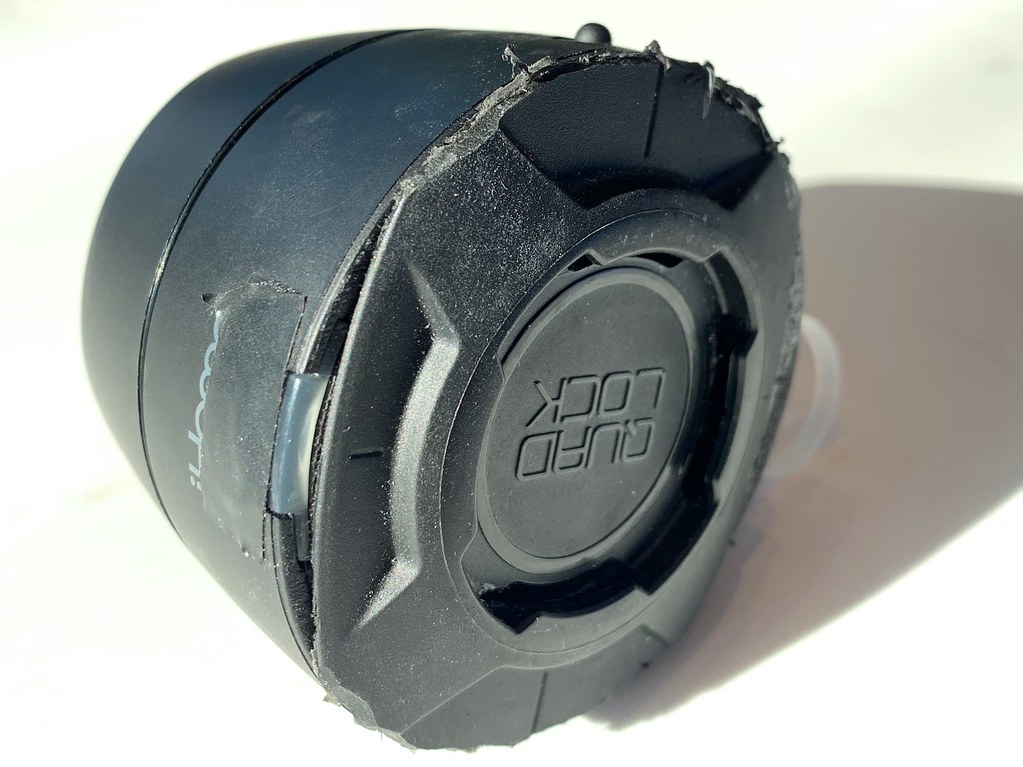
But the fun wasn’t over yet! I also glued a Quad Lock adapter to the bottom of each speaker.

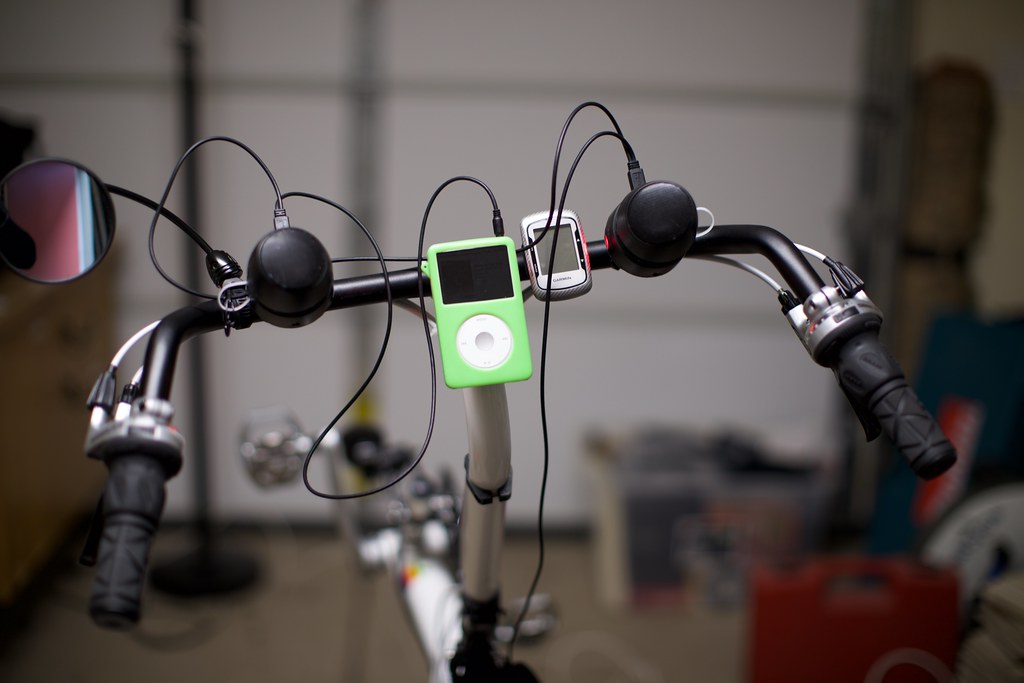
Now I could use the speakers with my laptop, or by my bedside, or on the ceiling of my tent, or on my bicycle! Huzzah! Here’s how they look:

Ready for some sing-along riding!

Perfect stereo for an audience of one ... and loud enough to irritate others too!

Yeah I guess the wires make it a little messy. But it sounds great!

Camp cooking, round 1

Materials:

A first attempt at cooking with the stove: A basic cup of hot chocolate.

Results:

  • The original pot I had was so small that it could not actually cover the unfolded blades of the stove, making it incredibly unstable.
  • The stove I bought is actually quite large relative to others that only use white gas.
    • I did some research and discovered that the white gas fuel is available in the United States but not so much in Europe and is very hard to find in Asia
    • So, it was a good idea to go with the stove that can also use liquid fuel.
  • My first attempt at cooking was to make hot chocolate.
    • I discovered that the thinness of the titanium pot makes it very prone to burn materials.
    • Though on the other hand it is fairly easy to clean afterwards.
  • The hot chocolate was delicious but immediately after cooking it I tried to disconnect the gas, which upset the pot.
    • I spilled a lot of it requiring quick attention with paper towels and a sponge.
    • Lessons learned:
      • Wait to disconnect the gas until the stove is clear.
      • Take potential spill and splash zones seriously because cleanup materials are hard to find in a camp.
  • Afterwards I found that the stove and the cooking plate and the spork and the canister stand would all fit inside the pot
    • I did not have any easy way to keep the pot closed so I cut a luggage strap to fit around it.
    • This left the fuel bottle, the fuel bottle insert, the fuel canister, the spare parts, and the air shield outside.
    • All those items fit together in the original sack, except for the fuel canister.  The fuel bottle kind of poked out the top though.
  • As long as I cleaned the pot thoroughly after use I now had a cooking set contained in a pot and a sack, with a very small frying pan for a lid, small enough to fit in one of the mesh bags on my pannier.
  • Even with this slightly larger pot, there was still some instability on the burner.
    • Plus if I want to fry more than two eggs, or cook more than a fistful of pasta, I need more room.
  • Because of the thin walls of my cookware I will have to do most of my cooking using water to distribute heat.
    • For example steaming broccoli or squash or cooking noodles or sausage.
  • I suspect I am soon going to want some kind of prep table or cutting board.
  • Speaking of which, I do not have a knife.

Round 2