
Complete List Of Gear
This section is for my own notes, but it’s online because there are lots of cycling geeks like myself who just love to read gear lists, as we search for the Best Version Ever of a specific thing.
Filter By Type
Filter By Trip
I have another cable as short as this one, but it doesn’t run at full 10Gbps speed and it doesn’t do power delivery so I can’t use it to charge big batteries. This cable does.

Sometimes you’re in the middle of nowhere and you want to play some old-skool 8-bit console game in an emulator.
This colorful gadget weighs very little, and I find it more fun to use than a keyboard.

This is how you pair your iPod Classic with your Airpods Pro.
Plug this little fellow into the iPod. Press the button until “SBC” flashes rapidly. Open the case of your Airpods Pro but don’t take them out. Wait a moment, then press the button on the back of the case and hold it. In a couple of seconds the “SBC” light will start flashing slower. If it doesn’t work the first time, press and hold the button on the Airpods Pro case again. At that point you can take the Airpods out of the case and use them. They are paired. Noise cancellation works as usual. To unpair, place them back in the case and shut the lid. In a short while this transmitter will shut off by itself.
This device don’t sound as good with the Airpods Pro as direct transmission from an Apple product with their proprietary audio chip inside (like the latest iPhones) but it sounds pretty dang good. And now your iPod Classic – which you’ve probably upgraded with SD cards so it holds 2 terabytes of stuff, or some other insane mod – can work with those fancy Airpods. WHOHOOO!!!

Sometimes the driving wind or rain will sting your eyes so much you can’t keep them open, but the cloud cover makes wearing sunglasses dangerous. That’s the situation these are for.
This is only a minor upgrade compared to the Edge 130, but hey, why mess with a good thing? It’s small, long-lasting, readable, and accurate enough. I could try and get my phone to constantly record a GPS track and report speed and time and distance, but the battery would drop like a rock. This does that job way better.
Long live the Edge 130 series!
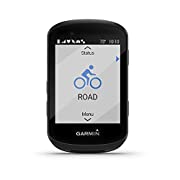
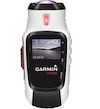
I really wanted to like this gadget. I thought it would be cool to move up from the Edge 130 to something with more storage and a color screen.
Nope. The interface is an absolute train-wreck. It has SIX buttons all around it, irregularly placed by design, and it’s completely impossible to remember which button does what in each context. They have no spatial correlation with the interface, and no consistency. I found myself hating every second I had to interact with it. I hate it as much as I totally love the Edge 130, which is a lot indeed.
When you’re doing heavy software development and your computer is recompiling things in the background all the time, you can blow through a standard laptop battery in one hour. That’s no good if you want to go work out in the middle of nowhere.
This battery lets me work full-tilt, with all 4 cores maxed out and the brightness all the way up, for about four hours. With two of them I can put in an entire day of coding without needing to park next to a power socket. Takes a while to charge them in the evening, but, you can’t have everything…
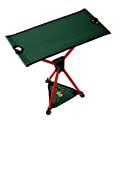
In a pinch this makes an okay backless chair like the manufacturer says, but for me it’s a combination footstool and table. It’s part of my work setup: With my butt in the Alite Stonefly chair and my legs up on this stool, I can comfortably work in a park or on a hillside for hours.
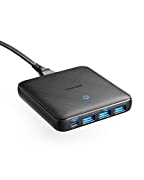
This has one fewer USB ports than my older charger, but it’s a good amount lighter, which is an acceptable tradeoff. Like the older one it allows me to charge the laptop and my other doodads at the same time, from one outlet — which in turn means I need only one international plug adapter when I’m traveling.

I was very skeptical of these, because I find the non-“Pro” airpods worse than useless: They sound awful, and constantly fall out of my ears. I don’t know why anybody likes them. But the AirPods Pro are a different beast.
For years to come, I will remember that experience of walking outside the Apple store to a noisy intersection in Oakland, putting in the AirPods Pro, and then jamming that “Noise Cancellation: On” button for the first time. The whole world just dropped out of existence around me, like I had suddenly suffered some terrifying brain injury. “Oh my god I can’t hear,” my brain screamed. “What just happened?”
Since then I’ve done demos of them to friends of mine, telling them to put the AirPods in their ears while they’re in “transparent” mode. Then I start some music, and suddenly switch on the noise cancellation. Their jaws fall open. It’s unnaturally, frighteningly effective. You suddenly hear the music, and almost nothing else.
I now use these when I’m traveling on the wide shoulder of a busy highway. It cuts the thunderous rushing noise down to an acceptable level, and I can listen to an audiobook at a low volume instead of cranking it like I used to.

Okay, fine. I’m a middle-class twit and I bought my own personal knife and fork for travel purposes. Don’t hassle me about it or I’ll poke you!
What I like about this set is the polished ends. Makes them feel a bit nicer.
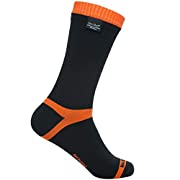
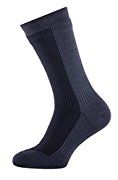
Bought these to add to my waterproof sock collection when the SealSkinz were discontinued. They work just as well. As I mentioned with the SealSkinz, waterproof socks on a recumbent are a fine idea because shoe covers don’t work, and with your feet elevated and facing into the wind they are a bit more likely to get cold. Wearing these with an additional pair of socks beneath was perfect for cycling in Iceland.
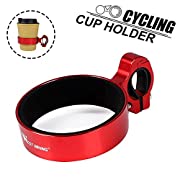
A cute idea. I keep it attached when the bike is in my hometown, and I’m riding my work commute or going to the farmers market. Practically speaking it’s only useful on really good roads, because the slightest bump tends to send your coffee splashing around. But I put my coffee in it anyway, with a lid on, because it’s just so indulgent and bohemian having my drink right there on the handlebars!
It’s lightweight enough to take on a tour but I haven’t bothered yet.
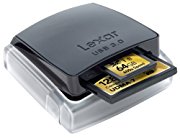
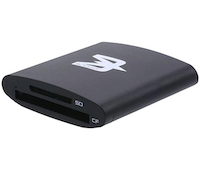 Since I moved to a MacBook with all USB-C ports, it seemed a bit weird to be using a reader that required a USB-3 Micro-B cable. So I got this little fellow. Lightweight, simple, and reads CompactFlash and SDXC UHS-II cards at full speed.
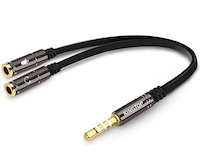 This connector works with the iPhone; specifically it’s a TRRS connector with the CTIA layout, and you can plug it right into the audio jack on the Lightning-to-audio adapter. You can also plug it into the side of your MacBook and it will work as well.
Unlike the FolioGadgets Y-adapter that I bought earlier, this one does not accidentally swap the left and right channels of stereo audio.
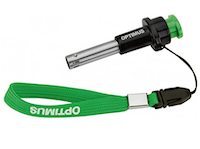 If I needed to start a fire in the wilderness with dry leaves and kindling, this wouldn’t do the job. I’d need regular old matches. But I’m not doing that; I’m just trying to light a stove. And this can be used about a thousand times, even if it gets wet and dries out again. When I’m not touring I use it to light my furnace.
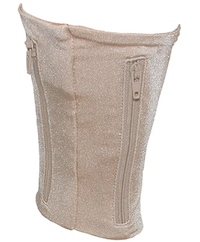 I bought this for when I’d be traveling in rougher parts of the world, and going out on foot. It’s big enough to hold my passport, cash, credit cards, and the tiny USBC SSD drive that I use to back up my laptop.
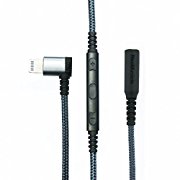
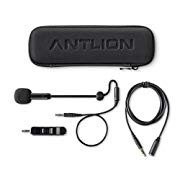 It’s ridiculous the number of iterations of audio gear I’ve gone through, trying to find a way to chat with friends while riding my bike. The biggest problem is wind noise, and second to that is environmental noise from traffic. And of course you need something comfortable enough that you’re not going to be messing with it constantly.
This thing comes with a couple tiny magnetic buttons that you can stick on stuff. When you want to use the microphone you hold it close to a button and it snaps into place. I glued one of the buttons to the adjustment clip on my helmet, and now when I want to talk to someone for a while I snap the microphone into position and wire it inline with my headphones. It seems strange that I would go for such a bulky solution, but it works so well it’s worth it. The microphone is uni-directional, and is held right up next to my mouth, facing it from about an inch away, and it stays out of my field of vision. It sounds perfectly clear even in high winds and with noisy traffic. I can talk in a conversational tone, sometimes so low that I can’t even hear my own words because of all the noise around me, and it comes through fine.
I attached the other magnetic button directly to my headphones so I can use it off the bike as well.
 Turns out that if you’re combining a separate microphone with your headphones, you need to worry about the layout of the pins coming from the connector. There are two conflicting standards and the iPhone only supports one of them. This connector works with the iPhone; specifically it’s a TRRS connector with the CTIA layout, and you can plug it right into the audio jack on the Lightning-to-audio adapter. It’s also solid-state, so less likely to wear out than a Y-shaped cable.
One pretty stupid flaw with it though: It swaps the left and right channels of your headphones. Durrr!
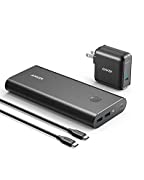
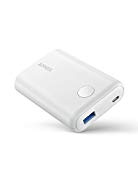 After losing my previous battery pack, I tried a few replacements. One had a solar panel built into it, which turned out to be useless. One was way too bulky. One kept shutting off mysteriously when my devices went into trickle-charging mode. Finally I ended up with this. Very high capacity for the weight, no ridiculous doodads like a solar panel or a tiny LED flashlight. Not particularly weatherproof but that hasn’t been a problem historically.
I’ll probably stick with this for a good while.
 Socks that separate your toes are luxurious when you’re on a recumbent. When pedaling, you don’t compress your feet as much as if you were hiking, and on a recumbent you never stand up in the pedals, so the amount of force you apply remains low but constant. As a result, your feet don’t tend to wear heavily at the socks, but they do tend to sweat.
That makes these perfect even for sunny days, and on rainy days you can layer them in waterproof socks without making your feet too thick. The only issue is finding them in the right size. I had to order XL and they were still almost too small.
When you put the sock on, bunch it up and slide the whole thing partway over your foot, then stop and use both hands to individually pull each toe into place. Then pull the sock the rest of the way on. Can be done pretty quickly as long as you keep your toenails in order.
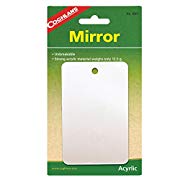 Gotta have a camping mirror, to clean all that sludge out of your eyes in the morning! And, it better be nice and light and somewhat durable, or you’re going to be making sidelong glances at it two or three weeks into a trip when you start questioning every ounce of weight you’re dragging around.
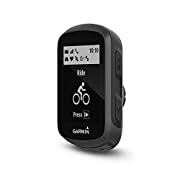
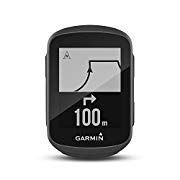 Finally, Garmin got their heads straight and started releasing gear that wasn’t meant to replace the smartphone, but could complement it. This is a great follow-up to the Edge 500, with all the same features plus some nice navigational extras, a bluetooth feature that you can turn entirely off (thank goodness), and a more modern type of USB port. It’s also a lot lighter than the 500, making it more likely to survive a drop.
I was very skeptical of Garmin’s newer hardware and stuck with the 500 for a very long time, but this little thing finally obsoletes it. It’s the same always-on, long-lasting, easy to see, set-and-forget device I’m used to.
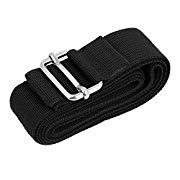 I use this for a very specific purpose. I pass it through the front strap slots on the Ortlieb Recumbent panniers, then through a carabiner I have hanging from the back of my seat, and tighten it down. It effectively suspends the panniers from the back of the seat, and keeps them aligned.
It took me a long time to find a luggage strap that was wider than 1-inch, didn’t stretch too much, didn’t use velcro which would wear out or suddenly tear open, wasn’t too long, wasn’t too thin, and didn’t come with a huge steel clip sewn into it. I bought a couple spares of course.
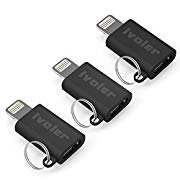 Keeping the phone charged during a long trip is important, but I didn’t want to carry around a bunch of Lightning cables in various lengths. So I got these and stuck a few of them on regular micro-USB cables instead.
Works fine for charging and data transfer but they tend to get suspiciously hot after a while, which makes me think they’re wasting electricity. Apple sells a similar adapter directly that looks almost exactly the same but doesn’t get hot.
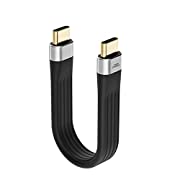
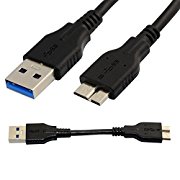
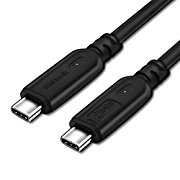 The cable that ships with the Apple MacBook is fine for charging, but only runs at USB2 speeds for data transfer. I wanted something at least as durable, but capable of full-speed USB3. If I didn’t know there were a bunch of chips and doodads inside the heads of this cable for data management and signal negotiation, I would be enraged at how much it costs. (I’m still getting used to the idea that things we call “cables” aren’t just wires and connectors any more.)
 The last pair of gloves I had worked fine for one winter, then during a spring rain I was changing gears on an uphill slog and noticed that my pointer fingers were wet. Both gloves failed in the same place.
I’ve worn these through the rest of the spring rains and so far no leakage, but my confidence in gloves in general has been shaken. I don’t like the idea of needing to buy a new pair every year.
 I shouldn’t have bought this. Titanium cookware is so middle-class. You know why I like it though? Because I can hang it from the straps of my backpack, and as I’m hiking up a trail it makes that little “clonk clonk” sound that makes me feel like a grizzled old prospector, heading north along the Dawson trail to dig my fortune out of the hills.
Then at the end of the day I drop myself down on a log and say, “what’s fer dinner Cooky?” And since Cooky is me, and dinner is noodles, I respond with “whatever you dang well like, as long as you like noodles.”
I don’t really need one of these. Neither do you. Just get a regular aluminum pot, or eat right out of the can, like a decent human being.
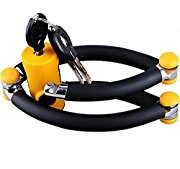 This lock comes with a holder but there’s no good way to mount the holder on a recumbent. No matter; it’s easy enough to just chuck it in a bag.
The documentation claims this lock is resistant to all hacksaws, all but the largest cantilevered bolt cutters, and even most hand-held hydraulic shears. So a theif would need a $2000 demolition tool to steal your bike. That’s an impressive set of claims, and I hope they’re never tested. Just looking at this thing is hopefully enough for criminals to move on to some other target.
I pass this little guy around the boom of my recumbent, between the seat and the headset (where the steering wheel connects), and lock it around a pole or part of a bike rack, and I’m good to go. No one is going to steal my bike unless they destroy it first.
 All the other cables in my bag-o-cables are black. These are white. Almost all the time, when I’m charging something, I need to get ahold of a micro-USB cable. So now I just reach into the bag for a white cable, and I’ve got what I need.
Seems like a small thing, but after looking in a bag of cables for the hundredth time, you’re glad for it.
Sadly, the manufacturer has discontinued these very durable and reliable cables. The market is flooded with cheap braided ones now.
 I have this suspended along the top of my recumbent boom, just in front of the rear fender. It has a little drawstring on it that’s supposed to go around a handlebar stem, but I’ve passed the drawstring through the mounting hole next to my fender and now it holds the bag in place, just in case the velcro straps somehow fail.
 After my recumbent got stolen I decided to get serious about security. With these twisted into place, a bike thief would find it almost impossible to remove the wheels from the frame without causing major damage.
This is important for a recumbent because the frame doesn’t have any loops in it through which you can pass a heavy chain or cable, so you pretty much need to use a U-lock or the equivalent to securely anchor the frame. … And on a Giro 20, the front wheel is so far from the frame that you can’t pass a U-lock around both.
I thought about how much it would suck if I came out of a restaurant and found my front wheel missing – a 20-inch wheel with a generator hub, not easy to find or rebuild in even the biggest city – and I went online and bought these skewers.
 These are an indulgence, because you can do a pretty good job holding cables in place with a couple of ordinary 25-cent zipties. But I gotta admit they look snazzy once they’re lined up on the bike. If you’re getting these for a Giro 20 recumbent steering riser, get the 1 1/4 kind, not the 1 1/8 kind.
 For years I went around with an original Bacchetta under-seat rack clamped beneath my Giro seat. I thought it was awesome, especially since it was very lightweight. It went across the US with me and through New Zealand.
Then my bike got stolen. The old rack was so long out of production that no one knew where to get one. It didn’t help that most of them had broken in the years since production was stopped – it really wasn’t that sturdy of a rack.
I pined for the old rack for a few months, then moved on and bought one of these TerraCycle racks and clamped it in place on my new recumbent. At first I resented the extra weight of separate clamps. Then I read the specifications and learned that the rack could support 30 pounds of gear per side. That means I can put most of my heavy stuff down below the seat, far closer to the center of gravity, making the bike handle way easier.
The difference on the road was striking, and now I feel dumb for waiting so long to get a new rack.
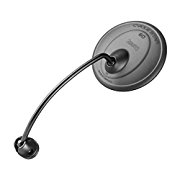 Some form of B&M mirror is essential on a recumbent, I think. For eight years I had the version of this mirror with the short arm, and it was great except I couldn’t put my hands fully up over the bars in my usual weirdo style because my left hand would collide with the arm of the mirror. Then I finally realized there was a version with a longer arm.
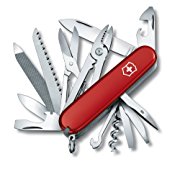 For 25 years I carried the same Swiss Army Knife in my backpack and across the country on my bike trips. Then my bicycle was stolen, along with all the parts in my toolkit, and I needed a new knife.
Things I wanted: The can opener, the scissors, the nail file, the tweezers, and the small and large knives. Things I didn’t want: The magnifying glass, the Philips screwdriver, the cigar cutter, a bunch of torx bits or hex sockets, a ballpoint pen, a flashlight LED, a digital alarm clock, a thermometer, a barometer, an altimiter, a ruler, a “parcel carrier”, … blah blah blah. The closest match I could find to the knife I got in 1990 was this.
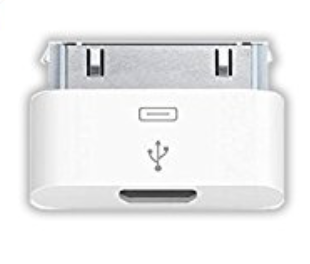 The iPod Classic has been discontinued, but there are still millions of them in use all over the world. Why carry around a special cable to charge and sync them, when you can carry a standard micro-USB cable, with this adapter stuck on the end? That gives you two cables in one.
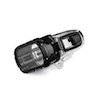
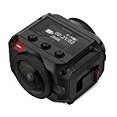 I had fun taking my Garmin Virb under water and doing bike-mounted time-lapse videos in New Zealand, but I was always dismayed by how unstable the footage was, and how hard it was to keep things properly framed. So I decided to try out the Virb 360 in Iceland.
I only used it a few times, but the experience of editing down what I shot into a coherent video was totally painless. Garmin has improved the software massively. If I had known how easy it would be to edit these things in retrospect I think I would have taken a whole lot more videos.
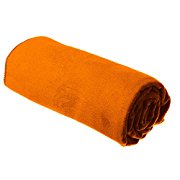
I’m a life-long Douglas Adams fan, so it’s a bit ironic that I’ve gone on several long journeys without taking a good towel. I bought this to correct that silly mistake. I also have a bit of a stink problem so an antimicrobial towel seemed like a good idea.
Unfortunately it hasn’t been that great on the road. The towel is alright for drying off, but not for wiping my greasy face or hands. The size was also overkill. I swapped it out for a regular cotton hand-towel.
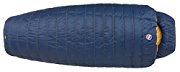
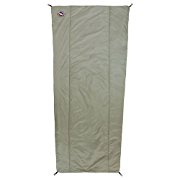 I figured a three-season 15-degree sleeping bag would be all I needed, and then I brought it along for an unplanned road trip through Oregon, and slept in the car while the temperature dropped to zero outside. I heaped all my laundry on myself and it was only barely enough, and I woke up dazed and tired.
“Rookie mistake,” as my buddies in the army say. But it convinced me to make sure I never went through that on a real camping trip. So I added this liner to the inside of my bag, and as a bonus, I can now use the sleeping bag on warm summer days by leaving it unzipped and using the liner as a top sheet.
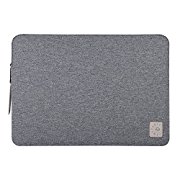 It was surprisingly difficult to find a protective sleeve for a MacBook that didn’t weigh too much and wasn’t too bulky to slide into the envelope of an Ortlieb bag. (This one was my fourth attempt, after three returns.) I also didn’t want one with a big logo on it, or some huge fake leather stripe. After I unwrapped this thing I took my pocket knife and cut the little square patch off the front, and I finally had a light, water resistant, featureless sleeve.
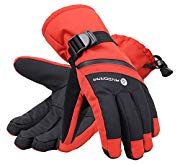
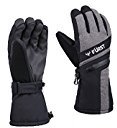 My previous pair of gloves turned out to not actually be waterproof. I discovered this in the middle of a ride across Illinois, in a lashing thunderstorm. They were like sponges after a couple of hours.
So far, these have stood up to rain in fairly high winds, and the battering of hail, with no intrusions. The pull-to-tighten system on the cuff works pretty well, and the touchscreen material works. The thumb is a little oddly shaped, but it’s not a big deal.
They come with a scratchy scarf that you’ll want to leave out on the curb after trying it on.
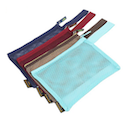
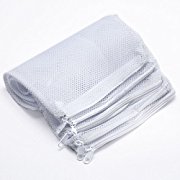
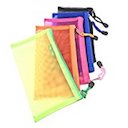 It took a whole lot of searching – and buying and returning (or just giving away) bags that weren’t quite right – before I stumbled across these. Multiple colors: Check. See-through: Check. Relatively fine but strong mesh, so cables and parts don’t get snagged: Check. Zippers instead of pull-strings: Check. Not too big or too small or too heavy: Check.
I use one of these for my important documents, another one for my audio cables and doodads, and another one for my tools (including pliers and a wrench). They’re sturdy and stuff doesn’t fall out.
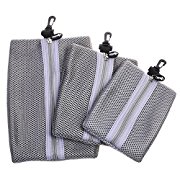
 Another set of bags that I hit upon after a whole lot of trial and error. Multiple colors, zipper for easy access, and strong mesh that’s not so big that it snags things. I use one of these for camera doodads, and another for batteries and battery charging cables. I really like being able to glance inside a backpack and instantly spot what I need based on the color, and I also really like being able to glance at the bag and verify that everything has been placed back in it. It really sucks to pack up all your stuff, bicycle two hours down the road, and then realize you left some small expensive thing behind on a picnic table. There goes your afternoon!
 For a long time I kept all my chargers and power cables swimming around at the bottom of a pannier. That sucked, so I bought a drawstring bag. They cables kept snagging on the bag and the drawstring started to unravel. So I bought a mesh organizer. That didn’t work because the organizer was flat.
Then I found these zippered pouches. They’re very lightweight but they have several layers of fabric, giving some protection to the items inside, and they’re shaped to hold bulky items. I dumped my power bricks and cords in the largest one, my portable speakers in the medium one, and gave the smallest one away. Problem solved.
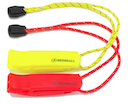 Don’t get lost in the wilderness and die because you’ve been shouting for help for 48 hours and now you can’t make any noise at all. Tie one of these extremely lightweight whistles to your backpack instead.
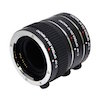
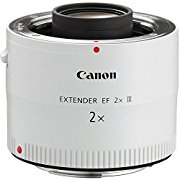 I use this in combination with the Canon f/4 70-200 IS lens, to get a 400mm f/8 when I’m outdoors. This extender and the lens combined weigh less than the f2.8 70-200 IS, and a lot less than the 100-400mm f/4.5-5.6 IS, and when I want versatility I just remove the adapter.
And is it sharp? Yes it’s sharp. I was on a ship passing through the Panama Canal, and I took a shot of a sailor on a tanker ship passing through in the opposite direction, and when I cropped it down I could read his nametag.
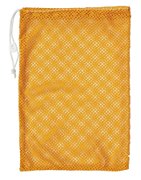
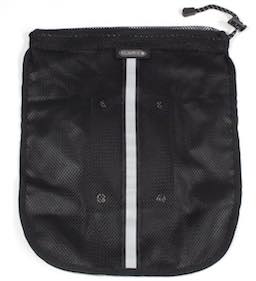
 You can probably tell by now that I have a bit of an obsession about getting the right storage bags for things. This bag is meant to sit at the bottom of an aquarium with filter media in it – tiny little chunks that absorb pollutants in your aquarium water. You obviously don’t want any escaping from the bag, even if you scrape it on a rock while you’re moving it around, so the bag is pretty dang tough.
It’s also the right size to hold all my little charging and data cables. Hooray!
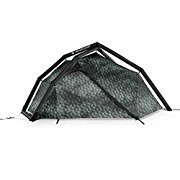 I am delighted with this little tent. Unlike other campers, including backpackers, a bike tourist will set up and take down their tent dozens of times in a single trip, and trading efficiency of that process for a little bit of weight is a good deal. I like the size of this thing, and the layout, and by adding a tarp to one side of it with zipties I even made a shelter for my bike that keeps everything hidden and out of the rain.
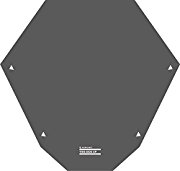 The extra protection this sheet provides on gritty or muddy surfaces was quite helpful in Iceland.
 These things rock. They come in all colors of the rainbow. I use one for socks and underwear, one for my sweater, one for shirts, one for sleeping gear, one for rain gear, one for my pants and belt and hat, and one for dirty laundry.
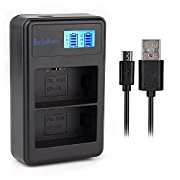 What kind of company name is “SmilePowo”? No matter. This is a USB charger for Canon batteries just like the previous one I bought except this one charges two at the same time, and has a slightly better interface. Now I just drop both batteries in before dinner, instead of having to swap them just before bed.
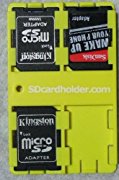 SD cards are small, which is a great thing until you start looking for one mixed into the bottom of your luggage. This organizer makes them much easier to find. SD cards are waterproof so there’s no need to stick them in a bag.
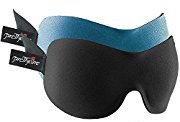 These are very lightweight. Might as well take one along, for when you’re enduring a long flight or train ride, or when the sun is up just a little too early to deal with.
 I used an earlier model of the Summit Park in New Zealand, and it was fine except the smaller zipper tended to get stuck occasionally, and the zipper was only on one side which made it impossible to join up with other bags. This newer model corrects those problems.
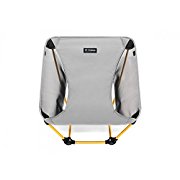 I like this chair a lot. It’s lightweight and fairly comfortable, and easy to set up. The one drawback is that it doesn’t provide any upper back support for a person over about 5’7″. To be comfortable in it for more than 20 minutes or so, I have to set it up against a vertical surface and lean against that.
Another company called Alite made a “rocking chair” version of this design that you can scoot down and then lean back in, which adds the back support. That chair is great. Unfortunately Alite went out of business.
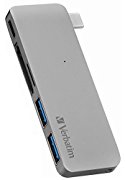 I’ve gone through a number of different adapters for my Macbook, trying to find something very light that does three things: Passes power through to the laptop without stealing too much of it, provides more than one USB3 port, and reads SDXC cards. This little gadget does all three.
It’s solidly built, and works fine even after tumbling around in a bike bag for months. I can plug two USB devices into it and it will slowly charge them at the same time it charges the laptop. It gets warm after awhile, but doesn’t get blazing hot like some other hubs I’ve tried. Covers the bases pretty well. It’s a little too easy to unplug when you’re trying to swap cables around, but the solution to that is to just unplug the whole thing anyway and then swap cables.
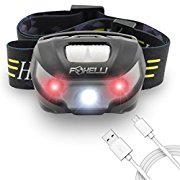 Did it get dark too suddenly, and now you’re stuck setting up camp by flashlight? Keep both hands free, by sticking this on your head. It’s waterproof and charges over USB, and has a little red light mode for late night bathroom trips.
 When you’re on a recumbent, waterproof pants only work up to a point, waterproof shoes don’t work much at all, waterproof shoe covers are hilariously useless. The soles your feet are facing straight into the rain, and your shoes are tilted so that water runs right into them and even blows up into your pants.
The solution is pretty simple: Waterproof socks. Wear them over your regular socks, and make sure they go up into your rain pants a ways. Your shoes will get wet and the water they retain will add weight, so try for shoes that are lightweight to begin with — or better yet, sandals, which you can wear even on cold days thanks to these socks.
 This is the absolute shortest cable I could find to connect my camera directly to my laptop, and connect to the little USB3 compactflash reader. When a single photo takes upwards of 35MB you start really pining for USB3.
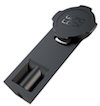
 Reading hundreds of huge images off a camera at USB 2 speed quickly becomes tiresome. Luckily, there are readers like this one that weigh almost nothing (especially if you rip the useless base plate off the bottom as soon as you get it) and read images from a card at 150MB/sec or more.
 These turned out to be so handy for adding easy-access capacity that I bought four of them. Attaching one to a bag means that your storage grows horizontally, which is good for bags on long racks or underneath a seat, like recumbents often have. Plus you can keep somewhat dirty or wet items outside the bag and away from everything else.
My rain coat and pants live permanently in one of these bags, and I use another to keep snacks in easy reach.
 When you’ve got all your gear on – including a jacket and scarf and helmet and sunglasses and perhaps even earmuffs – you don’t want to remove everything and switch headphones when you’re taking a call, and you don’t want to try and jam the phone up against your ear either.
Also, when you riding your bike you want the equivalent of “hands free”, but anywhere you mount the phone is going to place the microphone too far away from your face, with wind rushing all around. So you need to bring the microphone to you.
Adapters like this have become a bit scarce recently – they’re all starting to have a male plug instead of a female one. This one is a decent alternative.
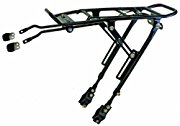 I would never actually put this rack on a bike I plan to tour with. But what I would do, is cannibalize it for parts.
The Tubus Carrier Cargo rack I prefer doesn’t actually have the right mounting arms to connect to the seat struts of a Giro 20 recumbent. This one comes with excellent mounting arms, rubber spacers, braces that can go around the seat struts, and a big assortment of bolts and locknuts. Sometimes the price drops as low as 20 bucks, making it a steal. If you have a Giro, buy this rack and the Tubus, then give the remaining parts from both to a friend. The Tubus mounting arms are compatible with it, so your friend will have a usable rack.
 I’ve never broken a cable during a trip, but I have screwed one up pretty badly when assembling a new bike.
That’s when I learned that most brake cables aren’t long enough to reach from the handlebar of a recumbent all the way back to the mounting point for the rear brake. My project was halted for four days until this arrived in the mail.
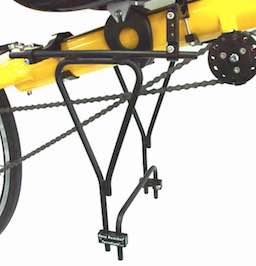
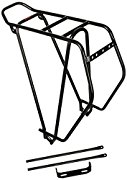 This is an excellent high-capacity rack. I’ve used a Tubus Cargo on my upright bike for ten years and it’s performed beautifully, and now I’ve got one on my Giro 20, thanks to the extra sockets Bacchetta added to the frame a few years ago. (Before that it was imposible to attach a rack of this shape.)
For more about racks, how I decided on this one, and how I mounted it, go here.
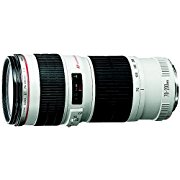 As much as I adore the Canon f1.2 50mm, it got frustrating never being able to zoom, and whenever I wanted to take video I suffered for lack of a stabilizer. I went looking at lots of zoom lenses but they were all very heavy, or had design problems, like a push-pull zoom mechanism or a bad aperture range. Then a professional photographer friend of mine went on a long bike tour and chose to bring this lens, which was one I hadn’t considered before.
His decision was pretty smart: This lens is almost as good at the go-to lens for Canon users, the venerable 70-200 f/2.8 IS, but instead of weighing three pounds it weighs 1.5. Same zoom range, same image stabilizer, same clarity — and if you add a half-pound 2x zoom magnifier onto it, you keep all those features except now you’ve got 400mm of zoom on your hands. As long as you’ve got good light, you can reach right across a town square, a lake, a valley, and pick out some feature in the distance. Add a circular polarizer and a tripod mount and it still weighs less than the f2.8. Plus, it’s so light you can carry it around all day and it won’t tear your neck off.
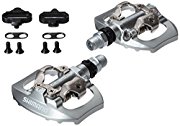
![]() Shimano discontinued the earlier crankset I used for Valoria, so I moved to this one instead. Like the earlier one, it can be modified to hold a 20-tooth chainring.
Shimano discontinued the earlier crankset I used for Valoria, so I moved to this one instead. Like the earlier one, it can be modified to hold a 20-tooth chainring.
After years or riding on the previous crankset I also decided that I wanted 170mm cranks instead of 175mm. The idea is this: One of your legs always goes out the same maximum distance away from you at the bottom of your pedal stroke. At the same time, your other leg is bent at the knee, at the top of the pedal stroke on the opposite side. The length of the crank arms determines how much your knee will be bent. I wanted my knee to be less bent, since I was relying on spinning the pedals faster rather than applying lots of torque. So I got shorter crank arms.
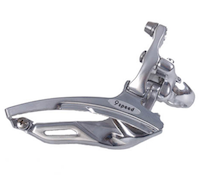
 A standard component for a Giro 20 recumbent, when building a 9×3 drivetrain. (Bacchetta has since moved away from this drivetrain.)
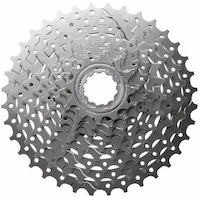 36 teeth is the maximum that the SRAM X.7 9-speed derailleur can reliably handle, so I got a cassette (a collection of rear gears) with that on it, for maximum slowness climbing hills.
Unfortunately, Bacchetta has since moved away from the 9×3 drivetrain, and I am not aware of any good solution for getting such a low gear ratio with their current setup, except perhaps awkwadly retro-fitting an internally geared hub in the rear wheel, like all the fancy Surly Long-Haul Trucker riders do.
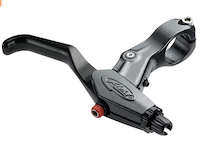 A standard component for a Giro 20 recumbent with disk brakes.
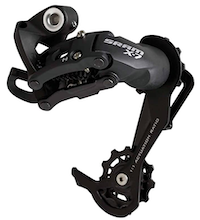
 A standard component for a Giro 20 with a 9×3 drivetrain. (Note that the Giro no longer uses this drivetrain.)
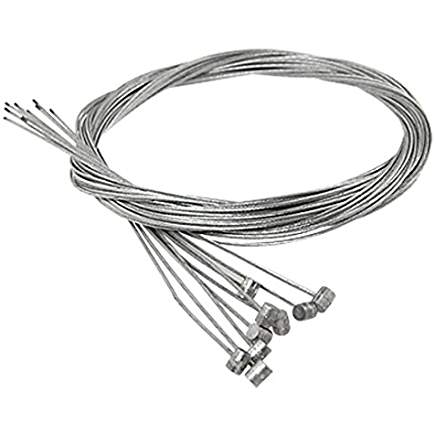
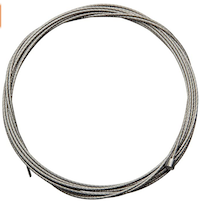
 It’s surprisingly hard to find brake wire that’s long enough for a recumbent, unless you shop in the tandem category.
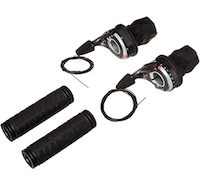
 Gotta have a long shift cable to reach all the way down that elevated steering mast.
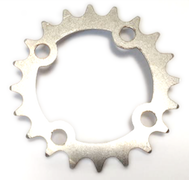 I add this on to my crankset by grinding down the posts that hold the smallest chainring in place. Because I’m crazy! And because I really like going as slow as I want while hauling a hundred pounds of gear and bicycle up a mountain.
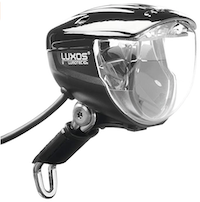 I really like having the option of spot-charging my gadgets out in the wilderness, though in practice I rarely use it. This headlight makes that trivial. The beam shape is good and the standlight feature is handy as well.
It has a feature that makes it automatically turn on when it senses darkness, which would be useful I suppose except it sometimes triggers during the day when you enter regions of shadow and then it doesn’t turn back off when the sunlight returns. It’s quite annoying to look down at the light and see the indicator for “on” and realize you’ve been wasting some of your energy over the last few hours powering a light you absolutely don’t need.
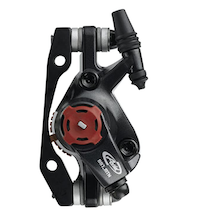 Part of the standard disc brake configuration for the Giro 20.
 Part of the standard shifting hardware for the Giro 20 in the 9×3 drivetrain configuration. (Bacchetta has since moved away from 9×3.)
 This is what you use to attach your steering stem to your Bacchetta frame. Only something you need as a consumer if you’re building the bike yourself from a frame kit.
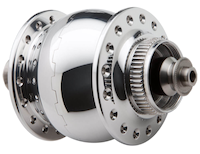 Ever since installing one of these on my old Bridgestone upright bike, I’ve made sure every new bike has one. It’s not because I’m a gadget hound who likes to charge devices while touring – though I am that – it’s because of the huge additional safety that comes from always having light, no matter how late I end up riding past sunset. This little device has saved my bacon a dozen times, out on long touring days when the terrain was extra rough.
I’m using the SONdelux instead of the other SON types because I’m integrating it into a 20-inch wheel, rather than a 26-inch one. That means I need the model with relatively low rolling resistance, so I don’t waste energy generating extra power at low speeds.
The SONdelux does not have a six-hole variant for directly attaching to BB7-style disc brakes, so you need a little adapter that screws onto the side of this as well. Buy that, and a 20-inch rim, and this hub, and take all three to your local bike shop that knows how to build wheels, and tell them you want it built for strength rather than speed.
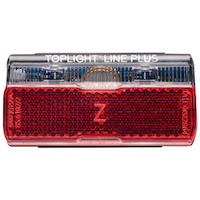 A nice bright light with a small reservoir battery for staying lit when you roll to a stop. It also has a good-sized regular reflector. Fits on the back of a Tubus Cargo just fine.
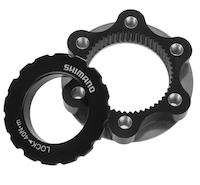 This is what you need as an interface between your SONdelux Disc hub, and your BB7 brakes.
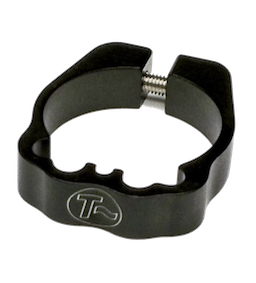
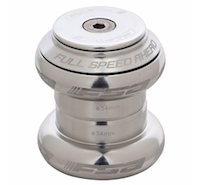
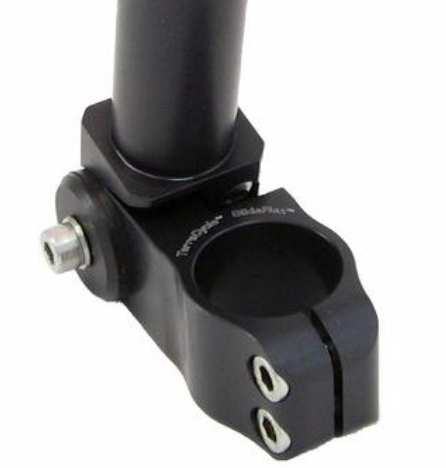 An integral part of the steering mechanism for a Giro 20 recumbent. I use the variant this with the 1-1/8″ lower clamp and the 1-1/8″ upper mast, and I put a much longer steering tube on top of it than usual.
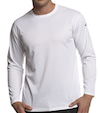
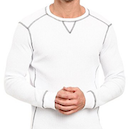 For me, this is the perfect touring shirt. Long sleeves for sun protection, close around the collar to avoid sunburn on the neck, feels comfortable, doesn’t make my skin stink like polyester materials do, layers well in the winter, … and it holds water when I pour it on myself to keep cool in the summer.
Plus it looks good when I’m walking around town off the bike, it’s well made, and it stands up to numerous washes. The only complaint I have is that it’s very expensive … But then again, so is almost everything in the world of bicycle gear.
 Hah! I’ve been looking for a long time for some way to get rid of that bigass wall charger, and now I can charge my Canon camera batteries off the same USB sockets as everything else! EPIC VICTORY. So far so good with this thing — I’ve only used it to top off a couple of batteries. We’ll see how well it stands up to a real road test…
 For seven years I rode my recumbent using the pedals it came with. Then I tried a different set of cycling shoes with a thicker sole, and suddenly my feet wouldn’t click in. This sent me on a quest to find pedals that worked with more shoes, and I eventually found these.
Like most SPD pedals, you can adjust the tension, so they grip your shoes strongly or lightly. My advice is to adjust the tension all the way to the lightest setting. When you’re on a recumbent you are not standing on the pedals, so the chance of accidental slippage is cut way, way down. At the same time, you want to be able to get your foot to the ground in a hurry, or even unclick one leg in order to swing it out for balance when you’re making a really tight turn.
 Since I’m using a Retina Macbook now, I don’t have an SD Card slot. Even if I had one, that wouldn’t allow me to read CompactFlash cards, and the Canon uses both kinds of card. I used to carry a combined USB hub and SD+CompactFlash reader, which required its own cable, but it ran at USB-2 speeds which was frustrating.
Now my solution is to just connect the laptop directly to the camera, which has a USB3 slot and can provide read/write access to both card slots all by itself. The cards store an insane amount of data these days, so it’s not like I’m going to be swapping them around all the time.
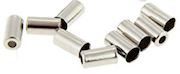 When I built a new recumbent, I had to cut custom brake cables to reach my weirdly high handlebar position. These little doodads go on the ends.
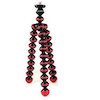
 I already had a tripod for road trips and camping trips, but it was too bulky and heavy to consider taking on a bicycle. A carbon-fiber tripod was the way to go. This one folds up nicely and is sturdy enough to hold a full-size Canon camera plus a big lens.
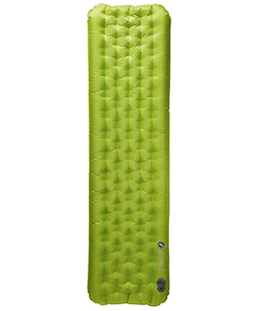 For a long time I used an Ortlieb roll-up mattress underneath my Big Agnes bag, because I wanted something that could self-inflate, act as a flotation device in a river, and lay on bare ground without getting damaged for sleeping outdoors. By switching to this I gave up that versatility, but I also gained some things in exchange:
This pad lives in a pocket directly inside the sleeping bag, so I never slide off of it at night, and when I’m done with it I just roll up the sleeping bag and the pad rolls up along with it and goes into the same bag.
And also, this pad weighs a whole lot less than the mattress.
 A new front rim for my new Giro-20. Strong enough for a heavy load, and the right number of holes to fit a SON dynamo hub.
 When building my new recumbent, I started with a frame kit, meaning no cranks were included. This gave me the opportunity to choose a different set of cranks, so I got a set designed for a mountain bike. All three cogs on it are smaller than the corresponding cogs on the stock cranks of my original Giro-20. Now I can climb hills a little easier.
 When I upgraded to a Retina Macbook, I realized I could ditch the power brick that came with it and charge it over USB, alongside the rest of my devices, using my Photive 60 Watt charger and a USB3-to-USBC cable. Only one problem: It charged very, very slowly.
Turns out that a Retina Macbook uses the “USB PD 2.0” charging protocol to charge over USBC. Long story short, I bought this multi-charger, and it can charge a bunch of USB gadgets just like the old one and also charge a Retina Macbook at the full speed of 29 watts. Huzzah! More weight savings!
 I bought this after my New Trent PowerPak Ultra stopped holding a decent charge. The smaller size and the durability were perfect, and for two years it held a good charge, and then I loaned it to a stranger and never got it back. D’oops!
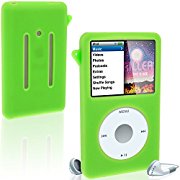 Hard cases on iPods kinda suck. Especially the ones that cover up the touch wheel and make it difficult to use. But you gotta protect the thing from drops, so I have this. As a plus, you can cut it with a pair of scissors, and that’s exactly what I did to make a hole in the back and stick on a Quad Lock mounting plate.
During the peak of iPod popularity I bet this case sold for something ridiculous like 35 bucks. The eight or nine it goes for nowadays is a more appropriate price.
 Heyo! When your feet get as stinky as mine do, you need these. After 8 years of use, the ones that came with my Shimano cycling shoes were as flat as a lizard on a highway – and about the same color. Time for a refresh.
 Canon still hasn’t built a focus-assist lamp into their fancy cameras, so I still need an extra doodad. This one is lighter, smaller, and easier to attach than the Yongnuo, and the pattern it generates is better as well.
The price on this item seems to have gone nuts! When I bought it, it was about $45.
 These shirts turned out to be even better than the ASICS. Thicker and less expensive, though still prone to that bacterial stink thing. They say “antimicrobial” but I think what they really mean is “weird-o-microbial”…
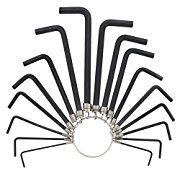 You know you need hex wrenches. And trust me, it’s way more convenient to have a handful of them on a keyring, than one chunky tool that you need to take apart or unfold.
Twist off the wrench you need, use it for a while – short side or long side – then twist it back on. (Clockwise in both cases, so you match the winding of the spring.)
This particular keyring has a bunch of hex sizes on it that you don’t need, but it’s still cheap. Just peel off the extra ones and give them to your neighborhood electronics geek.
 I like being outdoors under the open sky, but I hate skin damage from sunburn. My compromise is to wear long sleeves almost all the time. This is especially important when riding a recumbent, since the handlebars are in front of me instead of below. Those skin-tight layering clothes that other cyclists seem to enjoy just feel weird to me, but these were perfect.
Only one downside: They’re 100% polyester, so they tend to skew the balance of bacteria on the surface of my skin, and at the end of the day I smell like a shower drain. Cotton or wool shirts don’t have this problem.
 I wish I’d had these in New Zealand. They’re hard to use, but I’ve been able to get some neat otherworldly shots with them. My favorite activity with these is to hunker down close to some bug on the forest floor, with the camera on a flexible tripod, and stick the lens a half-inch from my target. Then I set the aperture to f/16 for the largest field of focus, lock the ISO to 100, and use a timer to hold the shutter open for as much as 30 seconds while I stand back and wait. Bugs and salamanders have an amazing – and convenient – ability to hold perfectly still for minutes at a time to avoid predators, so even with a 30 second exposure the resulting photos are perfectly sharp down to a single pixel.
These adapters are not very practical, but they are really fun.
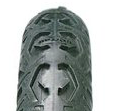 It took about eight years of moderate riding to wear through my last pair of these, so I called that a success and bought another pair. I take the upright bike offroad a little too often to trust it with city-style tires, and these are a decent compromise.
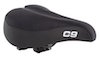 For some reason, this is the only seat I’ve found (after trying dozens over the years) that doesn’t give me a butt-ache after a day of riding. Of course, every butt is different, so I don’t know how useful this information is to anyone else!
I bought this after wearing out an older leather version of the same saddle from 2001 or so.
 Way too small and unstable for a full-size camera, but perfect for propping an iPhone somewhere to take a time-lapse video, or wrapping around a bicycle stem or a backpack arm.
 Since my phone remains in my Quad Lock case all the time anyway, this little adapter was perfect for turning it into a tripod mount.
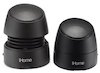 An essential gadget for relaxing after long cycling days. Fine stereo sound for my music while sleeping, sorting photos, taking a bath, eating a picnic lunch, etc. No messing around with bluetooth streams.
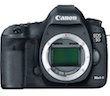
 I love night photography, but sometimes it’s hard to get the camera to focus. If the Canon 5D had a focus-assist beam built in like the Sony SLT-A99V, I wouldn’t need to buy this gadget. Also, nobody makes a focus-assist beam without flash sync hardware included, so I’m carrying around a lot of additional circuitry I’ll never use. But when you’re trying to get a picture of glow worms at night in a forest, you need focus-assist … so I tolerate this thing.
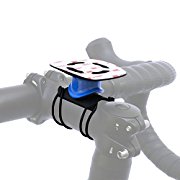 This item is depressingly expensive. Why depressing? Because it actually works so well it feels like it might be worth the money you spend, even though in terms of raw materials it’s marked up at least 500%. So you’ll get into this weird state of feeling ripped off and liking it. There’s probably a German word that describes it perfectly.
I used the adhesive part to make my iPod Classic mountable, and now I can swap between my iPod and my iPhone. Either one of them locks in place with a simple push-and-twist movement, and is easy to remove with one hand, even while wearing gloves. When it’s in place, even the nastiest bumps in the road cannot dislodge it.
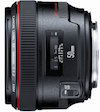 It was either this or the 85mm 1.2, and ultimately I went with a lens that would allow me to shoot wide and then crop when I wanted to, instead of never getting to shoot wide. It’s a fantastic walk-around lens, indoor or outdoor, and of course it does absurdly well in low light. It can be augmented to take good macro photos with a simple adapter, though the adapter makes focusing a chore. (You’ll be shooting things about a half-inch away from the lens with it.)
I was worried that I would miss the ability to zoom, but in practice that’s only come up when I’ve tried to get unobtrusive shots of wildlife or people, or when I’ve been stuck inside a vehicle of some kind. For those situations I bought an f/4 zoom lens, which works wonderfully during the day, but when it gets dark I switch back to this. I set the aperture at f/2, crank the “low shutter speed versus high ISO” balance setting a few notches towards “high ISO”, and snap away.
The f/4 zoom lens is stabilized and this one isn’t, but this one still just demolishes the f/4 in low light. I can walk into a dimly lit room, raise the camera, and take a 1/20th-second exposure that looks like I used a 700 dollar lighting kit and spent half an hour setting it up.
 This thing absolutely devours light.
Read the review here.
 The overriding factor in most bicycle touring purchases is weight, but there is also convenience to consider. Having a partner for my New Zealand trip meant adding the Cardo headsets, plus another phone and two headlamps, to the list of gadgets – for a total of nine that needed charging every day. Swapping all these things between a couple of USB ports on a laptop was not going to work.
With this, we only need to find one power socket and carry one international adapter, and we can cluster everything in one place on a desk, and leave every other USB charger at home. So far it’s been worth it.
 I would never use this to lock up a regular upright bike, especially back home in Oakland, but for traveling with a recumbent in the civilized world this lock is fine. No worries about losing a key, and it doesn’t weigh a lot even though it looks imposing – like it would be tedious to cut through.
In the whole New Zealand trip, there were only six situations where Kerry and I had to use this lock, since the rest of the time we had the bikes stashed in a hotel room … but each of those six times, it was a huge convenience and justified the extra weight of carrying a lock.
After I got home I purchased a second one and kept it in the parking garage at work.
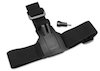 This fit my huge cranium a little too tightly, but I endured it for the sake of nice underwater footage in New Zealand. I used something else to mount the camera to the bike and my helmet, so this strap got very little use overall.
 Garmin no longer makes this case, which makes sense because their new video camera doesn’t require a waterproof case at all. I used this with the Virb Elite to get shots of sea life at the Poor Knights Islands, and it did the job fine … but who cares, eh?
 My experience with the Contour GPS camera was awful, but I still had the dream of attaching a camera to my bicycle and making time-lapse videos. Plus I knew there would be snorkelng and swimming in New Zealand and I wanted to get footage of that. So, in an explosion of spending, I bought this camera and a heap of accessories for it.
Amazingly enough, it did what I wanted. I was able to get pretty good-looking time-lapse video, and if I’d had time to tinker with the mounting system and my software I could have done something crazy like record the entire trip and turn the whole thing into one super-speed 15-minute video. The underwater footage turned out okay, and again with more time I could have had it looking great. Overall I’m pretty satisfied with this device, except I wish it was lighter, and that the accompanying iPhone app had more features.
That said, this device is also pretty redundant. I should probably not have purcahsed it, since my iPhone takes perfectly acceptable time-lapse videos. Now if only there was a good way to mount an iPhone on the masthead of a recumbent…
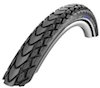 This is Schwalbe’s self-proclaimed ultimate touring tire. After riding them through New Zealand I can understand why. They’re just about the toughest design you can make while still keeping the tire usable on flat road. With these on our wheels, Kerry and I detoured through BMX tracks and up rough shoulders without concern.
Nevertheless, if you are traveling in a first-world country with relatively few hills and you don’t plan to do any off-roading, this tire is overkill. I took the Primo Comet 100psi tires all the way across the US and only had two flats, and those flats were a decent price to pay for less rolling resistance on those featureless midwestern highways. I wish I could recommend one tire for all touring situations but instead I’ll recommend these Marathon Mondials for rough or remote country – where a mangled tire could ruin your trip – and the Primo Comets for everything else.
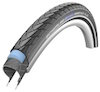 Some of the New Zealand route was over dirt and gravel trails, so it was time to move from the 100psi Primo Comet street tires to something more solid. These held up perfectly, with no flats and no slipping in the rain.
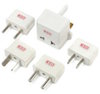 I really just wanted the New Zealand-style adapter from this. If I’m lucky the rest will come in handy some day too. The nice thing about these is that they’re two-prong only, which drastically reduces their size and weight.
 Kerry and I used these almost every day during our month in New Zealand, even in pouring rain, and they fundamentally changed our riding experience.
Read the review here.
 This doodad provides a high-amperage USB charging port without requiring you to carry along another plug adapter, when you travel internationally with your laptop. Great for us weight-obsessed gadget freaks, especially if you’re traveling with one of those new MacBooks with the USB-C charging port. Now, you can charge your laptop and your phone at the same time, like a normal person!
So is this item worth carrying around? For a short solo international trip, I’d say yes. For more than one person, you’re better off getting one dedicated multi-port high-wattage charger, so you can charge your spare batteries, helmet intercoms, speakers, lights, and phones all at the same time.
 I bought this when the smaller battery pack began to lose capacity, after years of heavy use. I decided to go up a size so Kerry and I could swap it back and forth.
In retrospect this battery was overkill, and we could have gone with something about 2/3 of the size and never worried. Now my sister uses it to charge her youngest son’s power-hungry iPad 3 on car trips.
 Comes with several waterproof bags you can use to place your phone, wallet, keys etc inside. Then you clip it around your waist and dive into the water. Made specifically for those times when you’re in unfamiliar territory and concerned about theives.
So far in two years I’ve only used it once, to conceal a car key inside a wetsuit. My paranoia probably got the better of me when I purchased this.
 I got this after my previous backpack was stolen. It’s spacious, with a removable aluminum back support and plenty of compression straps, and also has a top pocket and side pockets that you can get to while it’s stacked on the top of a rear rack. A couple of tie straps will keep it securely in place, and you can even pass the tie straps through the loops made by the compression straps, keeping everything aligned.
So far it’s been an excellent choice, as extra cycling luggage and as a regular hiking backpack. When placed on top of a long rack, the top pocket and side pockets are easily accessible under two crossed bungee cords.
 Another item purchased to replace one that was stolen. This jacket is rain-proof and has three external pockets and one internal one, a liner that can be partially unzipped, straps to tighten the wrists, and a pass-through for a headphone wire. It’s also extremely lightweight.
It doesn’t have an attached hood, which is a positive thing for a recumbent rider – you either want the hood on, or absent, not hanging down your neck squished against the seat. On rainy days I use this with a waterproof hood that wraps around the collar, and on windy days I use this without the hood.
After two years of use it has stood up perfectly, except I’ve learned over time that any “waterproof” zipper on a jacket is not really waterproof when you’re riding in torrential rain leaned back on a recumbent seat. So you’d better keep your electronic devices in a plastic bag or some other additional layer.
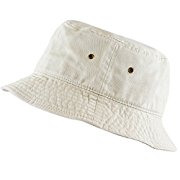 Why yes, I did buy this hat because it makes me look a bit like Twoflower, the Discworld’s first tourist. Shuddup; let me have my moment!
 This carries a huge amount of water, and you can bury it underneath your laundry to keep it cool. It has all the doodads you’d expect, and is easy to fill and doesn’t seem to affect the taste of what you put in it.
 Having an ice-cold drink on your journey is a fine indulgence if the extra weight of the container doesn’t bother you. This thing is much easier to drink from than a regular thermos, and keeps things cold or hot for almost as long.
 Perfect for anchoring things down on your rack. You can lift up one strap and pin something underneath temporarily – like your gloves or a bag of chips – while the other strap stays in place.
 After my Bike Friday got stolen at Fruitvale Bart station, I decided it was time to get serious about bike locks. I call this my “Big F-Off Lock” and I use it whenever I need to lock up a bicycle anywhere in Oakland. Your average local bike thief is equipped with a pair of cutters that can be concealed in a backpack – and unless your bike is being stolen by Hercules, he’ll need something with longer handles to cut this chain.
On a cross-town trip, some people wear their bike chain over their shoulder or around their waist while they’re riding, but this chain is just too heavy for that. It’s also way too heavy for touring, and not appropriate anyway because the bigger problem while you’re touring is thieves who will loot your bike in-place, taking your luggage. But if you wanna park a bike in Oakland and come back for it later, this is what you put on it. (And if you’re really worried, you remove your seat and take it with you.)
 I used these on several trips to link together my USB hub, iPod, GPS unit, portable speakers, and iPhone, and charge everything at once overnight.
Of course, nowadays the socket for iPhones and iPads has changed, so you’re better off getting something else.
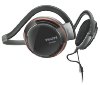 Losing my headphones in the middle of a tour is terrible (no audiobooks!) so I brought a spare set of these. This over-the-ear design is fairly comfortable, and can be worn under a helmet or inside a rain-hood, and is not prone to fall off your head when you hit a bump. Oh, and they sound alright too!
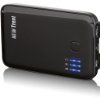 I obsessed for quite a while about the best way to charge gadgets on a bicycle. Eventually I settled on a portable USB-charged power pack.
Over many days of riding, I have never needed any more capacity than this 5000mAh battery pack in a single day. On my ride from Colorado to Ohio I put in one 18-hour day of riding, and used it to charge the iPhone twice and an iPod once. (Love those audiobooks!)
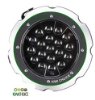 It’s about as heavy as an apple, and about as wide across as the iPhone is tall. It’s seriously bright, and it can be charged off any USB part, or hand-cranked in an emergency. It comes with a fold-out handle that doubles as a stand, with a hook on the end so you can hang it from a nail or a tent loop. It’s just a great thing to have around. I’ve used it while camping, while riding at night, and once to go scouting under furniture for a lost keyring.
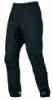
Finding a pair of rain pants that fit me was a chore. I was also dismayed to realize how expensive rain pants are in general. … But once I actually put them on and rode through a rainstorm, I was glad I’d spent the money. The velcro-and-zipper apparatus at the base of each leg is a great design. It helps you seal the pants tightly over your other protective layers, and it helps you rearrange those layers when they inevitably bunch up around your groin after pulling the rain pants up for the first time. Yikes!
These particular pants have a zippered pocket directly on the back, which is handy for riding on an upright bike, but worthless on a recumbent. No great loss, since actually using it means you stick your hand directly behind you in a way that makes you look like a zoo animal picking its butt.
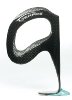 This is the only cage I’ve found that works when mounted on the back of my Bacchetta seat. The frame of the seat, and the netting stretched over it, bulges outward above the anchor points for the bottle cages, so if you’re using a stiff wire cage you can only slide very short containers into it. Longer containers collide with the frame of the seat. It’s a pretty dumb design flaw.
This cage solves the problem by gripping bottles with curved blades of carbon fiber. The grip is quite strong even when the bottle isn’t seated all the way into the cage. So, I can slap a large water bottle into it while cycling along, and it won’t fall out.
![]() I use these on the recumbent, and keep a spare pair in my toolkit. Ya never know how the road is going to treat your brakes. … Or when your rim will crack and mangle the brake pads currently in use.
I use these on the recumbent, and keep a spare pair in my toolkit. Ya never know how the road is going to treat your brakes. … Or when your rim will crack and mangle the brake pads currently in use.
 I bought these because, after eight years of use by me and the previous owner, the bar grips on the Giro 20 had almost completely disintegrated into tacky plastic mush.
 The only real choice I needed to make was between the 13-inch and the 11-inch version. There was no question of whether a geek like me would need a laptop, or what kind of laptop would be appropriate for long-range travel. I went with the 13-inch because I knew I would be messing around with photographs a lot, and the weight difference was not a big deal.
My only worry with this machine was that I would end up in a motel room that offered an ethernet jack but no wireless internet. So far, in all my travels, I have not been in this situation. (There’s a USB-to-Ethernet dongle available, but I don’t use it.)
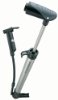 Fat lot of good that spare tire does you when you can’t inflate the sucker, eh? This pump is compact, comfortable, and has a pressure gauge for taking the guesswork out of roadside inflations. It felt a bit awkward to use until I realized that you’re supposed to flip up the handle on the top and then place the heel of your hand on it, with the end of the handle pointing towards your index finger. It’s pretty easy to pump a tire up to 100psi and beyond in this position.
Incidentally, the FastBack NorBack Frame Bag has a velcro arm inside it that fits this pump perfectly.
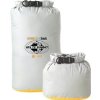
I use one of these to store my sleeping bag (the larger one) and the other one to store all my laundry. They do their job well. No complaints.
You might ask – why not just skip the bags, and use waterproof panniers instead? Well, sometimes it’s nice just to organize things by putting them in separate bags. And, these bags can be rolled up and then squished to drive out all the air, making their contents take up a lot less space. A wad of laundry the size of a watermelon can be become a chunk the size of a cantaloupe instead.
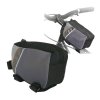 This cute little bag fits perfectly between the front edge of my seat and the handlebar stem, on my recumbent. I usually place little snacks inside it, or a charger for my phone, or occasionally my house keys.
 At first it seemed like a brilliant piece of hardware to bring on a bike trip.
Read the review here.
 These may seem like a strange thing to have on a list of cycle-touring gear, but I assure you, they belong here. One area of the body that the majority of outdoor travelers forget to protect is their hands, and when you’re cycling all day, the backs of your hands are relentlessly exposed.
These gloves are cheap – 3 bucks a pair – and they weigh almost nothing. They protect my hands when cycling and hiking, from heat and cold and dehydration. When it’s extremely hot out, I just get them wet. When it’s extremely cold, I stick them inside larger gloves. They protect my hands from sharp rocks when I’m splashing about in a river. I can make very messy repairs with them, and then just throw them away.
Two days out in blazing sun, and your bare hands will turn red and start to sting. Two months out in the sun with these, and you will end up with a pleasant, even tan.
Work gloves like these – slightly sturdier versions of a glove liner, essentially – are typically sold in bulk, ten pairs at a time. Grab a bunch.
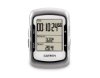 I bought this to replace my Garmin Forerunner 305. Except for one thing, it’s an across-the-board improvement and does its job perfectly.
Here’s the one thing: The Garmin product management department, in a spasm of divine inspiration, decided to remove a feature from the 500 that was present in the 305, in order to encourage an up-sell to the Edge 800: The automap. On the 305, you can press a few buttons and get a line showing where you’ve been since you last turned on the device. If you’re riding around an unfamiliar area, that feature can be a godsend, because it will show you exactly what direction you’re headed, and can help you retrace your steps. For some reason, they ripped all auto-mapping out. Either you run a pre-loaded course, or you have no map. Lame.
That gripe aside, it’s a lovely device. I use it as a kind of pinch-hitter for the iPhone, because if I was to use the iPhone as a primary GPS tracker with an always-on display, the battery would be toast.
Here’s what the Edge 500 gives me: Constant, set-and-forget recording of my location, for the entire day. A trip-timer telling me how long I’ve been on the bike. My speed, in bright readable numbers, all the time, at-a-glance. How far I’ve traveled for the day. And, as a bonus, a rough estimate of the altitude, and of the ambient temperature. I do not need to poke any buttons to read these things, they’re just there.
Plus, the device synchronizes quickly with standalone software like Ascent or Rubitrack, charges rapidly, and has an impressively secure twist-mount for my handlebars.
And, the battery life is outstanding. I have turned this thing on in the morning, taken it 80 miles on a bicycle, then gone to bed without remembering to turn it off, and found it still gleefully tracking away when I got up in the morning, with the timer at 18+ hours. U JELLY?
 A pretty smart design for a mount, and cheap too. The GPS has never come off accidentally.
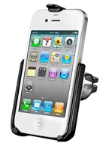 I’ve used four mounts designed and manufactured by RAM Mounts, for the original iPhone, the iPhone 3G, the iPhone 4/4S, and the iPhone 5. Every one of them has held the phone in place brilliantly. Potholes that have knocked my sunglasses off have not budged the iPhone one bit, and there’s a handy space for connecting a charge cable.
Once when I was riding through East Oakland, a guy came running up alongside me and tried to yank the phone off my bike. To his surprise, the mount didn’t budge. I slammed on the brakes, cussed him out, and then rode angrily away. East Oakland is crazy.
(… And West Oakland is worse. If you’re going to ride around with a fancy phone in West Oakland, either put it in your pocket, or don’t slow down for anything. But I digress.)
RAM Mounts went on to make a mount for the iPhone 5 that didn’t perform as well – the plastic tab at the top had a tendency to snap off after heavy use – and when the iPhone 6 came out they decided not to make a custom-shaped mount at all. I moved on to a mount made by Quad Lock.
 Back in 2010 when I bought this, smartphones were still marching their way across the cultural landscape, changing everything, but nowadays it’s obvious: A smartphone is a game-changer for bicycle trips, especially long ones.
Suppose you’re biking at night, on a route you’ve never taken, and the road loses shape and changes to dirt. The phone is right there on your handlebars, so you press a few buttons, and instantly you get a daytime satellite photograph of the entire woods. There in the center is a glowing dot, showing where you are. As you ride on, you can glance down at the dot and confirm that, yes, there’s the tree you should be seeing, and there’s the spot where the road bends,… et cetera. In addition, the phone is playing music for you. And checking your email. And if the woods are getting spooky, you can call someone up and ask them to tell you jokes.
All with one lightweight device. Frankly, it’s like having “cheat mode” for a bicycle. It turns your bike into a mobile command center. With a few bars of signal, I am just as connected to the digital world and my social network as I am when sitting at home.
On my ride across Oregon, I used it to look at satellite pictures of the roads ahead, to make sure I wasn’t going to end up on dirt or gravel. In Indiana, I used it to check the evolving weather forecast so I knew when to switch to rain gear. In Kansas, I used it to search for the next motel I would be staying at. I could get directions, read a review, look at the place in “street view” to make sure it wasn’t decrepit, then call them up and make a reservation, all without dropping below 15 miles an hour.
In the ensuing years I’ve upgraded to other phones – all iPhones so far – and they’ve only become more useful and more fun.
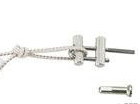 This thing kept a bad situation from getting a lot worse when I was traveling through Tasmania. I was going up a steep hill and I realized I’d been hearing a loud “ping” noise coming from my back wheel for quite a while. Yep, it was a broken spoke, and the wheel was already starting to bend a little bit. Soon other spokes would go, and the wheel would get too deformed to fit between the brakes, and I’d be pushing the bike until I found a shop. Good luck finding one in Tasmania.
Instead I got my pliers out and bent the spoke to one side, then set up this gadget and tightened it down. The wheel went back towards straight, and I was able to finish the remaining four days of my ride on it.
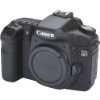 After spending years with a Minolta Dimage 7i camera, I found myself without an upgrade path when Minolta sold their entire digital camera business to Sony. The first few versions of the Sony Alpha series were pretty uninspiring. Eventually I jumped ship and bought a Canon.
The build quality of the 50D has been outstanding, and the image quality has been excellent. After five years of pretty rough use I’m still enjoying it, though that’s more likely due to the lens than the camera itself. The Sony Alpha SLT-A99V tempted me as an expensive upgrade for a while, but Sony just doesn’t have the same offering of lenses. My next move will probably be the Canon EOS 6D.
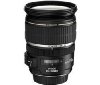 This lens is astonishing. It appears to gather more light than my eyes do. I have never needed to use the flash with this lens, even at night in parking lots, taking pictures for San Jose Bike Party. The focus is lightning-fast, perfectly accurate, and barely audible. The detail is magnificent.
The price may seen crazy, but look at it this way: To find a superior lens (at least here in 2012), you’d have to start by doubling that price.
Incidentally, if gathering lots of light is your game, then you might want to try the Canon EF 85mm f1.2L II. Another tempting upgrade … if my money supply was infinite, which it ain’t!!
 Mmmyep, it’s a media card. Nothing special. Gotta store pictures somewhere.
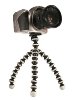 Not the right size to consistently hold up my Canon EOS-50D. I have to bend one of the legs upwards and then down again, making a kind of elbow that the lens can rest on. Better suited to a compact camera, I suppose.
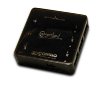 I use this all the time on trips with the laptop, on or off the bike. It reads the media in my camera, and it adds two more USB slots. That means I can get to a motel room and plug my Macbook Air into mains power, then attach this hub, and charge my little folding speakers, my phone, my spare battery, and my GPS unit, all at the same time.
Of course I still end up having to swap things around on some nights, since I can also use the hub to charge my iPod, my iPad, my Countour video camera, and my rainproof flashlight. Usually those items stay home, though.
Since this item is discontinued, try this instead.
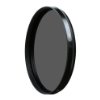 When you’re tromping around the outdoors this filter effectively doubles as a protective layer on top of your more expensive optics.
Plus there’s the indended advantage: It brings the intensity of the sky down to the intensity of the terrain, keeping it from washing out, and it helps reduce pesky reflections on water and other surfaces.
 The rack on the back of my recumbent. It’s a very solid and long rack, and it uses an attachment system that is compatible with the strange anchoring design on the back of the Bachetta. Over the years it has warped a little, from riding over nasty roads with huge amounts of gear anchored to it, but it has never fractured.
This particular rack isn’t made any more. Its successor is just as strong, but doesn’t have the upward curve that acts as a handle. Damn.
 This was the second rack I attached to the upright (the Bridgestone), when I got fed up with the first one. The design allowed me to attach it even though the Bridgestone had no mounting holes on the upper fork, and the additional bars in the frame allowed me to hang my panniers much higher off the ground, so that they were even with the rear ones. This increased my ground clearance, decreased my wind profile, and made the items easier to get at.
Three drawbacks: The rack is rather heavy, harder than usual to remove, and doesn’t pack into a shipping box very well. When I removed it for shipping to Australia, it wouldn’t fit in my Crateworks box, because it was too wide to fit on either side of the dividing compartment. So I left it behind.
 These came with the recumbent as a package deal. I would probably not have them if I was looking for panniers separately, but that’s because I would have been heavily biased toward something waterproof.
Waterproof material hasn’t mattered as much as I thought it would. There were a few times in Missouri where it rained heavily and they got soaked, but all my luggage was packed inside in waterproof bags. The weight of the water being held in the fabric was probably a drag on my pedals, but I didn’t notice it. The next day I emptied the panniers onto the motel room floor and hung them from my handlebars next to the space heater, and they were dry before I left.
True, I could pay $350 and get the large waterproof Ortlieb bags, and stop worrying about rain. But then I would be giving a few things up.
For one, the Arkels are flush with the top of the rack, making it easier for me to stack large things – such as an oversize backpack and a sleeping bag – on top. The bags also unzip along the side, and have several side pockets and pouches, so I can get anything I need from them without disturbing the items above. They also anchor to the rack very securely. Any bump that could dislodge them would probably break the rack itself. They take maybe two additional seconds per bag to attach or remove compared to the Ortliebs, and that time is completely inconsequential.
And most important, these bags actually fit on my rack. The Ortliebs are designed to fit on the elongated racks that ship with some – but not all – recumbents. They do not fit on mine.
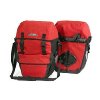 I use these bags all the time, and have exceeded the sensible weight capacity on them a few times, yet they show almost no damage. I say “almost” because one time I went around a sharp curve on the recumbent, with these bags suspended on the under-seat rack, and the bottom of the bags scraped against the pavement for 30 yards, making a constellation of tiny holes in the material. Totally outside the warranty. Nevertheless, as long as I don’t hang them upside-down in the rain or throw them into a lake, they still keep all of my gear dry.
The mounting system is very simple, and the external pockets are theoretically handy but I almost never use them. Sometimes I find items I’d put in there months ago and forgotten about, like food wrappers or gloves. The drawstrings and flaps are very quick to close, and I can open them with one hand while stopped at a stoplight. The interior of the main compartment is sensibly divided by a tongue of fabric that keeps flat things snug against the frame, which works well for transporting a binder or a laptop. There’s also a zippered mesh compartment inside for small things. With a little practice I discovered I could reach under the flap, undo the zipper, get an object, and re-zip the compartment all with one hand, without looking.
I use these bags for almost every excursion, recumbent or upright bike, across town to the store or across state lines. To get them to fail I’d probably have to light them on fire. (I once carried a full-size truck battery home from the hardware store. The bike leaned a lot but the bag was fine.) My only concern with them is kind of esoteric: When I’m riding in a large anonymous crowd, like San Jose Bike Party, I sometimes worry that the bags are too easy to remove. A stranger just behind me can reach out any time and yank on the handle, and then disappear into the crowd before I realize what’s happened. To deal with this paranoia I anchor the spine of each bag onto my rack with a large ziptie before I go riding into slow-moving group events.
Let me say this again, though, to give it due emphasis: I have used these bags almost every single day for over six years now, and they are just as sturdy as they were when I bought them. Not a single loose thread, torn seam, or broken clip. That is remarkable. They are worth every penny.
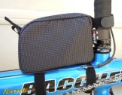 I placed this bag suspended upside-down on my original Giro 20 recumbent, beneath the main tube, just in front of the fender for the rear wheel. I put my tire levers and my spare tubes in it. Even upside-down, nothing fell out through all my trips, but the bag did accumulate quite a coating of grease from the chain. In retrospect it was a little too narrow for storing most things and I wouldn’t get it again.
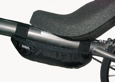 I carry this bag suspended from the main tube of my Bacchetta, between the front fork and the clamp that holds the seat in place. It’s a little cramped in that position, but I’m still very pleased with it. It’s where I keep my repair kit.
It’s designed to enclose (among other things) a bicycle pump, but I decided to mount the bicycle pump elsewhere. Usually it contains: Chain oil, a tiny set of needle-nose pliers, a tiny adjustable wrench, a set of hex keys on a keyring, a bag of nuts and bolts, some brake pads, zipties, and a swiss-army knife with scissors, bottle opener, and screwdriver.
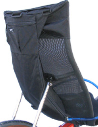 I have this bag mounted on the back of my Bacchetta seat. It hangs between the bottle cages, and has enough room for a small water pouch, or – when I’m riding in San Jose Bike Party – the enormous battery pack for my LED mohawk. The best thing about it though is the zippered pocket near the top. A BART card with a few bucks on it has permanent residence there.
This particular bag isn’t made any more, but FastBack has a couple of newer models like it.
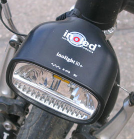 When I bought this light I felt assured that it was the best design available. Since it draws power from the dynamo in my wheel, I never have to worry about charging it, or running out of power in the middle of a ride. After two years of constant use, I bought a second one for the recumbent. Both are still going strong, and both still provide excellent visibility and get plenty of attention from motorists without being an eyesore.
There are other lights available that generate a longer channel of illumination in front of the bike, but they also draw more power from the dynamo, adding to the drag the dynamo creates. After a few months of riding with a dynamo light, I discovered I was able to sense that drag at high speeds. From this I realized that there is a price to be paid – in calories and effort – for extra light. The urge to upgrade to something brighter passed rapidly. That said, slightly more efficient LEDs come out every year, and in 2017 I switched to a B&M Lumotec Luxos U when I built another bike.
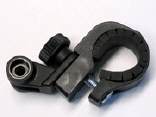
I used one of these on each bike – upright and recumbent – to position the Inolight. Very handy.
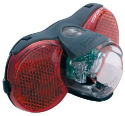 An easily visible, easy-to-mount, dynamo-powered taillight. It stays lit for a while after you come to a stop, making you visible at intersections. I bought one for each bike, but had to improvise with a few parts to attach it to the rack on my recumbent. (These days most racks will have rear mounting holes that make adding a taillight easy, but my OMM rack didn’t have those.)
About four years after buying it, I accidentally knocked the back plate off against a rock while I had the bike upside-down. It snapped back in place with no trouble, but the fit wasn’t as secure, so I ran a ziptie around it to grip the front and back together. Now I’m on year 7, and it’s still doing fine. Busch & Müller have earned their money for sure.
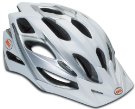
Just another bike helmet. In the summer I find I have to ride with a bandanna on underneath the helmet, to keep the sun from shining straight through the holes and toasting my forehead.
When using a recumbent, the upright posture encourages you to face forward instead of down, and the visor on the end of the helmet stops being effective. There’s a product called “Da Brim” that you can use to address this.
![]() I bought a pair when I got the recumbent. Six years and 7000 miles later they’re still in good shape.
I bought a pair when I got the recumbent. Six years and 7000 miles later they’re still in good shape.
You can use shoes like these for casual days – walking around the store, or getting between your bike and your desk at work – but you wouldn’t want to use them on an all-day hike. I like them because I don’t necessarily have to change out of them when I’m not riding. That makes them ideal for long trips when I’m on the bike most of time, but might stop any minute to walk into the woods, climb a hill, or use a scummy bathroom.
![]() Gotta have these, or your fancy bike shoes are useless!
Gotta have these, or your fancy bike shoes are useless!
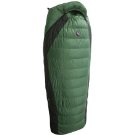 I really need a lot of room in a sleeping bag to feel comfortable, so I went big. Big Agnes big. This one packs up reasonably small and doesn’t weigh very much, and even if you don’t bring an inflatable mattress insert along, it makes a great alternative to crawling under the sheets in a motel room when you suspect the bed’s full of cooties. (Yeah, it happens.) Just pitch this thing on top of the blankets and crawl in.
Of course I’ve also used it inside a tent, on an inflatable mattress, and it’s great there too. Long underwear and a t-shirt keeps me from sweating in the synthetic lining.
 These are exactly the right size and shape to contain a 13-inch MacBook Air! Huzzah! Also good protection for an iPad. Then you can take the iPad into the bathtub and watch The Daily Show in style.
 I have two of these. Great for regular use in rough conditions. I’ve dropped them on the pavement many a time, and even used them as hot-water-bottles on cold nights. They can be sterilized over a fire or in a dishwasher.
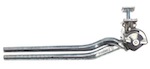 This is a spring-loaded double kickstand that unfolds beneath the center of my bike, holding it upright pretty securely. It’s great for when I stop randomly by the side of a road and want to rummage through my stuff, or use my rear rack as a table. I never have to worry about finding something to lean the bike on.
There are people out there who believe that any kickstand is a luxury, and choose instead to save valuable weight by removing theirs, or never installing one in the first place. What can I say … I use this thing an average of six times with every ride I make, local or long-range. I love it. Since it holds the bicycle straight up, I can put a lot more weight in the saddlebags without worrying that it will tip over. For fine-tuning the weight of unevenly packed bags or a slope in the road, I just turn the handlebars left or right after parking.
Typically, you install this thing by loosely attaching it, then marking how far down you want the legs of the kickstand to reach. Then you detach it again and saw off the excess material with a metal saw. You can do it in an hour or so.
 Exactly large enough to unscrew the pedals from my bicycle, and small enough to bring along for field repairs. This size is kind of important: When I got to New York and had to box up my bicycle, I had full access to a toolbox, and there were two adjustable wrenches available, and both were too large to fit between the pedal and the crank.
 Just some chain oil for wet conditions, in a portable portion size. Turned out to be handy when I entered Missouri.
 Chain oil for general use, in a small container. Nothing special, but essential for the toolkit. You’ll ride all day in the wind, and ten layers of grit and crap will stick to your bicycle. You’ll clean off some of the grit with cloth and your hands, but to work the rest out, you’ll need to apply (and re-apply) some oil.
I’ve read a few gripes in forums about how one should only use light grade oil and nothing else, applied often, to avoid drag. I’ve also met a couple of mountain bikers who used straight-up axle grease on their chains, applying it liberally with a stick before barreling down muddy hillsides, then wiping it off at the end of the day. Do whatcha want, yo. No judgement from me!
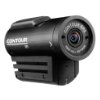 I’ve hauled this along on three separate tours, and only taken it out of the bag a couple of times. It has four problems that make it a pain in the ass to use.
The first is, it takes for-ev-er to boot up and acquire a GPS lock. Like, somewhere above two minutes even in open country. That’s unacceptable.
The second: It’s surprisingly difficult to mount. I’ve tried various angles on the bicycle, and they all cause too much vibration. I bought a mount for my helmet, but it holds the camera in a kung-fu grip that requires five years of training in a dojo to defeat. Plus I have to turn the lens slightly off the horizontal to correct for the incline of the mount, and if I get it wrong, everything I film comes out leaning to one side.
Third: The viewing angle is either too narrow or too wide, and the media files it generates are enormous. To get video in my specifications, I have to post-process the recordings, cropping 15% off the sides and cutting the resolution by 1/3.
I wrote an AppleScript to automate the process, but transcoding into h264 is no joke. My 2011 MacBook Air would grind away for 15 minutes on a 5 minute clip. You can forget about doing this “in the field”; your laptop battery would be dead in an hour.
Which brings me to complaint number four: The battery life. One of the big features that attracted me to this camera was that I could clip it to my helmet and set it in “picture mode”, which takes an endless series of decent resolution photos of whatever I’m looking at, one every 5 seconds or so. The idea is, I can ride out on the road and just look at something for five seconds, and then note the time, and at the end of the day I’ll have a picture of whatever I was looking at, ready for posting and commentary, and I never even had to take my hands off the handlebars or fumble for a camera.
But no. Even in what you would expect is a very low-power mode, the battery dies after only a couple of hours. So much for all-day riding.
Alas, I now leave this device at home on a shelf. Even the newer 2012 model does not adequately address these flaws.
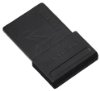 The idea behind this little doodad is interesting. It will allow you to get a view of whatever your Contour camera is pointed at on your iPhone, via bluetooth. You can use this view to frame a shot or check the angle of the camera mount.
I bought it because I was curious, and because it was cheap. (Free shipping.) I would be delighted if the company enhanced their firmware and software so that I could send a stream of Contour photos to my phone, and upload them automatically to a gallery website as I rode along. Real-time hands-free photoblogging! Kickass!
The power requirements of bluetooth make this unlikely, though…
 Just another memory card. Nothing to see here…
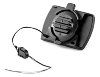 An accessory that came as a package with the Contour GPS video camera. I have used it precisely 0.0 times.
 Bacchetta used to sell their bikes with these, but a few years ago they switched to another tire that’s cheaper. They’re 100psi tires with a slick surface, so they need good roads to run on, but you can make serious time with them. I ride with them daily on my commute to work. From Colorado to Ohio I only had one flat, from a really nasty thorn.
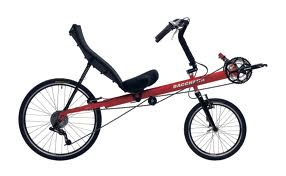 Using a recumbent bicycle for long trips is a totally different experience, and superior in many ways. If you want to know how a recumbent differs from a regular “upright” bike, check out this essay by John Andersen.
I’ve found the Bacchetta Giro 20 to be an agile, hard-working, and extremely comfortable ride. I’ve taken it 130 miles in a single day and gone to bed with zero joint pain – not in my knees, not in my tailbone, not in my neck or wrists.
The Giro 20 is a good balance between the low-profile rides of the more streamlined racing recumbents, and the forward-facing, upright rides offered by long-wheelbase recumbents. I have been tempted to move away from the Giro to the HP Velotechnik Street Machine, since the Street Machine has a nice integrated suspension, but that led me to the other great thing about the Giro: The pricetag. A Street Machine specced out to my requirements would have cost me twice as much as the Giro.
I’ve spent a lot of money on small degrees of improvement, in biking gear, computer gear, audio gear, camera gear … but that was too much, even for me. I’m quite happy with the Giro 20 and it’s probably good for another ten thousand miles.
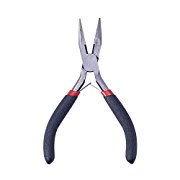 A small pair of pliers like this has been with me on every trip with the recumbent. I’ve used them to break and tighten zipties, pull debris out of my tires, manipulate broken spokes, strip and cut electrical wire, adjust brake and shifter cables, and push in or pull out the spade plugs that connect to my generator hub. Since they’re not part of a multi-tool I can use them at the same time I use my wrench or my knife.
Almost all the time I don’t need them and they sit ignored in the gear bag. Then suddenly I’m in the middle of nowhere and I use them to do something that takes only a few seconds — but would take 20 minutes, or be impossible, or dangerous, without them.
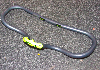 When Michael Reed assembled the mountain bike I later purchased, he chose these handlebars. I’ve found them to be extremely comfortable. They offer a gradient of hand positions, and allow you to lean way forward with your elbows on the bars and your hands gripping the plastic joint in the center, giving you a low profile with relaxed arms. They’re lovely.