Valoria II: Custom gearing

Me:
Does Bacchetta offer a choice of rear cassettes or gears? I’m wondering if there’s a way to get a few more teeth on that largest rear gear, if it will still fit in their shifting mechanism. If I go at my slowest hill-climbing speed (while still remaining stable) on my current bike, the cranks still turn just a little bit too slowly and tire me out faster. It would be great to try and address that.
Zach:
Bacchetta doesn’t offer any substitutions on gearing and the SRAM 9-speed derailer it comes with is rated for a 34 tooth largest cog which is what it has. There are 10-speed cassettes offered in 11-36 and 11-40 but those would require a narrower 10-speed chain plus a 10-speed rear derailer and right shifter. Likewise with the 11-speed cassettes, which are available with even larger than 40T rear cogs, though the 11-speed cassette also requires a different rear hub that has an 11-speed compatible cassette body.
Me:
That sounds like a lot of deviation from Bacchetta’s design, with the narrower chain. I’ve taken this old Giro thousands of miles with no chain troubles, so I won’t jinx that. Let’s stick with the standard set and I’ll just have to learn to pack lighter.
Zach:
Yes, in theory the narrower chains of 10 and 11-speed systems are less durable. Another uncertainty is how much more clearance there is between the top chain and underside of the chainstay, if a larger than 34T cog were used in the back. I know 36T will work, as I’ve set a Giro up with an 11-36 10-speed, but I don’t know if the chain would clear with the larger sizes.
Me:
So my best option for the back is a 12-36 9-speed cassette, like this one?
Zach:
Yes, like that one. A couple other issues with retrofitting one of these is the SRAM 9-speed rear derailers are only rated for a 34T largest cog, so they may have issues shifting onto the 36T cog due to the derailleur pulley being too close to the cog. Also, the chain is sized for a 48T chainring and 34T rear cog, so it may need to be extended by a few links, to allow it to shift onto the 36T cog while on the 48T chainring. Even if that isn’t a combination you don’t normally use, it needs to be allowed for because otherwise it could lock up the drivetrain and/or break off the rear derailleur hanger if shifted into that combination with an insufficiently long chain!
Me:
Hah! So that’s why my old Bridgestone started acting fiddly when I put the 36T on it a couple years ago!
Zach:
Probably, yes.
Me:
Well, it sounds like I’m already at the lowest possible gearing then…
Zach:
Not necessarily. There are still more options. You might instead look into replacing the stock FSA Comet 48-36-26 crankset with a 4-arm “mountain bike” crankset — one that comes with 44-32-22 rings. A 22/34 gives a lower first gear than a 26/36, and would also be lighter weight with less chainring material, less rear cog material, and less chain.
Me:
How much more would that cost?
Zach:
Actually it might not cost anything more. It would be less labour, in that the stock crankset and bottom bracket need to be removed anyway for powder coating (while the cassette wouldn’t normally need to be replaced). And, it would save buying the 24T inner ring and the labour of swapping that out. So it might cost you the same in money/time just to buy a good new crankset.
Me:
Sounds good. Would we use the crank arms that come with the Giro? (Is there anything unique about them, like a non-standard length or design?)
Zach:
A 4-arm mountain bike crankset means whole a new crankset, since the spider is integrated with the right arm. Most mountain bike cranksets these days use large diameter splined bottom bracket spindles, so they come with their own bottom backet. The Giro has a standard 68mm English-threaded bottom bracket shell, so it’s compatible with the majority of these. The crankset that comes with the large Giro has 175mm arms, but when getting a new crankset you can choose shorter arms if desired.
Me:
Oh – no, let’s keep the 175mm arms. I’m happy with the length of the stock set on my old Giro. That’s really why I inquired. This is good – it’s an even better granny-gear than before, cuts down the top gear a bit (which has always been too big for my purposes) and saves some weight. So we’re looking for a 4-arm 44-32-22 mountain bike crankset with 175mm arms, that fits a 68mm English-threaded bottom bracket. If I know you, you have a pretty good idea where to get one?
Zach:
The majority of 4-arm 44-32-22 MTB cranksets on the market come standard in 175mm. Lots of brands and price ranges available. I don’t have any specific recommendations; it’s pretty much personal preference on that.

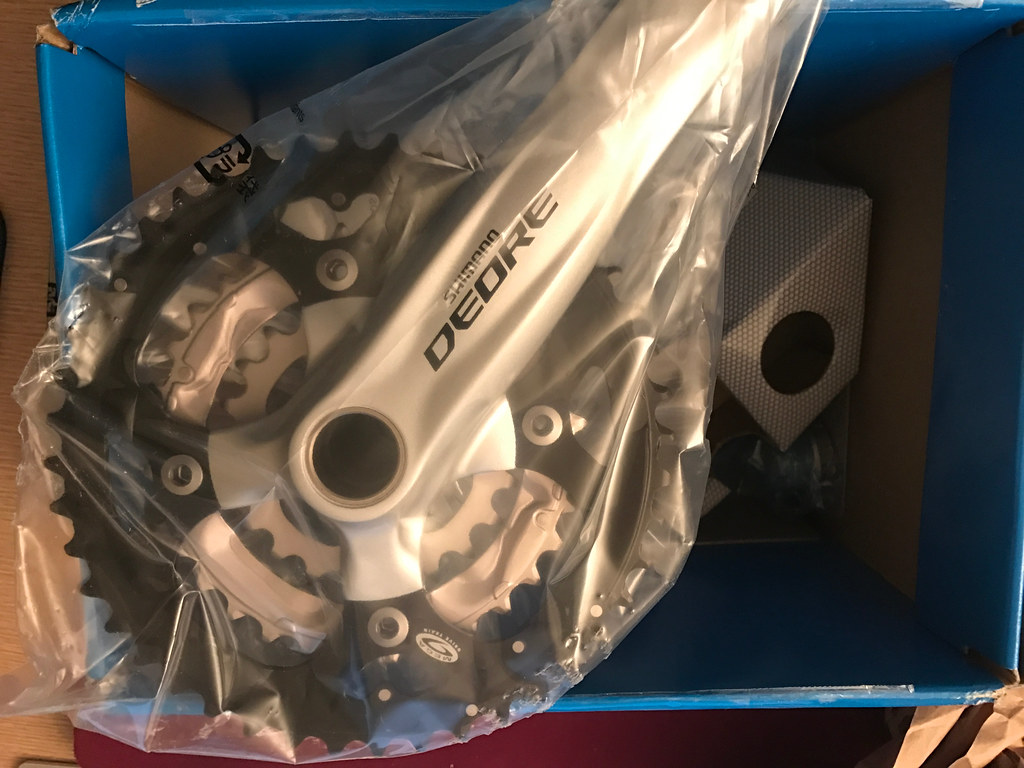
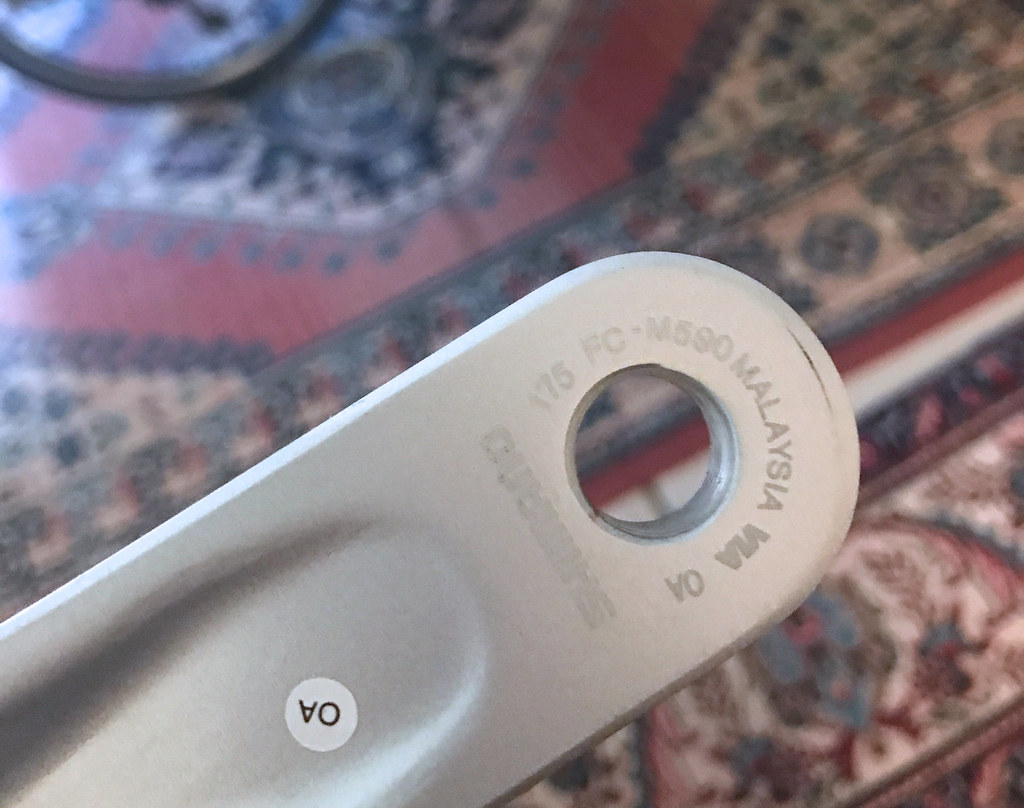
An afternoon poking around online led me to this Shimano Deore 2-piece 9-Speed Mountain Bicycle Crank Set, model FC-M590, with 175mm arms and 22/32/44 gearing.

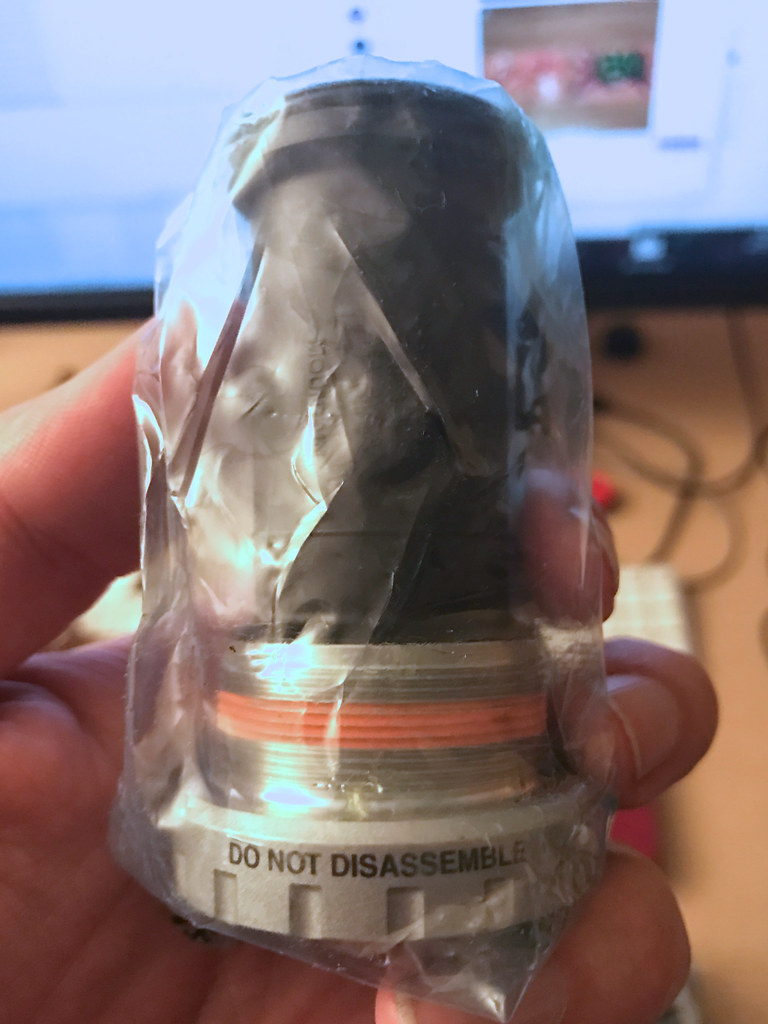
You know a product is often sold to do-it-yourself types, when it comes with a warning like this printed on it!

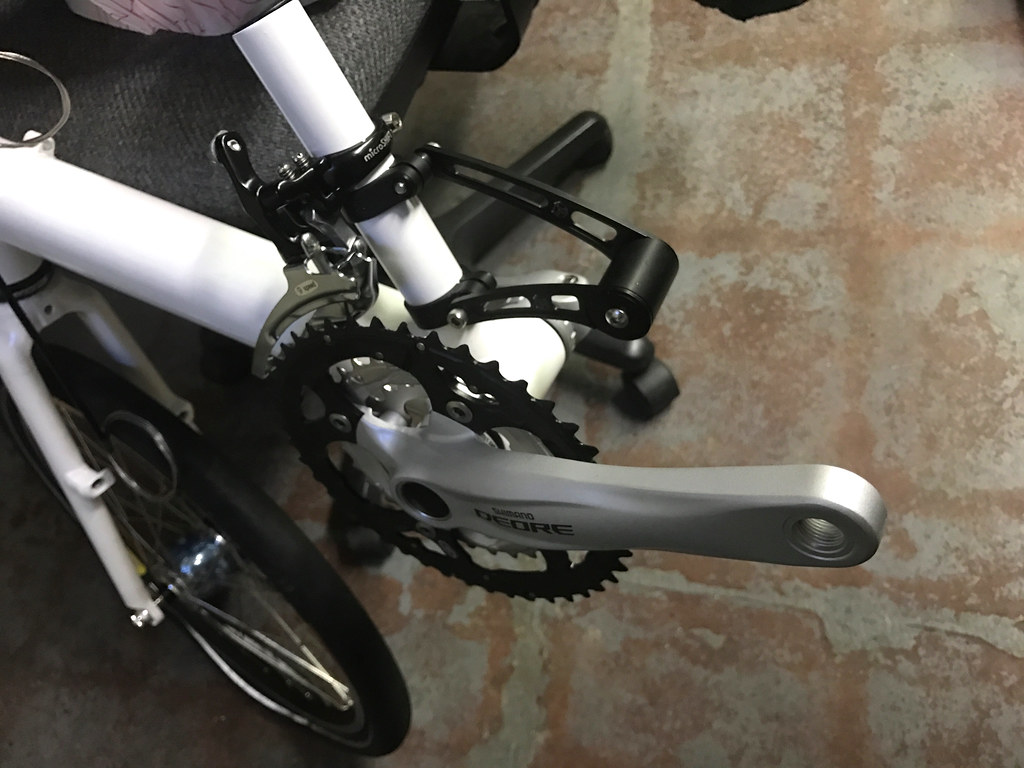
I know how to do a fair amount of stuff to a bike, but installing a crankset properly is still beyond me. When it arrived, I handed it over to Zach, and he did all the work:

In retrospect, his advice was excellent. Now the smallest gear is even smaller, and the largest front gear actually serves a purpose. (On my old Giro with the stock cranks, I almost never used it.)

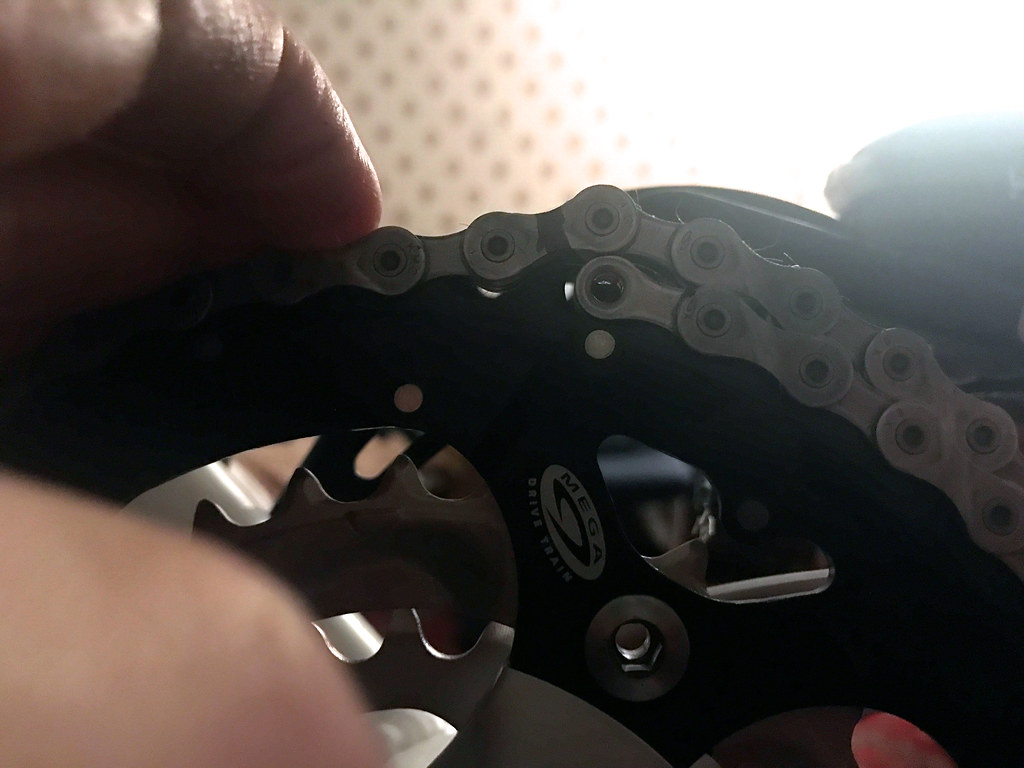
The only thing left for me to do was install the chain. To make sure a chain is the right length you need to place one end on the largest gear at the front, then thread it around like it usually goes, running it over the largest gear on the back, so it comes back to the underside of the front gear. Then you take up the slack on the bottom (pulling the chain tensioner forward almost as far as it will go) and then place the other end of the chain on the front gear.

Where the chain starts overlapping itself on the gear is where you need to shorten and join it.

There are chain tools you can get that are small enough to bring with you on the road, and you can use them along with your hex wrenches to remove a chain, replace a broken link, and rejoin the ends, in only a few minutes.

It’s amazing how easy this stuff is, if you’re willing to read a few directions!

Valoria II: Custom colors

Over the following weeks, I barraged Zach with questions about customizing the Giro 20, forming a plan of action. The first thing I asked about was color:

Me:
Does Bacchetta offer a color customization option?
Zach:
Bacchetta only offers one colour per model. The Giro A20 is only available in yellow with the area near the head tube white and the chainstays black. The only way to change the color is to take the frame to a powder coater, have the stock powder coat stripped and have it re-coated.
Me:
Would this mean ordering the frame from Bacchetta separately and then building up the bike “from scratch” so-to-speak, instead of ordering the whole bike from them at once?
Zach:
If you like the stock components, it would be least expensive to order a complete bike and remove the only components that are pre-installed at the factory (chain idler, headset, crankset, bottom bracket and front derailer) and then send the bare frame and fork to a powder coater. This is because Bacchetta orders relatively large numbers of components so can get them for a much lower price than I can.
Me:
I get the feeling I’m going to be swapping out almost all the stock components.
Zach:
Then a frame kit is the way to go. When the frame arrives but before we assemble the bike, we can take it to a powder coater. If you wanted decals on it, new decals would need to be ordered from Bacchetta.

This is what a Bacchetta frame kit arrives in.

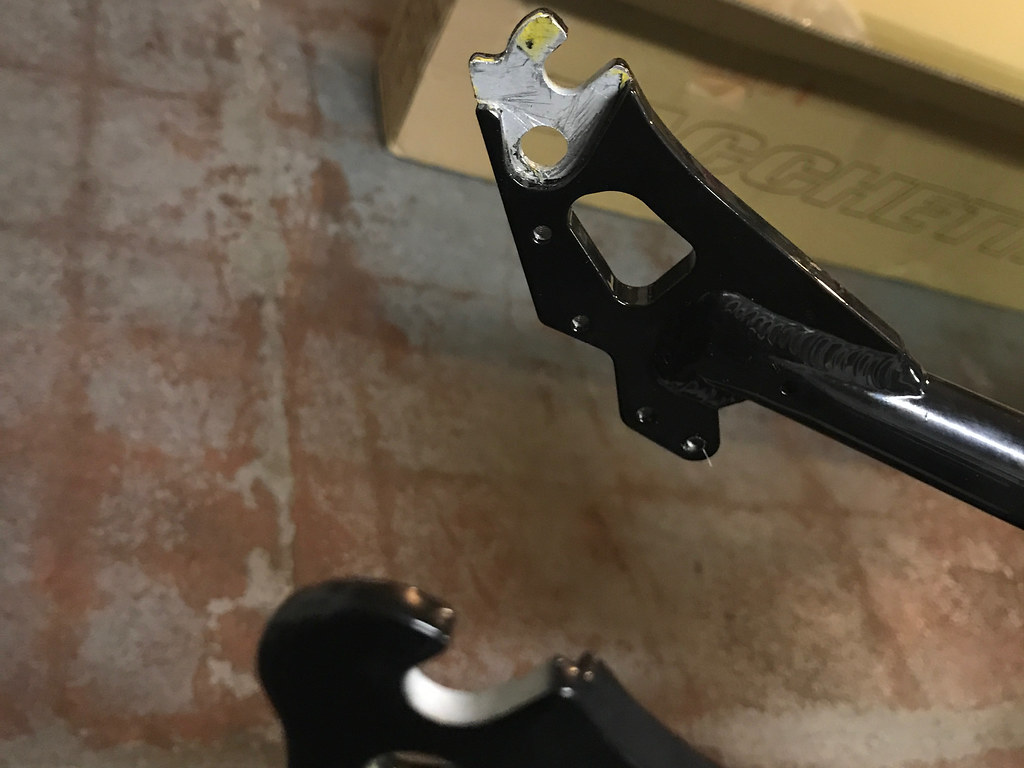
Here are the parts I want to re-coat. That’s the main boom with all the decals removed, the fork, the kickstand attachment plate, two segments of handlebar riser, and the cap that screws onto the end of the riser to attach the handlebars.

The boom of a Giro 20 is made of aluminum, but it comes with metal spacers that attach to the rear dropouts. You can get these in a couple of different sizes, to match different wheels. When re-coating this frame you need to make sure that you don’t coat the inside area where these spacers connect, because the fit has to be precise.

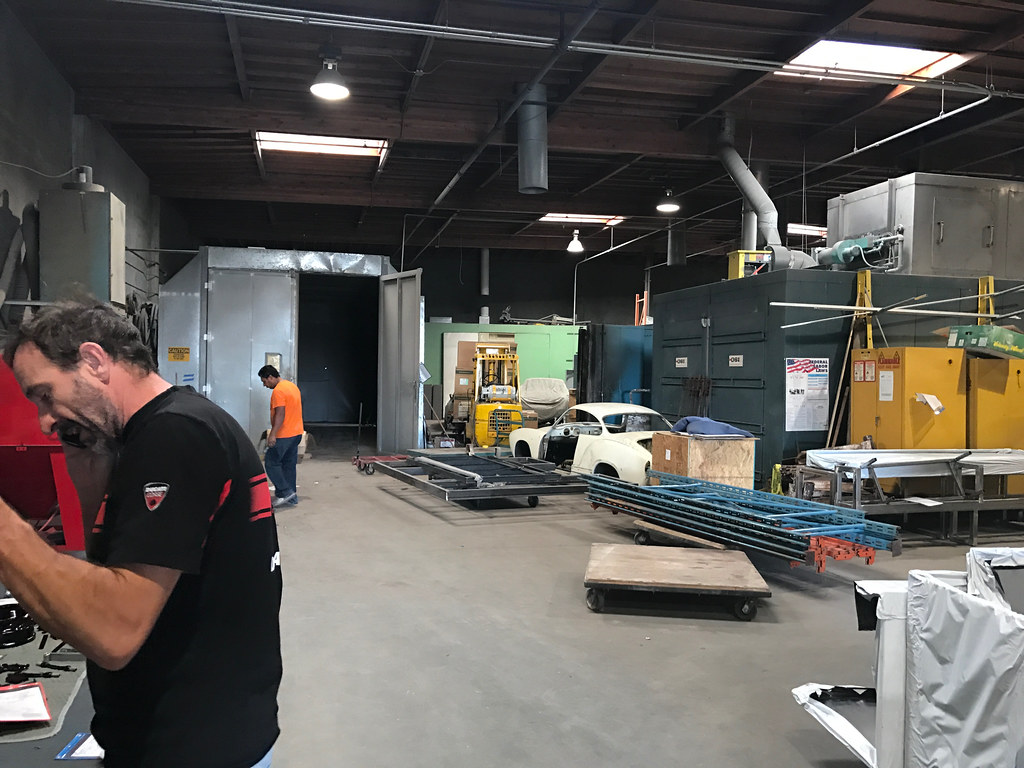
I called and emailed a bunch of different places in the Bay Area, and eventually paid a visit to West Coast Powder Coating in South San Francisco. Just a brief look around at their current projects convinced me that they knew how to properly coat a bike frame.

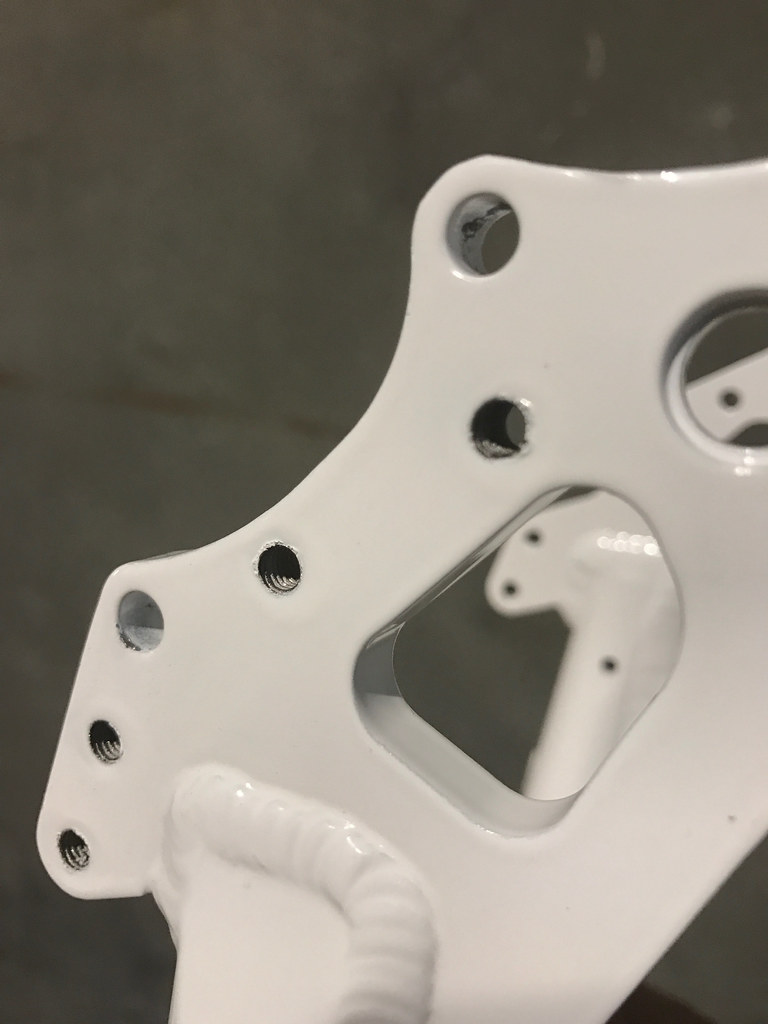
I dropped off the parts, and in about a week, I came back to find them coated. In general they did an excellent job. The new coat was actually more precise than the original factory one:

Before ...

... After

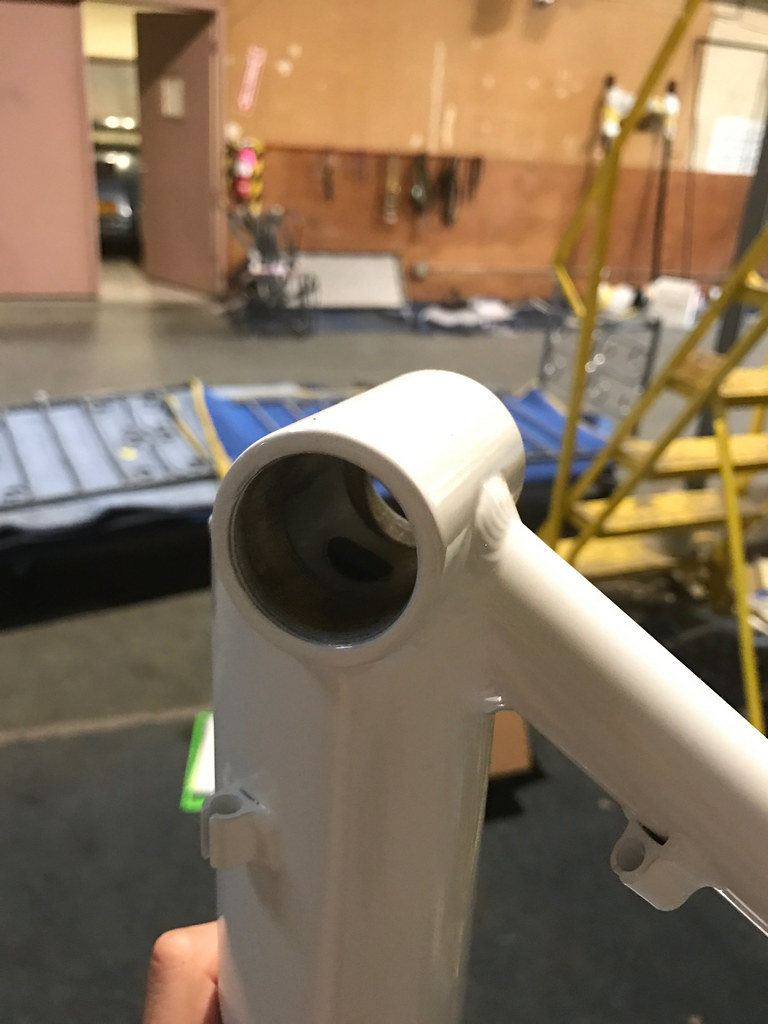
Everything that was threaded was left bare, as it should be. The one exception was the spot where the steering column passes through, a.k.a. the “head tube” on a regular bike frame. They’d coated it all the way through:

I wasn’t sure if this would be a problem later. But, I didn’t want to demand a re-do of a job that was already so close to perfect.

So I wandered over to their work area …

… and pilfered a couple of large rubber stoppers from their bin!

It’s possible to remove powder coating with paint thinner. You just have to be very careful to make sure that the thinner only contacts the area you want to remove. It’s also quite toxic. You don’t want to get any on your skin, even for a short while, and the fumes are intense.

I wrapped the stoppers in tinfoil, to keep the paint thinner from dissolving them, then plugged up both ends of the head tube and filled the area inside. The idea is, you let the paint thinner do all the work – softening up the coating – so you don’t have to work so hard scraping it away afterwards.

About an hour later, I pulled out the stoppers, thoroughly rinsed the head tube and everything else, and with only a little bit of poking from a wire brush, the tube was clean.

I also had to remove some of the coating from the curved handlebar stem, because it needed to fit inside the straight piece. I did that by brushing on a few narrow stripes of paint thinner, peeling off the strip that came loose, and cleaning it up with an X-acto knife.

And there we go! A Bacchetta Giro 20 frame in a custom color!
Valoria II: Building a new recumbent

This is Valoria:

My trusty steed, Valoria, crossing the valley!

I can’t remember how she got the name. Something to do with valkyries and heading off into wild territory, I bet. I purchased her almost on an impulse from a stranger at my workplace, just a few weeks before my first long-range bicycle tour. I am very glad I did. It was life-changing.

Valoria is an original Giro 20 recumbent – the first version that Bacchetta made. Her frame is steel. She’s got an Old Man Mountain rack on the back, in a shape that the company no longer makes: Old Man Mountain racks do not have handles any more. That sucks because the handle is a great way to move around a recumbent — like grabbing a kitten by the scruff of the neck.

Valoria’s seat has braze-on eyelets underneath it, for attaching a rack directly beneath the seat. Giro no longer includes those braze-ons, and no one makes the under-seat rack any more. If you want another one like it, tough luck. Also, all the Giro 20s nowadays have the headset and idler wheel in a different place, closer to the front. This affects the geometry of the steering. The handlebars are also several inches wider. If you want a set of handlebars like the original Giro 20, you either find an original Giro 20, or you give up.

She is truly a one-of-a-kind bike. So why am I even trying to replace her?

The short list:

  1. She does not have disc brakes, and there’s no way to retrofit them.
  2. Her shifters are very worn out.
  3. She’s got more steel in her than I need. She’s rated to carry 280 pounds, and I only tour with 250 at the very most.

That’s it. Not a long list. But it was item 1 that did the trick. On the trip from Colorado to Ohio, I hit the v-brakes at the same time I hit a pothole, and the pressure cracked my front rim, cutting my tour short. On the New Zealand tour, I did a number of descents through very long, windy mountain roads, with fast-moving traffic, and a full load of gear. I couldn’t actually slow down as much as I wanted because I didn’t have the hand strength to grip the v-brakes hard enough!

A few close calls in Oakland were enough to force the decision. I wanted disc brakes, period.

And so, I began a dialogue with Zach Kaplan, master recumbent builder, fleshing out the details.

First question: Did I want an entirely different brand of recumbent, or another Giro 20, in the modern style with disc brakes?

Me:
My current bike doesn’t have a suspension and isn’t very easy to disassemble. If I wanted to get these features, what other bikes should I consider?
Zach:
There are other touring oriented bikes, with full suspension and custom heavy duty racks and factory option generator lighting systems, such as those from HP Velotechnik and AZUB. They are heavier than the Giro 20 though and much more expensive. One of them, the HP Velotechnik Grasshopper fx, folds but the folding is designed for taking on trains. It doesn’t come anywhere close to to fitting into a case that wouldn’t incur an oversize charge on an airline, so in that respect it’s the same as the Giro.
Me:
Yes, assembling and disassembling the Giro 20 for plane flights is a hassle. What about the Lightning P-38? The P-38 comes apart and packs into a suitcase. Does that save a lot of time and labor?
Zach:
The P-38 Voyager with the S&S couplers that fits into a suitcase takes just about as much work and time to disassemble and pack up as a Bacchetta, just fits into a smaller airline legal case. The P-38 with case is very close to the airline maximum weight limit and I’ve known of people who have had to put the chain and pedals in another piece of baggage to keep the case under the weight limit.

Some further research confirmed this. I found a few videos of P-38 owners packing up their bikes for travel, and no one managed to get the task done in anything less than an hour, despite plenty of experience and practice.

Me:
Hmm. If it’s about the same amount of work, then the most the P-38 could offer me is space savings. For the Giro, taping the CrateWorks boxes closed and shipping them to our destination made their bulkiness irrelevant for the actual ride. We’d have to send the P-38 case ahead of us in the same way.
Zach:
That’s true.
Me:
Is the P-38 similar in comfort level to the Bacchetta?
Zach:
The P-38 seat is similar in comfort level to the Bacchetta Recurve seat. Other than the S&S coupler option, the main advantages of the P-38 are it is lighter weight and has a lower seat height which makes it easier for shorter riders to put their feet down.
Me:
How does it compare for loaded touring?
Zach:
For unloaded riding the P-38 is a bit higher performance due to being lighter weight. If you want to use it for loaded touring, the P-38 has some major downsides. It isn’t compatible with an under seat rack, and the frame – being made of of small diameter, thin walled tubes to save weight – is relatively flexy torsionally so not designed to carry heavy weight on the rear rack. As a result, it doesn’t handle that well when heavily loaded.

So, it looked like the P-38 was too light. At the other end of the spectrum, I knew the HP Velotechnik bikes were all quite heavy. I’d done test-rides with the Speed Machine, the Street Machine, and the Grasshopper. The suspension felt luxurious, but in my touring, I just never spend that much time on rough roads. Besides, the way HP Velotechnik prices their frames and parts, I would pay almost $2000 more for a bicycle whose only additional feature is a suspension. Not a clear winner over the Giro 20.

In fact, no matter how many other options I looked at, I kept coming back to the Giro 20. It seems I was not going to replace Valoria — I was going to reincarnate her!

The choice made, Zach and I began to hash out the details.

NZ Day 28: Taking off

We had a little time to kill, so Kerry and I walked downtown to a cafe and snacked while it rained outside. Eventually we moseyed back to the hotel, and the shuttle to the airport arrived. The driver knew the dimensions of the boxes ahead of time and the van was large enough, so that went smoothly.

The attendant at the airport was another matter. She argued with us for quite a while about whether we could get our boxes loaded on the plane and how much it would cost. She could not believe that the rules allowed it, and I had to patiently make my case over and over again until she kicked it up the food chain, and her boss waved us through.

The transition can be jarring sometimes. I work in an industry that is obsessed with optimization, in an area teeming with startups all wrestling to eat each others’ lunch and be “disruptive”. Meetings and deadlines and design specifications fly fast and furious and you can damage your reputation by being just a few minutes late, or not knowing your area of expertise down to the fine details when someone needs an answer. But I have to take that entire mode of thinking and shove it into a luggage compartment, and just go with the flow: If five people need me to explain the same thing five times, in a reasonable and patient voice, then that’s what I’ll do. If it takes all day, I’ll just get myself a sandwich and pace myself, and chop doggedly at the red tape until it stretches just enough. That’s just the way it has to go. No use getting imperious or upset.

The transfer to the international flight in Auckland was even more hurried than the first one. The design really was a bit ridiculous and I hope they improve it. The flight itself was just as cramped and uncomfortable as before; a kind of endurance test. Apparently I smelled so much from my earlier exertion with the bike boxes that the woman seated near me asked to transfer to another seat. Well, she didn’t tell me as much, but the way her face wrinkled up when I shifted around was all the signal I needed.

I know it’s a miracle that we can cross around to the other side of the Earth in less than a day, but even making the journey in first class is extremely uncomfortable, for the simple fact that you cannot lay down anywhere, for even a moment. Unfortunately, it’s not economical to build a plane that offers that kind of space. For every three stacked compartments where a person could lay flat, you can insert at least six seats. Airlines would have to double the ticket price at least, and no one would pay the difference. Plus they’d have to completely retool the interior of the plane to use it for shorter trips.

I can see the reasons it sucks. But yeah — it still sucks.

Anyway, we arrived in San Francisco without incident, unloaded our boxes in a haze, and called a shuttle. About an hour later we were standing in the driveway, and shortly after that we were attending to our respective cats, and starting to relax.

Time for a trip wrap-up!

What were the highlights of the trip?

Kerry and I both agree on the three highlights of this trip: Matapouri Bay, Hobbiton, and the Whanganui canoe trip. We could have spent an entire week just hanging around totally relaxed in Matapouri and another entire week on the Whanganui, canoeing and camping and hiking in those amazing woods. But the schedule didn’t allow it.

Below that top three I’ll add three more things: The Tongariro crossing, the Whangarei kayak trip through the mangrove forest, and the day we spent meandering around Waipu on our bikes, bothering the horses and sheep and picnicking and enjoying the unbelievably great weather.

Seriously, there are so many amazing natural activities all over New Zealand. We didn’t even go bird watching, or skydiving, or see the dolphins, or White Island, or go into any of the big caves, or go surfing, or walk through the Goblin Forest, or ride the old train tracks, or see ANY of the icy terrain of the South Island…

So how was it, cost-wise?

Kerry and I both had plenty of savings. What we were short on was time. This is probably typical for software developers wanting to travel. The upshot is, we paid for a wide variety of experiences, and crammed them all into one month. Snorkeling, boat rides, kayaking, canoeing … all things that required custom equipment and/or transport that we had to rent. If our bicycles hadn’t been highly customized we would have probably rented those too.

Camping in New Zealand is easier than in neighboring Australia, though it still varies by region. That was irrelevant though because Kerry and I didn’t even bring tents or sleeping bags. Our route lined up consistently with towns large enough to sport hotels, and since it was the tail end of the tourist season we booked almost every stay well in advance. Between food and lodging, and with the currency exchange, we averaged about 1.5 times the amount we’d pay back home. The quality of the rooms varied wildly, but the food was always good.

If we’d brought camping equipment and used it, New Zealand would have been less expensive than any European country — even the ones like Denmark and Sweden where camping is cheap, because of the reduced cost of food and other supplies. But without that camping element, New Zealand was pretty darned expensive.

Also, there was the paradoxical effect of the shuttle system. We had to pay oversize luggage fees to get our bikes into the country, and spend extra days at the beginning and end dealing with them. Between the fees and the hotel stays, and the extra food we surely ate because of pedaling around, it probably cost us more to travel through New Zealand by bike than it would have cost us just arriving on foot and taking the shuttle between attractions. The shuttle network in New Zealand really is quite marvelous, and if I’d known that in advance I would have taken the following advice:

Bring two folding bicycles to New Zealand. The kind that fit inside an ordinary suitcase. Plan on taking the shuttle between every town with every attraction you’re keen to see, and once you get into town, unfold the bikes and ride them around. Then fold them up again at the end of the day and proceed to the next town.

That way you get the mobility and range of the bikes, but you don’t have to deal with the endless hills between cities.

Would you go again if you had the chance?

You bet! If I was doing the North Island again, I’d bring folding bikes like I described in the answer above. If I was doing the South Island, it’d be a toss-up. The middle section of that island is flat enough to be pleasant biking, and there are a lot more places to camp so we could bring camping gear and enjoy it. But there is also a train that runs the length of that island, and we’d probably use shuttles to cross most of the mountains between the interior and the West coast, so bikes might not be the best call there either.

There is just so much variety in New Zealand that it’s silly to spend the majority of one’s time there bicycling. Yes, I would totally go back — but not primarily as a bicycle tourist.

Kerry agrees with this. She’s been to Europe and India, and was impressed at how different New Zealand was from those places, but aside from a few days that were truly enhanced by having bicycles, she could have enjoyed New Zealand just as much by renting an RV or taking the shuttles on foot.

NZ Day 27: Disassembly

Today was a day off, at least from traveling. We spent most of the daylight hours slowly disassembling our bikes and packing them into the Crateworks boxes, along with the rest of our gear.

For anyone curious to see how two tandem bicycles can fit into three Crateworks boxes – one long, two short – and still pass the airline weight requirements, this hyperspeed video shows exactly how we did it:

Packing Recumbents

In the afternoon we took a break to walk to a truly horrible French restaurant – our first seriously bad dining experience in New Zealand. Perhaps the country was throwing a tantrum because we were about to leave!